
Tools
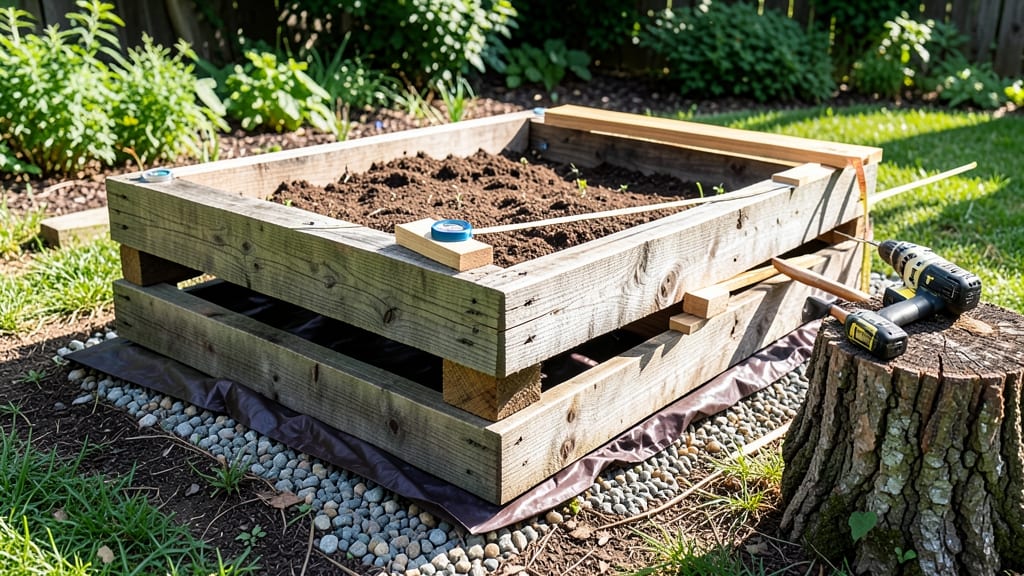
Building a raised garden bed with pallets turns scrap wood into a durable, customizable growing space that lasts for years. 🌱 I've constructed three of these over the past five seasons, and each one has outlasted my last attempt at a flimsy wooden frame.
The key is choosing the right pallets, treating them safely, and stacking them for maximum stability. Most people overlook pallet quality, but HT-stamped heat-treated wood is safer and more stable than chemically treated options. You'll need four pallets, a drill, outdoor screws, and landscape fabric for drainage.
The whole project takes about 2-3 hours for a 4x8-foot bed, and the results are worth every minute—deep soil, no bending, and a space that works for vegetables, flowers, or herbs.
By the end, you'll have a bed with 10-12 inches of soil depth, perfect for root crops and deep-growing plants. The edges stay sturdy, weeds stay out, and you can even add trellises or seating along the sides.
My first bed is still going strong after four years, and the second one now holds my heirloom tomatoes. Works for any yard size, from tiny urban patios to sprawling backyard gardens. The best part? You're repurposing materials that would otherwise end up in a landfill. Let's get building!
📚 In This Guide
- What you need
- Instructions
- Tips and common mistakes
- Wrapping up and next steps
What you need
- ● 4-6 wooden pallets (heat-treated or weather-resistant, avoid chemically treated pallets marked with "MB" or "HT").
- ● Outdoor screws or decking screws (2.5–3 inches long, galvanized or stainless steel to prevent rust). Quantity: ~50–70 screws.
- ○ Staple gun + staples (for securing landscape fabric or weed barrier, optional but recommended).
- ● Landscape fabric or hardware cloth (to block weeds and pests; cut to fit pallet dimensions).
- ● Drill/driver (cordless for convenience) + drill bits (for pre-drilling screw holes).
- ● Measuring tape + pencil (for marking cuts).
- ● Circular saw or handsaw (for trimming pallets to size; safety goggles + gloves are a must!).
- ● Post hole digger or shovel (if securing the bed to the ground with stakes).
- ● Level (to ensure your bed is perfectly even).
- ○ Wood glue (optional, for extra reinforcement at joints).
- ● Wood preservative or outdoor paint/stain (to extend pallet lifespan).
- ● Corner braces or metal brackets (for added stability).
- ● Drainage holes (drill a few at the bottom if using pallets as-is).
- ● Compost or soil mix (pre-mixed garden soil or a blend of topsoil + compost).
- ● Garden edging or bricks (to line the base for a polished look).
Step-by-Step instructions for building a raised garden bed with pallets
Here's my go-to method for creating a sturdy, long-lasting raised bed using pallets—no fancy tools required.
🪴 Step 1: Select and Prepare Your Pallets
Grab four heat-treated pallets (HT stamped in red or green ink) to ensure they're safe for gardening. Avoid chemically treated pallets—those marked MB or DB contain toxic preservatives. I like to use 36-inch-wide pallets for a standard 4x4-foot bed, but you can adjust based on space. Lay them flat and inspect for splinters or cracks. Sand down any rough edges with 80-grit sandpaper—your hands will thank you later.
Check the pallets' structural integrity by gently pressing down on the corners. If a board feels soft or crumbles, replace that pallet. Real talk: pallets vary in quality, so don't skimp here. A weak corner will compromise your entire bed over time. Once you've confirmed they're solid, stack them in a square formation, leaving a 2-inch gap between each pallet for drainage and root growth.
☀️ Step 2: Assemble the Frame and Add Support
Use 2-inch outdoor deck screws to secure the pallets together at the corners. Pre-drill holes to prevent splitting—this is where most DIYers mess up. I drive two screws per corner from the inside and two from the outside for maximum stability. For extra reinforcement, add 2x4 stakes at each corner, screwing them into the ground at a 45-degree angle before attaching the pallets. This prevents the bed from tipping in wind or when you're working inside it.
Here's the thing—if your pallets aren't perfectly level, your plants will suffer. Use a 4-foot level to check all sides, adjusting the corner stakes as needed. Fill any gaps between pallets with 1x4 boards cut to fit, securing them with screws. This creates a seamless base that won't trap moisture or pests. Pro tip: Line the inside of the bed with landscape fabric to block weeds while allowing water to drain freely.
💧 Step 3: Layer for Drainage and Soil Quality
Start with a 4-inch layer of coarse material—I use a mix of cardboard (no glossy ink) and straw—to smother weeds and improve drainage. This layer breaks down over time, adding organic matter to your soil. Next, add a 2-inch layer of gravel or small rocks along the bottom edges. This prevents soil from spilling out while still allowing excess water to escape. Don't skip this—compacted soil at the bottom leads to root rot.
Fill the remaining space with a mix of topsoil, compost, and perlite (I use equal parts of each). For a 4x4-foot bed, that's about 1 cubic yard of soil mix—enough to fill to the top. Fluff the soil with a garden fork to aerate it before planting. You'll see the difference when roots grow freely instead of struggling through dense soil. Water the bed lightly after filling to help settle the layers.
✂️ Step 4: Finish with Edging and Protection
To keep soil in place and extend the bed's lifespan, line the outer edges with landscape fabric, securing it with galvanized staples. Then, cover the fabric with landscape edging stones or bricks to create a clean border. This also makes weeding easier—you'll never have to dig around the edges again. For extra durability, paint the pallets with non-toxic exterior paint if they're exposed to the elements. I use a semi-transparent stain to protect the wood while keeping the natural look.
Here's where it gets fun: add a drip irrigation system or soaker hoses along the inside edges before filling with plants. Run the lines through the soil mix, then cover them with mulch. This ensures even watering without the hassle of hand-watering. Once everything's in place, let the bed sit for 24 hours before planting. This gives the soil time to settle and the wood to absorb any residual moisture from the rain.
Tips & tricks for building a sturdy raised garden bed
A few smart moves will turn your pallet project into a garden showstopper that lasts for years. Here's what I've learned from building (and fixing) multiple raised beds over the years.
Material Selection Matters: Don't just grab any pallets—look for the HT stamp in red or green ink, which means they're heat-treated and safe for gardening. The 36-inch width gives you that perfect 4x4-foot bed, but if you're working with narrower pallets, consider using two side-by-side with a 2-inch gap between them. I've seen people use chemically treated pallets (marked MB or DB) and end up with plants that don't thrive—don't make that mistake!
Leveling is Non-Negotiable: That 4-foot level check in Step 2 isn't just a suggestion—it's the difference between a bed that stays put and one that sags or tips. I've had beds that looked perfect until I planted something heavy, and suddenly one corner settled. Use the level after securing each pallet, and adjust those 2x4 stakes at a 45-degree angle until everything's perfectly even. Trust me on this: your plants will thank you.
Drainage Layers Are Your Secret Weapon: That 4-inch layer of cardboard and straw might seem like overkill, but it's what keeps your soil from turning into a swamp. The cardboard breaks down slowly, adding organic matter, while the straw creates air pockets for roots. For the 2-inch gravel layer at the bottom, I like to use crushed stone instead—it lasts longer and doesn't compact as much. This simple step prevents root rot and keeps your bed healthy for years.
Long-Term Protection Pays Off: The 24-hour settling period before planting isn't just about letting the soil compact—it's also giving your pallets time to absorb any moisture from the air. If you're in a rainy climate, consider adding a waterproof barrier layer (like pond liner) between the pallets and soil to extend your bed's lifespan. And that landscape fabric along the edges? It's not just for looks—it keeps soil from spilling out and makes weeding a breeze.
Pro Tips for Build A Raised Garden Bed With Pallets
- A few smart moves will turn your pallet project into a garden showstopper that lasts for years. Here's what I've lear...
- Material Selection Matters: Don't just grab any pallets—look for the HT stamp in red or green ink, which means they'r...
- Leveling is Non-Negotiable: That 4-foot level check in Step 2 isn't just a suggestion—it's the difference between a b...
Frequently asked questions
Can I use any type of pallet for a raised garden bed?
Not all pallets are safe! Only use HT (Heat-Treated) or MB (Methyl Bromide-treated) pallets—avoid chemically treated ones (marked "MB" or "CH" for chemical use). Sand or stain pallets to remove splinters and prevent leaching. If unsure, check for a stamp or ask the supplier. Pro tip: Break down pallets to inspect for hidden nails or warping before assembly.
How long does it take to build a raised garden bed from pallets?
For a beginner, plan 2–4 hours for a 4’x8’ bed, depending on prep work. Disassembling pallets (30–60 mins), cutting lumber (if needed), and assembling the frame (1–2 hours) are the longest steps. Time-saver: Pre-drill holes for screws to speed up assembly. If you’re rusty with tools, budget extra time for mistakes!
Will pallets attract pests like termites or rodents?
Yes, but you can minimize risks! Elevate beds 6–12 inches off the ground to deter burrowing pests. Avoid placing beds near woodpiles or dense vegetation. Treat pallets with borax or food-grade mineral oil to repel insects. Bonus: Fill beds with compost and mulch to improve soil and deter pests naturally.
Can I build a raised bed in winter? What’s the best time?
Winter is ideal for building—cooler temps reduce warping and you can prep soil indoors. However, avoid assembling in freezing rain/snow. Best timing: Start in late fall or early spring to give plants a head start. If building in summer, water pallets before assembly to prevent cracking.
What if my pallets are uneven or wobbly after assembly?
Uneven beds drain poorly and may collapse. Fix it: Use a level to check corners, then adjust by adding shims (scrap wood) or tightening screws. For wobbliness, bury the corner posts 4–6 inches deep or secure with stakes. If pallets warp, reinforce with 2x4 braces inside the frame.
Wrapping up and next steps
Building a raised garden bed with pallets is a rewarding project that brings sustainability, affordability, and gardening joy right to your backyard!
With just a few tools, some creativity, and a little elbow grease, you’ve created a durable, customizable space to grow fresh herbs, veggies, or flowers—no matter the season. 🌱
Now that your bed is ready, it’s time to plant, nurture, and enjoy the fruits of your labor!
Start by adding quality soil, mulch, and your favorite plants, then watch your garden thrive. Ready to take it further? Explore companion planting tips or even DIY irrigation hacks to keep your green oasis flourishing all year!