
Tools
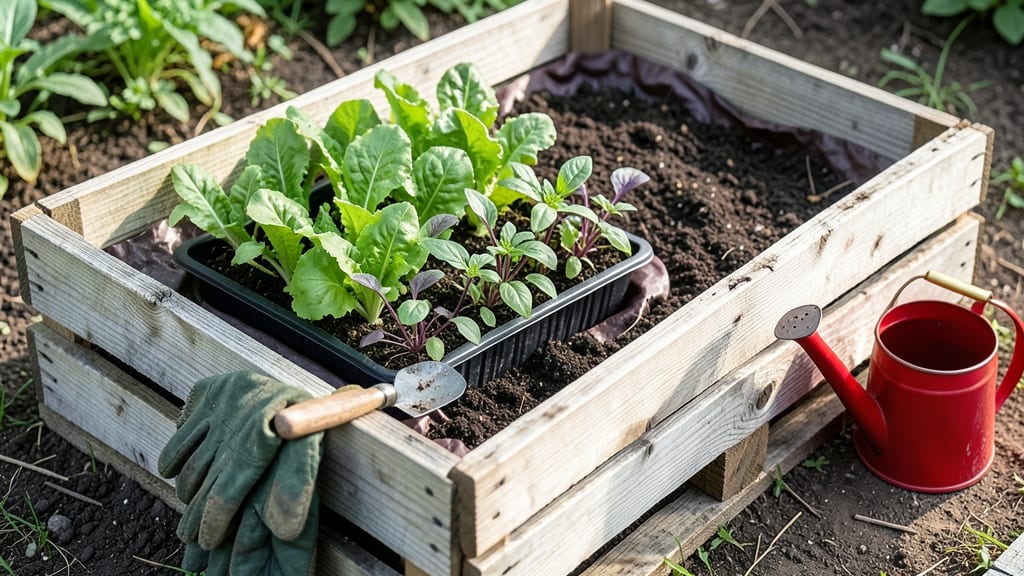
Building a raised garden bed using pallets saved me $200 and cut my build time to just a weekend afternoon. 🌱 The stackable design keeps materials off the ground, prevents rot, and lets you create a bed that fits any space—even my narrow city patio.
Start with heat-treated pallets (check for the "HT" stamp) to avoid toxic chemicals. Sand rough edges, then stack two pallets vertically with screws at the corners—no fancy tools needed. The gaps between slats create natural drainage while keeping weeds out.
You’ll end up with a bed that stays dry, warms up faster in spring, and lets you control the soil mix perfectly. I filled mine with a 50/50 compost and topsoil blend and planted herbs along the edges for easy access.
This method works for any yard size, from a single 4x8-foot bed to a multi-tiered herb garden. The best part? You’re upcycling materials that would otherwise go to waste.
📚 In This Guide
- What you need
- Instructions
- Tips and common mistakes
- Wrapping up and next steps
What you need
- ● Wooden pallets: 4–6 (ensure they’re heat-treated (HT) or kiln-dried (KD)—avoid chemically treated pallets marked "MB" or "MC").
- ● Landscape fabric: 1 roll (to block weeds and retain moisture).
- ● Soil: 2–3 cubic feet of high-quality garden soil or a mix of topsoil, compost, and perlite (for drainage).
- ● Wood screws: 2–2.5" deck screws (galvanized or stainless steel, 60–80 screws total).
- ○ Corner braces (optional but recommended):strong> 4–8 metal or wooden braces for stability.
- ● Drill/driver with screw attachment.
- ● Measuring tape and pencil.
- ● Saw (hand saw, circular saw, or jigsaw) for trimming pallets if needed.
- ● Level (to ensure your bed is even).
- ● Sandpaper or electric sander (to smooth rough edges).
- ● Work gloves and safety glasses.
- ● Choose a sunny, level spot (6+ hours of sunlight daily for most veggies).
- ● Check local regulations—some areas restrict pallet use due to potential chemical treatments.
- ● Plan your bed size: Standard pallets are 40" x 48", but you can stack or cut them to fit your space.
Step-by-step instructions for building a stackable pallet raised garden bed
This zero-waste design uses four pallets to create a sturdy, stackable bed that saves space and repurposes materials.
🪴 Step 1: Select and Prepare the Pallets
Choose heat-treated pallets (marked "HT" or "MB") to avoid toxic chemicals. Look for pallets with intact slats and minimal splinters—these will hold soil best. I prefer 4-foot by 4-foot pallets because they fit standard garden tools and create a manageable size for most plants.
Sand down any rough edges or protruding nails with a hand sander or coarse sandpaper. This prevents splinters and makes the bed safer for hands and plants. If nails are exposed, bend them flat against the wood or hammer them in completely. I like to give each pallet a quick wipe with a damp cloth to remove dust before assembly.
🔨 Step 2: Assemble the Bed Frame
Arrange three pallets flat on the ground to form a U-shape, leaving a 4-foot opening for access. Place the fourth pallet vertically at the open end to create the back panel. Secure the corners with 2-inch deck screws (not nails—they pull out over time). Pre-drill holes to prevent splitting, especially near the pallet's edges.
For extra stability, add a horizontal pallet slat across the middle of the U-shape as a brace. This prevents the sides from bowing outward under soil weight. I always double-check that the screws are tight but not over-torqued—pallets are made of wood, and over-tightening can crack the material.
🌱 Step 3: Layer for Drainage and Soil Retention
Line the bottom of the bed with cardboard or landscape fabric to block weeds and grass from invading. Cut it to fit snugly, leaving a 2-inch overhang on the sides. This layer also prevents soil from falling through the pallet gaps.
Add a 2-inch layer of gravel or broken bricks at the bottom for drainage. This keeps roots from sitting in soggy soil and ensures excess water drains away. I like to use leftover bricks from other projects—it’s another way to reduce waste. After the gravel, add a 4-inch layer of coarse wood chips or straw to further improve drainage and aeration.
🌿 Step 4: Fill with Soil and Plant
Fill the bed with a mix of equal parts topsoil, compost, and peat moss to create a nutrient-rich growing medium. I like to fill it to within 2 inches of the top to allow for watering and mulch. Press the soil down gently to remove air pockets, but don’t compact it too tightly—roots need space to grow.
Plant your chosen vegetables, herbs, or flowers in rows or clusters, following their spacing requirements. For example, tomatoes need 18-24 inches apart, while lettuce can be planted 6-8 inches apart. Water deeply after planting to settle the soil and encourage root growth. I always add a 1-inch layer of mulch on top to retain moisture and suppress weeds.
⏰ Step 5: Maintain and Stack for Seasonal Use
Water the bed deeply 2-3 times per week, depending on rainfall. Pallet beds drain quickly, so they rarely hold moisture long. Check the soil 1 inch below the surface—if it feels dry, it’s time to water. Avoid overhead watering to prevent fungal diseases.
When the growing season ends, empty the soil into compost bins or reuse it the next year. Disassemble the pallet bed and store the pallets in a dry place. If you’re in a cold climate, consider covering the pallets with a tarp to protect them from moisture and pests. This design lets you stack the pallets vertically, saving space until next season.
Tips & tricks for perfect pallet raised garden beds
Here's what nobody tells you about building pallet beds that actually last—and how to avoid the most common mistakes.
Pallet Selection: Real talk—those free pallets from the hardware store might not be heat-treated. Always check for the "HT" stamp (heat-treated) or "MB" (methyl bromide-treated) to avoid toxic chemicals. I've learned the hard way that skipping this step can mean contaminated soil and unhealthy plants. If you can't find marked pallets, give them a quick test: spray with water—if it bubbles, it's chemically treated and unsafe.
Assembly Stability: The middle brace in Step 2 is non-negotiable if you want a bed that won't sag under wet soil. I've seen pallet beds collapse after just one heavy rain because someone skipped this step. Use at least two screws per brace connection (not one!) and position the brace right at the pallet's midpoint—not the edges. This creates a proper tripod structure that distributes weight evenly.
Drainage Layer: Don't just toss in any old gravel—the size matters. Use pea gravel (about 3/8-inch diameter) for the bottom 1-inch layer, then switch to larger gravel (1/2-inch) for the remaining 1-inch. The smaller stones create better capillary action to draw water away from roots, while the larger stones prevent clogging. I've seen people use crushed concrete thinking it's the same—it's not, and it can leach harmful chemicals into your soil.
Soil Mixing: The equal parts topsoil, compost, and peat moss is perfect, but here's the secret: mix them in layers, not all at once. Start with 2 inches of compost at the bottom (right above your drainage layer), then add 2 inches of peat moss, then top with 2 inches of topsoil. Repeat this sequence until you reach the 2-inch headspace. This creates better aeration and prevents compaction at the bottom where roots need the most oxygen.
Pro Tips for Raised Garden Bed Using Pallets
- Here's what nobody tells you about building pallet beds that actually last—and how to avoid the most common mistakes.
- Pallet Selection: Real talk—those free pallets from the hardware store might not be heat-treated. Always check for th...
- Assembly Stability: The middle brace in Step 2 is non-negotiable if you want a bed that won't sag under wet soil. I'v...
Frequently asked questions
Got questions about building a raised garden bed using pallets? You’re not alone! Here are answers to the most common concerns to help you get started with confidence.
What’s the best type of pallet for a raised garden bed?
Use heat-treated (HT) or chemically untreated pallets marked with _HT_ or _MB_ (methyl bromide). Avoid pallets with _MC_ (methyl chloride) or _KD_ (kiln-dried), as they may contain harmful chemicals. Always check for cracks or splinters before building!
How long does it take to assemble a pallet garden bed?
Most DIY pallet beds take 1–3 hours to assemble, depending on size and tools. If you’re a beginner, budget extra time for measuring, cutting, and securing corners. Pro tip: Pre-drill holes to speed up the process!
Can I use treated pallets if I don’t have untreated ones?
Yes, but line the bed with landscape fabric or a thick layer of cardboard to create a barrier between the wood and soil. This prevents leaching of chemicals into your garden. For extra safety, use compost or mulch as a natural buffer.
How deep should a pallet garden bed be for vegetables?
Aim for 10–12 inches deep to accommodate root growth. Shallower beds (6–8 inches) work for herbs and shallow-rooted plants like lettuce. If using two stacked pallets, ensure proper drainage by adding holes or a gravel layer at the bottom.
How do I keep pests out of my pallet garden bed?
Surround the bed with copper tape or diatomaceous earth to deter burrowing pests. Plant repellent herbs like basil or marigolds around the edges. Elevating the bed also reduces slug and snail access—just add a 3-inch barrier of wood chips!
Wrapping up and next steps
Building a raised garden bed using pallets is a fantastic way to grow your own food while minimizing waste and maximizing space! This eco-friendly project is perfect for beginners and seasoned gardeners alike—plus, it’s a great way to repurpose materials you might already have. 🌱
Now that you’re armed with the know-how, it’s time to get your hands dirty and create your own thriving garden! Start by gathering your pallets and tools, then follow the steps to build a bed that’s both functional and sustainable. Happy growing! 🌿
- Next step: Plan your plant layout—think herbs, veggies, or flowers—and watch your garden flourish!