
How To
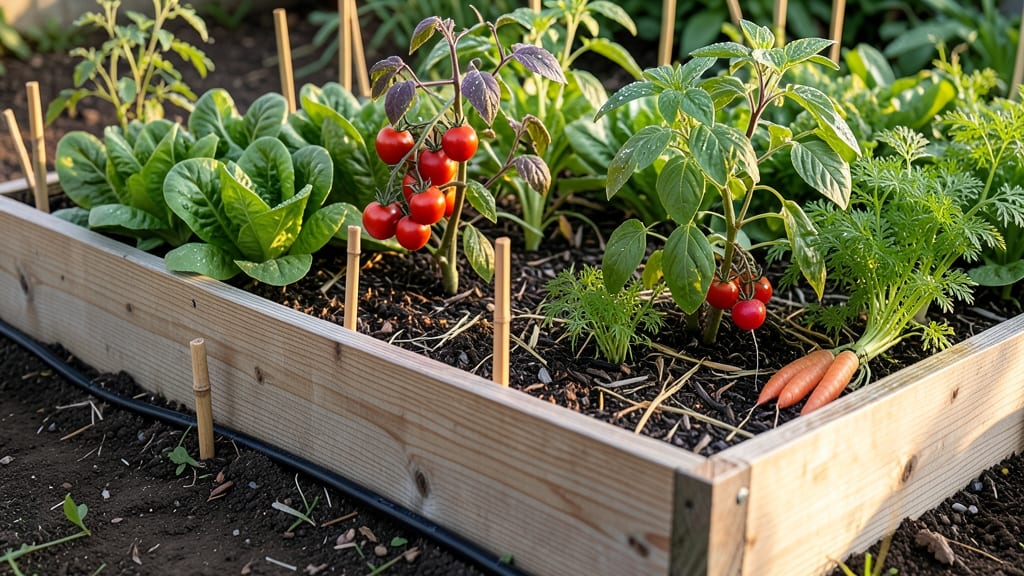
This raised bed idea turns small spaces into high-output gardens where every inch works for you. 🌱 I designed my first one after watching my patio tomatoes struggle in crowded ground soil, and the difference was night-and-day—now I grow three times as much in half the footprint.
The secret lies in stacking layers: taller plants at the back, mid-height in the middle, and shallow-rooted crops at the front, all while keeping pathways wide enough to reach every plant without stepping in the beds.
You don’t need fancy materials—cedar, untreated lumber, or even repurposed pallets work perfectly for the frames. The key is 12-inch deep beds filled with a mix of compost, peat, and native soil to prevent compaction.
My second bed, built last spring, now produces continuous harvests from early radishes in March to winter kale in December, all without bending over. The tiered design also makes watering and weeding a breeze since everything’s accessible from the sides.
What you’ll end up with is a garden that looks like a living staircase of greens, herbs, and flowers—neighborhood-envy levels of productivity. The front tiers get full sun all day, while taller back rows provide afternoon shade for heat-sensitive plants.
Plus, the elevated design keeps critters out and your back safe from stooping. This isn’t just gardening; it’s transforming your outdoor space into a vertical harvest machine.
Works for balconies, backyards, or even urban rooftops—just adjust the scale. The same principles apply whether you’re growing veggies, flowers, or a mix of both. Ready to stack your next harvest? Here’s how to start with the right layout and materials!
📚 In This Guide
- What you need
- Instructions
- Tips and common mistakes
- Wrapping up and next steps
What you need
- ● Untreated lumber: 2x6 or 2x8 boards (cedar or redwood recommended for durability) – 8–12 pieces, 8 ft long
- ● Corner brackets or L-brackets: Galvanized steel (4–6 pieces, depending on tiers)
- ● Galvanized screws or deck screws: 2.5–3 inches long (100–150 screws)
- ● Landscape fabric or hardware cloth: To deter pests and weeds (cut to bed dimensions)
- ● High-quality soil mix: 2–3 cubic feet per square foot of bed space (blend of topsoil, compost, and perlite)
- ○ Mulch or straw: For moisture retention (optional but helpful for tiered designs)
- ● Circular saw or handsaw
- ● Drill/driver
- ● Measuring tape
- ● Level
- ● Staple gun (for securing landscape fabric)
- ● Work gloves and safety glasses
- ● Trellis or netting: For climbing plants like beans or cucumbers
- ● Drip irrigation kit: For hassle-free watering
- ● Paint or stain: To protect wood and add flair (choose non-toxic options!)
- ● Drainage pipes or gravel: If building on uneven ground
How to design tiered raised beds for maximum yield
Let’s turn your raised bed into a vertical garden powerhouse—more plants, less wasted space, and harvests that stretch well beyond summer.
🪴 Step 1: Build or Repurpose a Raised Bed with Tiered Levels
Start with a 4-foot-wide by 8-foot-long raised bed (standard wheelchair-accessible width). If building from scratch, use cedar or redwood boards (rot-resistant) at least 2x6s for sides and 2x12s for the base. For tiered levels, add horizontal dividers (like 2x4s spaced 12 inches apart) to create 3-4 planting zones. If repurposing an existing bed, simply install wooden frames or lattice inside to create shelves.
Line the bottom with cardboard or landscape fabric to block weeds, then fill each tier with 6-8 inches of high-quality compost-amended soil. The top tier should have the deepest layer (8-10 inches) for root crops, while middle tiers can be 6 inches deep for greens and herbs. I always leave a 2-inch gap between tiers to prevent soil spillage.
☀️ Step 2: Assign Plants to Tiers Based on Sun and Growth Needs
Place sun-loving plants (tomatoes, peppers, squash) in the top tier where they’ll get the most light and warmth. Middle tiers are perfect for medium-height plants like bush beans, kale, or carrots—these thrive with 4-6 hours of sun and don’t need deep roots. The bottom tier is ideal for shade-tolerant greens (lettuce, spinach) or slow-growing crops (onions, garlic) that benefit from cooler soil.
Here’s the trick: rotate crops annually to prevent soil depletion. For example, plant heavy feeders (tomatoes) in the top tier one year, then swap them for light feeders (carrots) the next. I also add climbing plants (pole beans, cucumbers) to the sides of the bed to maximize vertical space without crowding tiers.
💧 Step 3: Water and Mulch Each Tier Strategically
Water the top tier first, then let it drain 10-15 minutes before moving to the next level. This prevents the bottom tiers from becoming waterlogged. Use a soaker hose or drip irrigation system to deliver moisture evenly—aim for 1 inch of water per week, adjusting for rain. You’ll know you’ve got it right when the top inch of soil feels damp but not soggy to the touch.
After watering, apply 2-3 inches of mulch (straw or shredded leaves) to each tier. Mulch keeps soil moist, suppresses weeds, and adds organic matter as it breaks down. For the top tier, I use straw to retain moisture, while the bottom tier gets shredded leaves to cool the soil for shade-loving plants. Replenish mulch every 4-6 weeks or after heavy rain.
✂️ Step 4: Maintain and Adjust for Seasonal Changes
Check soil moisture daily in summer and every 2-3 days in cooler months. Tiered beds dry out faster at the top, so monitor the top tier closely—if it feels dry while the bottom is still damp, water just the top. In late summer, add a light layer of compost to all tiers to replenish nutrients. I also prune aggressively to improve airflow, especially for plants like tomatoes and peppers.
As seasons shift, swap out plants to extend harvests. In early spring, plant cool-season crops (spinach, peas) in the bottom tier while keeping warm-season plants (basil, cucumbers) in the top. By mid-fall, transition the top tier to garlic or cover crops while the bottom tier can still grow hardy greens. This keeps your bed productive year-round.
🌱 Step 5: Extend the Season with Seasonal Adjustments
To prolong harvests in cold climates, add row covers or cold frames over the top tier in early fall. For hot summers, provide shade cloth (30-50%) to protect heat-sensitive plants like lettuce in the bottom tier. I also plant succession crops—as soon as you harvest bush beans, replace them with radishes or arugula in the same tier.
The key to year-round success? Plan ahead. Sketch your bed layout in early spring, noting which crops go where and when. Keep a simple harvest calendar to track what’s ready and what needs replacing. With tiered beds, you’ll double (or triple!) your yield without expanding your garden’s footprint.
Tips & tricks for tiered raised beds that actually work
Here's what nobody tells you about making tiered raised beds that actually produce year-round—without the headaches.
Material Matters: Cedar or redwood are your best bets for durability, but if you're on a budget, pressure-treated lumber works too—just avoid the green kind, which can leach chemicals into your soil. I learned this the hard way after my first bed rotted in just two seasons. For dividers, use 2x4s spaced 12 inches apart to create those planting zones, but leave that 2-inch gap between tiers—trust me, it prevents soil spillage that turns into a mess.
Soil Depth Strategy: The top tier needs that 8-10 inches of soil for root crops like carrots or potatoes, but don't go deeper than necessary—too much soil can stay too wet. For middle tiers, stick to 6 inches for greens and herbs, which have shallower roots. Pro tip: Mix in compost-amended soil at a 50/50 ratio with regular garden soil to boost fertility without compacting the mix.
Seasonal Plant Swaps: I didn't realize how much this would extend my harvests until I started rotating crops. In early spring, plant cool-season crops (spinach, peas) in the bottom tier while keeping warm-season plants (basil, cucumbers) in the top. By mid-fall, transition the top tier to garlic or cover crops—this keeps your bed productive even when temperatures drop. The key is planning ahead and sketching your layout in early spring.
Watering Hack: Water the top tier first, then wait those 10-15 minutes before moving to the next level. This prevents waterlogging in the bottom tiers, which can drown your shade-loving greens. Use a soaker hose or drip system to deliver moisture evenly—aim for 1 inch per week. I always check the top inch of soil: damp but not soggy is the sweet spot.
Pro Tips for Raised Bed Idea
- Here's what nobody tells you about making tiered raised beds that actually produce year-round—without the headaches.
- Material Matters: Cedar or redwood are your best bets for durability, but if you're on a budget, pressure-treated lum...
- Soil Depth Strategy: The top tier needs that 8-10 inches of soil for root crops like carrots or potatoes, but don't g...
Frequently asked questions
Got questions about raised bed gardening?
Here are answers to the most common ones to help you plan with confidence!
What’s the best material for raised bed frames?
Untreated wood (like cedar or redwood) is ideal—it’s rot-resistant and affordable. For longevity, consider composite lumber or metal frames. Avoid pressure-treated wood with arsenic (older types) for edible gardens. Pro tip: Line the bottom with landscape fabric to deter weeds and pests!
When is the best time to start a raised bed garden?
Spring (after the last frost) is perfect for planting cool-season crops like lettuce or peas. For warm-season veggies (tomatoes, peppers), wait until soil temps hit 60°F+. Year-round harvests? Layer with cold-hardy greens in fall/winter!
Can I build a raised bed on a budget?
Skip expensive lumber by using cinder blocks, bricks, or repurposed pallets. Skip soil by filling with cardboard + compost (lasagna method) instead of pricey topsoil. Even a $50 DIY bed yields big rewards!
How do I fix poor drainage in my raised bed?
Add a 2–4 inch layer of gravel or broken pottery at the bottom before filling with soil. Elevate the bed further if your yard floods. Overwatering? Check for clogged drainage holes in the frame. Pro tip: Mix in perlite or vermiculite to improve airflow!
Are raised beds better than in-ground planting?
Yes—for control! They warm up faster, drain better, and reduce weeds. However, in-ground beds are cheaper and better for deep-rooted plants (like potatoes). Raised beds shine for small spaces, poor soil, or mobility needs.
Wrapping up and next steps
Transforming your garden with raised bed ideas like tiered planting zones isn’t just about aesthetics—it’s a game-changer for maximizing space, extending harvests, and making gardening effortlessly rewarding! 🌱 Whether you’re a seasoned green thumb or a curious beginner, these designs let you grow more with less fuss while keeping your garden organized and productive year-round.
Now that you’re inspired, take the next step! Start small with one tiered bed, experiment with your favorite crops, and watch your confidence (and harvests!) grow. Happy planting—your future self will thank you! 🌿✨