
Flowers
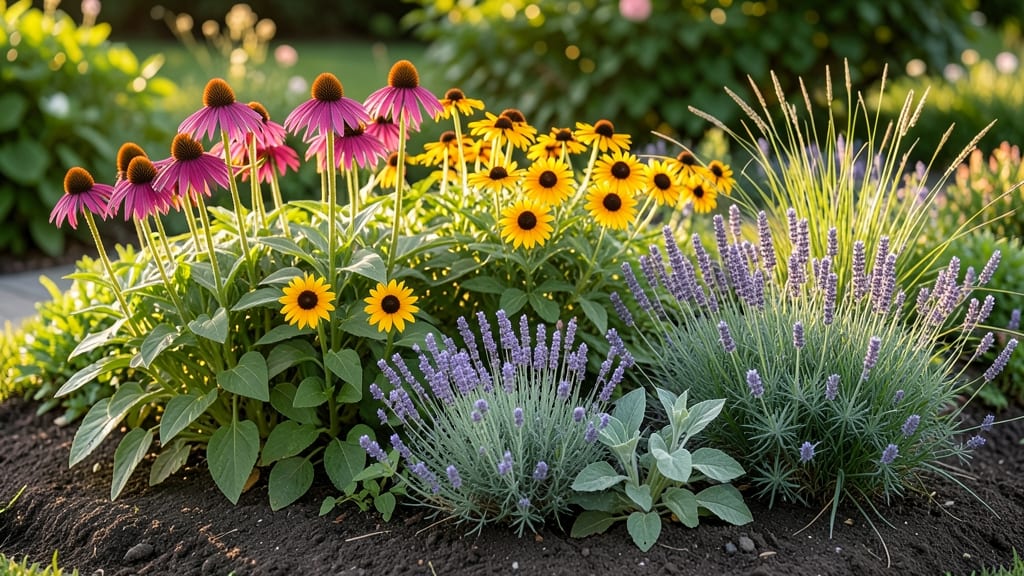
Creating a flower bed that feels like a living painting starts with layers that never stop blooming. 🌸 I designed my first whimsical bed after realizing most gardens looked flat—until I added height, texture, and seasonal transitions.
The secret isn't expensive plants but how you arrange them: tall back, medium middle, and low-spilling edges.
Begin with your sun exposure and soil type—those dictate what thrives. Then sketch rough shapes: curves soften small spaces, while geometric beds add drama to large yards. I use 3-foot-wide beds for easy maintenance, with paths just wide enough for wheelbarrows.
The best designs repeat color families (like purples and blues) while mixing bloom times for continuous interest.
By summer's end, your bed will burst with color that shifts from spring's delicate blooms to fall's fiery hues. The key is 30% evergreens for structure, 40% seasonal flowers, and 30% foliage plants that add texture.
Mulch keeps roots cool and weeds at bay, while regular deadheading extends each bloom's life.
This works for containers, cottage gardens, or formal borders—just scale the proportions. The magic happens when you step back and see how each plant contributes to the whole. Let's make your flower bed the envy of the neighborhood!
📚 In This Guide
- What you need
- Instructions
- Tips and common mistakes
- Wrapping up and next steps
What you need
- ● Soil & Amendments: Topsoil (2–3 cubic yards, depending on bed size)
- ● Compost (1–2 bags, 40 lb each) for nutrient-rich soil
- ● Organic mulch (2–3 bags, 2–3 cubic feet each) to retain moisture
- ● Plants: Perennials (3–5 varieties, 3–5 plants per type)
- ● Annuals (5–10 plants, mix of colors/heights)
- ● Foliage plants (e.g., hostas, heucheras; 3–5 plants)
- ● Ground covers (e.g., creeping thyme; 1–2 plants)
- ● Edging & Structure: Edging material (e.g., metal, plastic, or stone; 10–20 ft, depending on bed shape)
- ● Garden stakes or trellises (if climbing plants are included)
- ● Garden shovel or spade
- ● Garden fork (for aerating soil)
- ● Wheelbarrow (for hauling soil/amendments)
- ● Garden trowel (for planting small flowers)
- ● Measuring tape (25 ft)
- ● Gloves (heavy-duty, waterproof)
- ● Watering can or hose with spray nozzle
- ● Pruners (for trimming)
- ● Decorative stones or pebbles (for pathways or accents)
- ● Solar-powered garden lights (for evening ambiance)
- ● Wind chimes or whimsical garden art
- ● Drip irrigation system (for low-maintenance watering)
- ● Seasonal fillers (e.g., spring bulbs, fall mums)
Step-by-Step instructions for designing a whimsical flower bed
Here's how to create a layered flower bed that stays vibrant from spring through fall—no green thumb required.
🌱 Step 1: Sketch Your Bed Layout
Start by drawing your flower bed shape on graph paper or directly on the ground with chalk. I like to sketch a simple oval or kidney shape for a whimsical look—avoid straight edges unless you're going for a formal garden. Mark the center as your focal point, where taller plants will go. For a 4-foot diameter bed, draw concentric circles at 1-foot intervals to plan your layers.
This isn't just about looks—layering plants by height creates natural transitions and prevents smaller flowers from getting lost. I always sketch in my tallest plants (like delphiniums or hollyhocks) in the center, then medium-height perennials (like coneflowers) in the next ring, and low-growing annuals (like pansies) around the edges. Think of it like building a stage: the tallest "actors" need the most space to shine.
☀️ Step 2: Choose Plants for Season-Long Color
Select plants that bloom at different times to ensure continuous color. I divide my selections into three categories: early spring (like crocus or bleeding heart), mid-season (like black-eyed Susans), and late summer/fall (like asters or goldenrod). For your 4-foot bed, aim for about 3-5 plants per layer—this keeps the design cohesive without looking crowded.
Color coordination matters too. I like to use a palette of 3-4 colors max—maybe purples, pinks, and whites with one bold accent color like red or yellow. Place the boldest colors in the center where they'll draw the eye, then soften the edges with lighter hues. Don't forget foliage! Plants like heuchera or hosta add texture and color even when flowers aren't blooming.
🪴 Step 3: Prepare the Soil in Layers
Before planting, remove any grass or weeds from your bed area. I like to outline the shape with a spade, then dig down about 6-8 inches to loosen the soil. For poor soil, mix in 2-3 inches of compost into the top 6 inches of soil—this gives roots plenty of nutrients to establish. If your soil drains poorly, add a 1-inch layer of coarse sand to improve drainage.
Here's the thing—don't skip the soil prep. Even the prettiest plants will struggle if the roots can't breathe. After amending, rake the surface smooth and create small mounds where your tallest plants will go. This gives them a head start in establishing strong roots before they get buried by smaller plants around them. Water the bed thoroughly after prepping so the soil settles evenly.
🌿 Step 4: Plant in Height Order
Begin planting with your tallest plants in the center, working outward to shorter varieties. Dig holes about twice as wide as the plant's root ball but only as deep as the root ball itself—planting too deep can suffocate roots. Place each plant in its hole, then fill with soil, pressing gently to remove air pockets. Water immediately after planting to help settle the soil around roots.
I like to plant in groups of 3-5 for each variety—this creates natural drifts that look intentional. Space plants according to their mature size: give tall plants like delphiniums 18-24 inches between them, medium plants 12-18 inches, and small plants 6-12 inches. After planting, add a 2-inch layer of mulch around each plant (but not touching the stems) to retain moisture and suppress weeds.
✂️ Step 5: Add Finishing Touches and Maintenance Plan
Once all plants are in, step back and look for any gaps. Fill empty spots with annuals or fillers like ajuga or creeping thyme. Add decorative elements like stepping stones, solar lights, or a small birdbath if they fit your whimsical theme. I like to place a few larger stones strategically to break up the plant mass and add visual interest.
Create a simple maintenance schedule: water newly planted beds once a week for the first month (more if it's hot and dry), then taper to every 10-14 days once established. Deadhead spent blooms regularly to encourage more flowers, and fertilize lightly in early spring with a balanced 10-10-10 fertilizer. The key to a whimsical bed is letting it evolve naturally—don't be afraid to swap out a few plants if something isn't thriving after a season.
Tips & tricks for whimsical flower bed design
Creating a flower bed that stays vibrant all season takes a few key tricks—these will help you avoid common pitfalls and elevate your design.
Layering Like a Pro: When sketching your concentric circles in Step 1, remember that each layer should be about 1-foot wide for a 4-foot bed. This creates natural transitions between plant heights. I like to think of it like a wedding cake—each tier should be proportional to the one above it. For extra drama, consider adding a 6-inch wide border of low-growing plants like creeping thyme to frame the entire bed.
Plant Selection Shortcut: Instead of trying to remember every plant's mature height, group them by category as you shop: "tall backdrops" (4-6 feet), "mid-height stars" (2-3 feet), and "foreground fillers" (under 1 foot). This visual grouping makes planting in Step 4 much easier. I always keep a small notebook with me at the nursery to jot down which plants belong in which layer—it saves time when you're standing in front of 20 different varieties!
Soil Prep Secret: In Step 3, when you're mixing in 2-3 inches of compost, don't just dump it in the center. Spread it evenly across the entire bed area before digging. This ensures all your plants get equal access to nutrients. For clay-heavy soil, I recommend adding 1-inch of coarse sand mixed into the top 6 inches—this dramatically improves drainage without altering the soil structure too much.
Maintenance Hack: The 10-10-10 fertilizer mentioned in Step 5 is my go-to, but here's a pro move: mix it with 2 inches of compost when applying. This gives your plants both quick nutrients and long-term soil improvement. I apply it in early spring and again after the first big bloom cycle to keep things looking fresh all season.
Pro Tips for Flower Bed Design
- Creating a flower bed that stays vibrant all season takes a few key tricks—these will help you avoid common pitfalls ...
- Layering Like a Pro: When sketching your concentric circles in Step 1, remember that each layer should be about 1-foo...
- Plant Selection Shortcut: Instead of trying to remember every plant's mature height, group them by category as you sh...
Frequently asked questions
Got questions about crafting your dream flower bed? We’ve got answers! Whether you're a beginner or looking to refine your skills, these FAQs cover the essentials to help your garden thrive year-round.
What’s the best time of year to start designing a flower bed?
The ideal time depends on your climate! In mild regions, spring or early fall is perfect—soil is workable, and plants have time to establish roots before extreme weather. In colder areas, plan for early spring (after the last frost) or late summer to avoid winter stress. Pro tip: Sketch your design first! Even if you plant gradually, having a layout ensures balance and harmony.
How much does a professional flower bed design cost?
Costs vary widely based on size, complexity, and materials. A basic DIY design with mulch and perennials might cost $50–$200, while a custom, high-end landscape with hardscaping, rare plants, and irrigation can run $1,000–$10,000+. Budget-friendly tip: Start small! Focus on one section or use affordable annuals for instant color.
Can I use containers or raised beds for small spaces?
Containers and raised beds are perfect for patios, balconies, or tight yards. Choose self-watering pots or raised beds with drainage to prevent root rot. Opt for compact perennials (like lavender or dwarf coneflowers) or trailing annuals (petunias, nasturtiums) for vertical interest. Bonus: Containers let you move designs seasonally!
How do I keep pests and weeds out of my flower bed?
Prevention is key! Use organic mulch (like wood chips or straw) to suppress weeds and retain moisture. Hand-pull weeds regularly before they seed. For pests, introduce beneficial insects (ladybugs, lacewings) or use neem oil. Design tip: Plant pest-repelling flowers (marigolds, basil) near vulnerable plants to deter critters naturally.
Will my flower bed survive winter?
Many plants thrive with winter prep! Perennials (like hostas or daylilies) are hardy—just add 3–4 inches of mulch after the first frost. Tender annuals (like impatiens) won’t return, but you can replant in spring. Evergreens and shrubs add structure; wrap young trees in burlap if winds are harsh. Pro move: Take photos of your bed in winter for spring planning!
Wrapping up and next steps
Designing a whimsical, layered flower bed isn’t just about beauty—it’s about creating a living, evolving masterpiece that brings joy all year round.
Whether you’re mixing perennials for structure, adding seasonal blooms for color, or incorporating playful textures, the key is to start small, experiment fearlessly, and let your creativity bloom! 🌸
Ready to transform your space? Grab your gardening gloves, sketch out your vision, and take that first step—your future flower bed is waiting for you! Happy planting! 🌱