
Tools
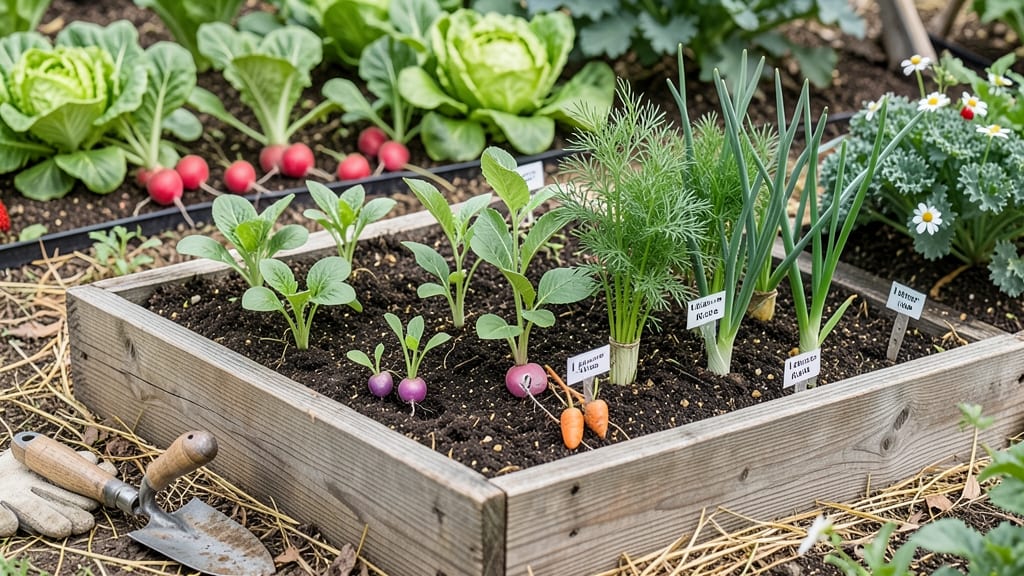
A small raised vegetable garden layout in a 4×4-foot bed grows more food than you'd expect—if you use square-foot spacing right. 🌱 I designed mine after wasting space with traditional rows, and now every inch produces.
The secret? Placing plants in a grid where each square foot holds exactly what it can support without crowding.
You'll need a 4-foot-by-4-foot frame (or two 4×8-foot beds), 12-inch-deep lumber, and landscape fabric to suppress weeds. For soil, mix 60% compost, 30% topsoil, and 10% perlite—this keeps roots happy and drainage perfect.
My first bed cost under $100 and now feeds us fresh greens for months.
By the end of summer, you'll harvest 16 heads of lettuce, 9 tomato plants, and 16 radishes—all in one small space. The layout even includes companion plants like basil near tomatoes to repel pests naturally. No wasted soil, no overcrowding, just pure productivity.
Works for patios, balconies, or backyards—just adjust the grid size for your space. Let's get that bed planted!
📚 In This Guide
- What you need
- Instructions
- Tips and common mistakes
- Wrapping up and next steps
What you need
- ● Raised bed frame: Untreated wood (cedar or redwood recommended), 2x6 or 2x8 lumber, or pre-made raised bed kit (4–6 ft long, 2–4 ft wide, 6–12 in deep). Pro tip: 💡 Avoid pressure-treated wood—it can leach chemicals into your soil!
- ● Cardboard or landscape fabric: 1–2 sheets (to block weeds and grass).
- ● High-quality soil: 1 cubic yard of mix of 60% topsoil, 30% compost, and 10% perlite/sand (or pre-mixed raised bed soil).
- ● Garden twine or string: 50 ft (for marking square-foot grids).
- ● Measuring tape, level, and pencil: For precise layout.
- ● Staple gun or nails: To secure cardboard/fabric.
- ● Garden gloves and knee pads: Comfort is key! 😉
- ● Drip irrigation kit: Saves time and water.
- ● Square-foot grid template: Pre-cut plastic or printed grid for easy spacing.
- ● Mulch (straw or shredded leaves): Retains moisture and suppresses weeds.
- ● Compost thermometer: Ensures your soil is ready for planting.
- ● Seeds or seedlings: Start with fast-growing crops like lettuce, radishes, or herbs!
Step-by-Step guide to designing a square-foot raised bed layout
This method transforms even a 4x4-foot bed into a high-yield, organized growing space—no guesswork involved.
🪴 Step 1: Divide the Bed into a 1-Foot Grid
Use a tape measure and string to create a grid of 1-foot squares across your raised bed. A 4x4-foot bed gives you 16 perfect squares—each will become its own planting zone. I like to use wooden stakes at each corner of the grid for visual reference and to keep the strings taut. This ensures every square is exactly 12 inches on all sides, which is critical for square-foot spacing.
Real talk: If your bed isn't perfectly square, adjust the grid to fit the available space while maintaining those 1-foot increments. You can have partial squares along the edges, but always keep the full 1-foot depth for root zones. Mark each square with a small label or write directly on the bed's wood with a pencil—just don't use anything that will stain or damage the lumber.
🌱 Step 2: Assign Plants to Squares Based on Spacing Charts
Refer to a square-foot gardening chart to determine how many plants of each variety fit in a single square foot. For example, you might place 16 radishes, 4 onions, or 1 tomato plant per square. I always start by plotting my largest plants—like tomatoes, peppers, or cabbage—first, since they need the most space. Place them in squares where they'll get the most sun exposure, typically along the southern edge of the bed.
Don't overcrowd the chart by mixing incompatible plants. For instance, leafy greens like lettuce and spinach can share space with herbs, but avoid pairing heavy feeders like corn with light feeders like carrots. The goal is to maximize yield without competing for nutrients or light. Once you've placed your anchor plants, fill the remaining squares with complementary crops.
☀️ Step 3: Group Plants by Family and Sun Requirements
Organize your layout so plants from the same family aren't adjacent—this prevents soil-borne diseases from spreading. For example, place brassicas (like broccoli and cabbage) away from other brassicas, and keep nightshades (tomatoes, peppers, eggplants) separated. I like to dedicate one side of the bed to sun-loving plants and the other to partial-shade varieties, which simplifies maintenance and watering.
Watch for how the sun moves across your bed throughout the day. If one corner gets less than 6 hours of sunlight, reserve it for shade-tolerant plants like lettuce, spinach, or bush beans. You'll notice that even in a small space, you can create microclimates that extend the growing season for certain crops. Adjust your layout if you see plants leaning toward the light—rotate the bed slightly to balance exposure.
💧 Step 4: Plan for Companion Planting and Succession
Incorporate companion plants to naturally deter pests and improve growth. For example, place basil near tomatoes to repel flies, or interplant carrots with onions to confuse carrot flies. I also leave a few squares empty or plant them with fast-growing crops like radishes or lettuce, which I harvest early to make room for slower-growing plants like squash or corn later in the season. This is called succession planting, and it keeps your bed productive all season long.
Label each square with the plant variety and the date planted. This helps you track growth stages and rotate crops next year. I use small wooden stakes or biodegradable labels tucked into the soil. Avoid plastic labels—they can leach chemicals and don't break down. Keep a simple logbook or use a gardening app to note which plants thrive in which squares, so you can replicate your layout in future seasons.
✂️ Step 5: Test and Adjust for Your Climate
After your first planting, observe how each plant performs in its assigned square. Note which varieties struggle with pests, bolt too quickly, or don't produce well in your microclimate. Adjust your layout the following year based on these observations. For example, if your tomatoes consistently underperform in the northernmost square, move them to a sunnier spot next season. This iterative process ensures your raised bed becomes more efficient with each cycle.
Don't forget to account for your local frost dates and growing season length. In cooler climates, prioritize cold-hardy crops like kale or peas in early squares, while warmer climates might focus on heat-tolerant varieties like okra or sweet potatoes. The key is flexibility—your layout should evolve as you learn what works best in your specific conditions. With each season, you'll refine your design into a personalized, high-yield system.
Tips & tricks for perfect small raised bed vegetable garden layout
A few strategic tweaks will help you maximize every square inch of your raised bed and avoid common gardening pitfalls.
Precision Matters: When creating your 1-foot grid in Step 1, use a level to ensure your bed is perfectly even before marking squares. Uneven beds can cause water pooling in some squares while others dry out—this inconsistency leads to uneven growth. I also recommend using a carpenter's square to verify your angles are perfect 90-degree corners for the grid. This attention to detail ensures your 12-inch squares maintain their integrity throughout the season.
Sunlight Strategy: In Step 3, observe your bed's sunlight patterns for at least 3 days before finalizing your layout. Note which squares receive the full 6 hours of sunlight mentioned in the instructions, and which get partial shade. I've found that rotating the bed's orientation by 10-15 degrees can sometimes shift sunlight exposure enough to create an additional sunny square. This micro-adjustment can make the difference between a thriving tomato plant and one that struggles to produce.
Companion Planting Secrets: For Step 4, go beyond the basic companion pairings and consider the "three sisters" method in your layout. Plant corn in one square, beans climbing the corn stalks in an adjacent square, and squash at the base to shade the soil. This creates a self-sustaining micro-ecosystem that improves soil fertility and reduces pests. The beans fix nitrogen, the squash suppresses weeds, and the corn provides structure—all within your square-foot framework.
Documentation System: Create a simple key for your square labels that combines plant variety with a numerical code for spacing. For example, "T1" for 1 tomato plant per square, "R16" for 16 radishes. This system makes it easy to reference your spacing charts later and quickly identify which plants need thinning. I keep a small notebook by the garden with these codes and their corresponding spacing requirements—it's become my go-to reference when planning new layouts.
Pro Tips for Small Raised Bed Vegetable Garden Layout
- A few strategic tweaks will help you maximize every square inch of your raised bed and avoid common gardening pitfalls.
- Precision Matters: When creating your 1-foot grid in Step 1, use a level to ensure your bed is perfectly even before ...
- Sunlight Strategy: In Step 3, observe your bed's sunlight patterns for at least 3 days before finalizing your layout....
Frequently asked questions
Got questions about maximizing your small raised bed garden?
Here are answers to the most common ones to help you grow like a pro!
What’s the best size for a small raised bed?
Aim for 4’ x 4’ (16 sq ft) or smaller—this size is easy to reach from all sides and works perfectly with square-foot spacing. If space is tight, even a 2’ x 4’ (8 sq ft) bed can yield great results with careful planning! Just ensure it’s at least 6–12 inches deep for root crops.
When is the best time to plant in a raised bed?
Start 4–6 weeks before your last frost date for cool-season crops (like lettuce or peas) and 2–3 weeks after for warm-season veggies (tomatoes, peppers). Raised beds warm up faster, so you can plant earlier than in-ground gardens. Use a soil thermometer to check when it’s ready!
How do I rotate crops in a small raised bed?
Rotate families (e.g., tomatoes → beans → brassicas) yearly to prevent disease and pests. In tiny spaces, swap specific plants within sections instead of moving entire beds. Keep a simple planting journal to track what worked where!
What’s the easiest way to deter pests in a small raised bed?
Use physical barriers (row covers, netting) and companion planting (e.g., marigolds with tomatoes). For slugs/snails, add copper tape or diatomaceous earth. Avoid chemicals—raised beds are low-maintenance with smart spacing!
Can I grow vegetables in a raised bed without soil?
Yes! Try hydroponics (with a deep-water culture system) or grow bags filled with coconut coir or perlite. For traditional soil, mix 50% compost with 50% garden soil or use mel’s mix (peat moss, compost, perlite). Just ensure good drainage!
Wrapping up and next steps
A small raised bed vegetable garden doesn’t have to mean small yields—with square-foot spacing and smart planning, you can grow plenty of fresh produce in limited space! Whether you’re a beginner or a seasoned gardener, this layout maximizes efficiency while keeping maintenance simple.
The key? Start small, experiment with crops, and let your green thumb guide the way.
Ready to dig in? Sketch your design, gather your supplies, and plant with confidence. Your future harvest—and your dinner table—will thank you! 🌱✨