
Landscaping
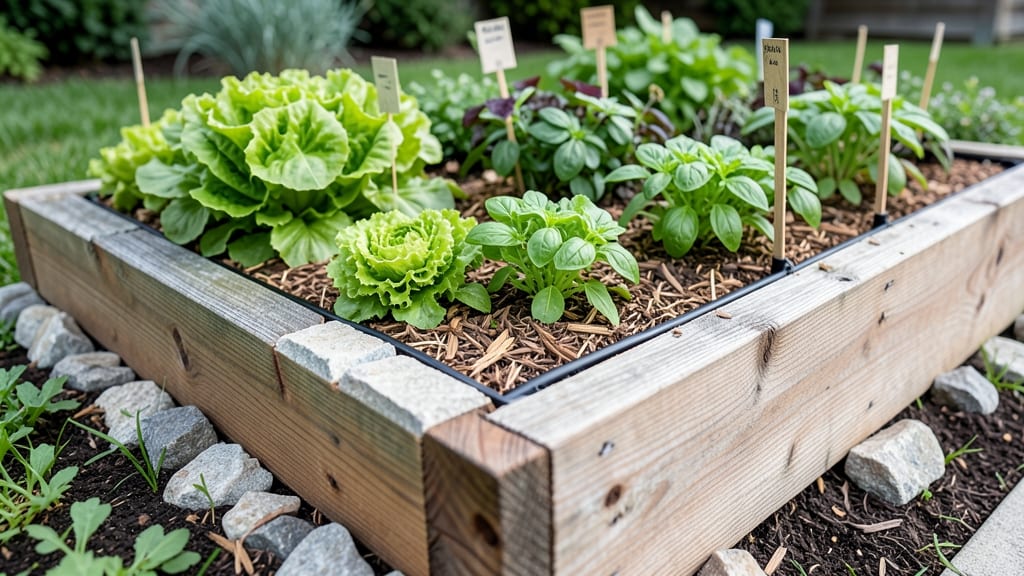
Modular cedar frames let you design a raised planter bed that fits your space—and your plants—perfectly. 🌱 I started with just two 4x8-foot sections, then expanded them into a custom layout that maximizes sunlight and minimizes wasted space.
The key is thinking in sections: each frame can be 2x4 feet, 4x4 feet, or even 8x2 feet, so you build exactly what your yard needs.
Cedar resists rot and insects naturally, but the real magic happens in how you arrange the sections. Place taller plants like tomatoes at the north end to avoid shading shorter greens, and leave 12-inch walkways between sections for easy access.
For small spaces, go vertical: stack two frames to create a tiered bed that doubles your growing area without taking up more square footage.
By the end of the project, you’ll have a bed that’s deeper than standard garden soil (12+ inches), drains perfectly, and stays weed-free at ground level. The modular design means you can swap sections next season if your sun exposure changes—or if you just want a different look.
Plus, the cedar’s natural color blends seamlessly with any garden theme.
This works for urban balconies, suburban backyards, or even a rustic farmhouse aesthetic. Start small, and expand as your confidence (and garden) grows. The first frame is always the hardest—after that, it’s just adding pieces like a puzzle.
📚 In This Guide
- What you need
- Instructions
- Tips and common mistakes
- Wrapping up and next steps
What you need
- ● Cedar lumber: 2x6 or 2x8 boards (pressure-treated or naturally rot-resistant) – quantity varies based on bed size (e.g., ~12 boards for a 4’x8’ bed).
- ● Galvanized or stainless steel screws: 2.5” to 3” deck screws (100–200 screws, depending on size).
- ● Corner brackets or L-brackets: Heavy-duty metal (4–8 brackets for stability).
- ● Landscape fabric: 3–4 ft wider than bed dimensions (to block weeds).
- ● Soil mix: High-quality garden soil, compost, and perlite (or pre-mixed raised bed soil).
- ● Measuring tape, speed square, and pencil (for precise cuts).
- ● Drill/driver (with Phillips and square-drive bits).
- ● Circular saw or miter saw (for clean cuts).
- ● Level (to ensure your bed stays even).
- ● Work gloves & safety goggles (because safety first!).
- ● Wood stain or sealant: For extra protection (cedar-friendly options like Tung oil or linseed oil).
- ● Drainage pipe: Perforated PVC (if your bed needs extra water flow).
- ● Modular connectors: For expandable designs (e.g., locking cedar joints).
- ● Edging stones or pavers: To define the bed’s perimeter beautifully.
- ● Post caps or decorative trim: For a polished, finished look.
Step-by-Step instructions for building modular cedar raised planter beds
Here's how to create customizable, long-lasting cedar frames that let you adjust growth zones as your garden evolves.
🪴 Step 1: Plan and Measure Your Layout
Start by sketching your design on paper, marking where each 4-foot section will go. Cedar resists rot naturally, but I always space beds 12 inches apart for easy access and airflow between plants. Measure your garden space carefully—cedar planks come in standard lengths, so plan joints to fall at corners or hidden spots.
For modularity, I design each bed section as 4 feet long × 2 feet wide, using 2×6 cedar boards for the frame. This size works perfectly with standard lumber lengths and gives you room to mix plant heights later. Mark your measurements directly on the ground with stakes and string for precision.
☀️ Step 2: Assemble the Frame Components
Cut your 2×6 cedar boards to these lengths: 4 feet (2 pieces), 2 feet (2 pieces), and 1 foot 8 inches (4 corner braces). The corner braces (cut at a 45-degree angle) give your frame strength and a clean look. Sand all edges smooth—cedar splinters are real, and you don't want to deal with that when handling fresh wood.
Pre-drill 3/8-inch holes through the boards where screws will go, using a deck screw (not regular screws—they strip cedar fast). I use 3-inch deck screws for corners and 2-inch screws for face screws. Assemble each section like a picture frame, keeping the boards flush. For extra stability, add a 2×4 support brace under each long side halfway along the length.
🌱 Step 3: Layer and Secure the Frame
Place your assembled frame directly on the ground where you marked it. Cedar's natural oils mean you don't need a bottom layer for most plants, but if your soil is heavy clay, add a landscape fabric barrier first to prevent weeds from creeping up. This also keeps soil from spilling out—trust me, you'll thank yourself later when you're not raking mulch from the lawn.
Check for level with a 2-foot level, adjusting by placing small rocks or pavers under low corners. Once level, drive 4-inch galvanized stakes into the ground at each corner, then secure the frame to them with 3-inch exterior screws. This keeps your beds from shifting over time, especially when they're full of wet soil.
💧 Step 4: Add Soil and Create Growth Zones
Fill your frame with a 12-inch layer of soil mix—I use 60% garden soil, 30% compost, and 10% perlite for drainage. For modular growth zones, divide each 4-foot section into two 2-foot zones—one for shallow-rooted plants like lettuce, the other for deeper roots like carrots. Install a 1-inch tall divider made from the same cedar (cut to fit) to keep soil from mixing.
Water the soil thoroughly after filling, then let it settle for 24 hours before planting. This prevents compaction and gives roots room to establish. Here's where the modular magic happens: you can swap out entire sections later if your planting needs change—just lift the cedar frame and move it to a new spot.
✂️ Step 5: Maintain and Expand Your Design
After planting, water deeply every 2-3 days until new growth appears, then adjust based on rainfall. Cedar frames last 10-15 years if you avoid direct soil contact with the wood (keep mulch 2 inches away from frame edges). To expand, simply add another 4-foot section**—the modular design lets you create L-shapes, curves, or even spiral patterns as your garden grows.
For winter, remove annual plants and refill with fresh soil in spring. Perennials stay put, and the cedar's natural resistance keeps them protected. The best part? You can rearrange the entire system next year if your sun exposure changes or you want to try a new layout.
Tips & tricks for building modular cedar raised planter beds
Building these customizable garden frames takes planning—but these tricks will save you time and frustration.
Precision Cutting Pays Off: When cutting your 2×6 cedar boards to the specified lengths (4 feet, 2 feet, and 1 foot 8 inches), use a straightedge and clamp your boards securely to prevent splintering. I learned this the hard way after ruining three boards with uneven cuts—cedar is unforgiving when you rush. A miter saw with a fine-tooth blade gives the cleanest cuts for those 45-degree corner braces too.
Screw Placement Matters: Those 3/8-inch pre-drilled holes aren't just for looks—they prevent cedar from splitting when you drive in 3-inch deck screws at the corners. I always mark screw locations with a pencil first, then pre-drill at a slight angle (just enough to guide the screw) to ensure perfect alignment. Regular screws will strip cedar's soft grain, so invest in quality deck screws—they're worth every penny.
Leveling is Non-Negotiable: The 2-foot level check in Step 3 isn't just about looks—uneven frames cause drainage issues and stress plant roots. If your ground isn't perfectly level, use galvanized washers under the stakes instead of rocks (they won't rust and won't sink over time). Pro tip: Check level diagonally too—many people only check side-to-side and miss the subtle angles that throw off the whole frame.
Soil Settlement Strategy: That 24-hour settling period before planting is crucial, but don't skip it! After filling with your 12-inch soil mix, gently press down the top inch with your hands—this mimics natural compaction without being too heavy. For the 60% garden soil, 30% compost, 10% perlite blend, I add a handful of worm castings (optional) to boost microbial activity right from the start. This prevents future compaction issues when roots establish.
Pro Tips for Raised Planter Bed Design
- Building these customizable garden frames takes planning—but these tricks will save you time and frustration.
- Precision Cutting Pays Off: When cutting your 2×6 cedar boards to the specified lengths (4 feet, 2 feet, and 1 foot 8 inches), use a straightedge and clamp your boards securely to prevent splintering.
- Screw Placement Matters: Those 3/8-inch pre-drilled holes aren't just for looks—they prevent cedar from splitting when you drive in 3-inch deck screws at the corners.
Frequently asked questions
Got questions about raised planter bed design?
Here are answers to the most common ones—whether you're a first-time builder or a seasoned gardener looking to optimize your setup.
What’s the best height for a raised planter bed?
A standard height of 6–12 inches works well for most plants, balancing accessibility and drainage. For deeper-rooted veggies (like tomatoes or carrots), aim for 12–18 inches. If mobility is a concern, 10–12 inches is ideal—high enough to reduce bending but low enough to avoid overworking soil.
When is the best time to build a raised planter bed?
Build 6–8 weeks before planting season (spring or fall, depending on your climate) to let soil settle and decompose. If using untreated cedar, allow 2–4 weeks for the wood to weather and stabilize. Pro tip: Winter is a great time to prep frames—just cover with a tarp to protect from snow or rain.
Can I reuse materials from old raised beds?
Cedar lasts 10+ years
if untreated, but check for rot, cracks, or splinters. Sand down rough edges and reinforce weak spots with metal brackets. For a budget-friendly twist, mix cedar with galvanized hardware cloth (to deter burrowing pests) or upcycle pallet wood (pressure-treated only!).
How do I prevent weeds and soil erosion in raised beds?
Line the bottom with cardboard or landscape fabric (cut to fit) to block weeds, but leave the sides open for root growth. Top with 2–3 inches of mulch (straw, wood chips) to retain moisture and suppress weeds. For erosion-prone slopes, add edging stones or bricks around the perimeter to contain soil.
Why is my cedar planter bed warping or splitting?
Warping often happens if wood isn’t acclimated to outdoor conditions (store it outside for a few weeks before building). To prevent splits, pre-drill screw holes and use stainless steel or galvanized screws (not nails). If warping occurs, reinforce corners with metal corner braces or replace damaged sections. Pro tip: Space boards ¼-inch apart to allow for seasonal expansion.
Wrapping up and next steps
Designing a raised planter bed with modular cedar frames is more than just a landscaping upgrade—it’s a game-changer for your garden’s health, accessibility, and beauty! 🌱 Whether you’re a seasoned gardener or just starting out, customizable growth zones let you tailor your space to thrive, reduce weeds, and even save your back.
The key? Start small, plan smart, and let your creativity grow alongside your plants.
Ready to transform your outdoor space? Grab your materials, sketch your design, and start building! Your future garden (and future you) will thank you. 🛠️✨