
Tools
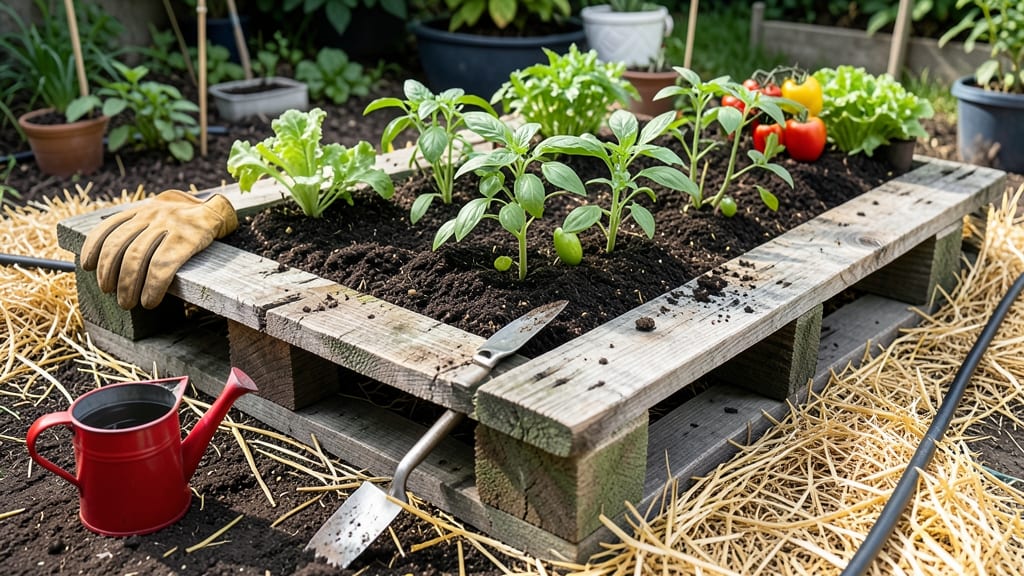
A raised garden bed made out of pallets turns scrap wood into a sturdy, space-efficient planter that costs next to nothing. 🌱 I built mine last spring using two heat-treated pallets, and now I grow more in 4' x 8' than I ever did in my in-ground plot.
The best part? It’s accessible, customizable, and perfect for small spaces or bad soil.
You’ll need basic tools—a drill, screws, and sandpaper—and a little elbow grease. Skip the expensive lumber: pallets are free (or cheap) at local businesses, and with proper prep (sanding and sealing), they’re just as strong as store-bought beds. My first bed lasted three seasons with no rot or wobble.
By summer’s end, you’ll have a productive planter that’s easier on your back and better for your plants. Fill it with herbs, lettuce, or even dwarf tomatoes—everything grows faster in raised beds. Plus, the upcycled vibe makes neighbors ask questions, which is half the fun.
Works for beginner gardeners or seasoned pros—just adjust the height for accessibility. Here’s how to build one that lasts, with zero waste and maximum growing power.
📚 In This Guide
- What you need
- Instructions
- Tips and common mistakes
- Wrapping up and next steps
What you need
- ● Pallets: 4-6 sturdy, heat-treated (HT) or kiln-dried pallets (avoid chemically treated ones). Look for standard 48" x 40" pallets for a 4' x 8' bed.
- ● Screws: 2.5" to 3" deck screws (galvanized or stainless steel, 100+ screws for a 4' x 8' bed).
- ● Landscape fabric: A roll to line the bottom (prevents weeds and improves drainage).
- ● Soil: High-quality garden soil mix (avoid pure topsoil—opt for a blend with compost and perlite for aeration).
- ● Tools: Drill/driver (with screw attachment)
- ● Tape measure
- ● Level (to ensure evenness)
- ● Staple gun (for securing landscape fabric)
- ● Work gloves & safety glasses
- ○ Hammer (optional, for stubborn pallets)
- ● Wood preservative: Seal pallets to extend lifespan (especially if using untreated wood).
- ● Corner brackets: Reinforce joints for extra stability (great for taller beds).
- ● Drainage rocks: Small gravel or pebbles at the bottom for better water flow.
- ● Paint/stain: Customize your bed with non-toxic, outdoor-safe finishes.
- ● Drip irrigation kit: For hassle-free watering (especially useful for raised beds).
Step-by-step instructions for building a sturdy pallet raised garden bed
Here’s how I build a simple, long-lasting raised bed using pallets—no fancy tools, just basic supplies and a little elbow grease.
🪴 Step 1: Select and Prepare the Pallets
Choose heat-treated pallets (marked "HT" or "MB" for methyl bromide) to avoid toxic chemicals. Avoid chemically treated pallets—they’re often stamped "CH" or "DB," which can leach harmful fumes into your soil. I like to use four standard 40x48-inch pallets for a 4x8-foot bed, but you can adjust sizes as needed.
Clean the pallets thoroughly with a stiff brush to remove debris, then sand any rough edges or splinters. If the wood looks weathered, I give it a quick coat of non-toxic wood sealant (like linseed oil) to extend its life. This step prevents rot and makes the bed last through multiple growing seasons.
✂️ Step 2: Assemble the Frame
Arrange three pallets side by side to form the base. The fourth pallet will be the top layer. Use 3-inch outdoor-rated screws (galvanized or stainless steel) to secure the corners. I pre-drill holes to prevent splitting, especially if the wood is dry. Space screws 6-8 inches apart along the seams for maximum stability.
For extra reinforcement, I add 2x4 corner braces inside the frame before screwing the top pallet into place. This ensures the structure won’t sag over time, even when loaded with soil. Double-check that all edges are flush—uneven surfaces can cause drainage issues later.
💧 Step 3: Line the Bed for Protection
Lay down landscape fabric (heavy-duty, 3-4 mil thickness) inside the bed to block weeds and grass from invading your soil. Secure it with landscape staples along the edges, tucking any loose fabric neatly. This step is critical if you’re placing the bed directly on grass or soil—it keeps your garden clean and reduces maintenance.
Next, add a 2-inch layer of cardboard (like flattened boxes) over the fabric. This acts as a natural weed barrier and helps break down into compost over time. Wet the cardboard slightly before placing it to prevent it from blowing away during assembly.
🌱 Step 4: Fill With Soil and Plant
Fill the bed with a mix of equal parts topsoil, compost, and perlite (or coconut coir for moisture retention). I fill it to 6-8 inches below the rim to allow room for mulch and easy watering. Avoid filling it completely—soil settles over time, and you don’t want plants spilling over the edges.
For the first planting, I add a thin layer of mulch (straw or shredded leaves) to retain moisture and suppress weeds. Water the bed thoroughly after filling, letting the water drain completely. This ensures your soil is evenly moist and ready for planting. Now you’re set to grow anything from veggies to flowers!
Tips & tricks for perfect pallet raised garden beds
Building a raised bed from pallets is a fantastic way to create a sustainable garden space—but these small details make all the difference between a sturdy planter and one that falls apart after a season.
Pallet Selection: Always double-check those pallet stamps! "HT" or "MB" means heat-treated and safe for gardening, while "CH" or "DB" indicates chemical treatment that can harm your plants. I’ve learned this the hard way—once used pallets stamped "DB" and had to dig up my entire bed after noticing stunted growth. Pro tip: If you’re unsure, give pallets a quick rinse with soapy water before using them to remove any lingering dust or residue.
Assembly Reinforcement: When securing the frame in Step 2, don’t skimp on the corner braces. I’ve seen many DIY beds sag after just one growing season because builders skipped this step. Use those 2x4 corner braces inside the frame before adding the top pallet—it’s the secret to keeping your bed square and preventing warping. Also, pre-drilling holes for screws is a game-changer, especially if your pallets are dry. It prevents splitting and makes assembly much cleaner.
Soil Mix Strategy: The equal parts topsoil, compost, and perlite (or coconut coir) in Step 4 is perfect, but here’s what nobody tells you: wet your perlite before mixing it in. Dry perlite can create air pockets that make your soil too loose. I like to soak it in water for 10 minutes first, then squeeze out excess moisture. This ensures your soil stays evenly moist without becoming waterlogged. For heavy clay soil areas, you might even want to increase the perlite to one-third of the mix—it improves drainage dramatically.
Long-Term Protection: After filling your bed, don’t forget to add a final layer of mulch every few months. I use a mix of straw and shredded leaves to keep moisture in and weeds out. This also helps regulate soil temperature, which is especially important if you’re growing in hot climates. Plus, it makes your garden look neat and finished—no one will guess it’s made from upcycled pallets!
Pro Tips for Raised Garden Bed Made Out Of Pallets
- Building a raised bed from pallets is a fantastic way to create a sustainable garden space—but these small details ma...
- Pallet Selection: Always double-check those pallet stamps! "HT" or "MB" means heat-treated and safe for gardening, wh...
- Assembly Reinforcement: When securing the frame in Step 2, don’t skimp on the corner braces. I’ve seen many DIY beds ...
Frequently asked questions
Got questions about building and using a raised garden bed made out of pallets? You’re not alone! Here are some of the most common concerns—and their solutions—to help you get started with confidence.
Are pallet garden beds safe for growing vegetables?
Yes, but with a few precautions! Avoid treated pallets (marked "MB" for methyl bromide) as they may contain harmful chemicals. Opt for heat-treated or _HT_-stamped pallets instead. Sand rough edges, line the bed with landscape fabric, and avoid planting root crops directly against the wood to minimize exposure.
How long do pallet garden beds last?
With proper care, a well-built pallet bed can last 3–5 years or longer. Extend its life by:
- Sealing wood with non-toxic sealant (like linseed oil) to prevent rot.
- Avoiding direct soil contact with untreated pallets.
- Replacing individual planks if they degrade over time.
Can I use broken or damaged pallets?
Broken pallets are perfect for upcycling—just sand, reinforce, or replace weak sections. Use sturdy planks for the bottom frame and reserve intact pallets for the sides. If a plank is splintered, flip it so the smoother side faces outward. Pro tip: Check for nails/screws and remove them before assembly!
What’s the best time of year to build a pallet garden bed?
Build your bed in early spring or late fall to give soil time to settle before planting. Avoid winter construction (unless in mild climates) to prevent frost damage to wood. If starting later, add a layer of cardboard or landscape fabric under soil to suppress weeds while the bed stabilizes.
How do I keep pests out of a pallet garden bed?
Pallets can attract pests like rodents or termites. Prevent issues with these steps:
- Elevate the bed slightly (4–6 inches off the ground) to deter burrowing pests.
- Use copper tape or chicken wire around the bottom edges.
- Avoid placing beds near woodpiles or dense vegetation.
- Rotate crops and remove debris yearly to disrupt pest life cycles.
Wrapping up and next steps
Building a raised garden bed from pallets is a fantastic way to breathe new life into old materials while creating a thriving space for your plants! 🌱 Whether you're a seasoned gardener or just starting out, this project is budget-friendly, eco-conscious, and perfect for year-round growing.
With a little creativity and effort, you’ll have a sturdy, upcycled planter that’s ready to nurture your favorite veggies, herbs, or flowers.
Now that you’re inspired, roll up your sleeves and get started! Grab those pallets, gather your tools, and watch your garden flourish—one upcycled bed at a time. Happy building! 🛠️🌿