
How To
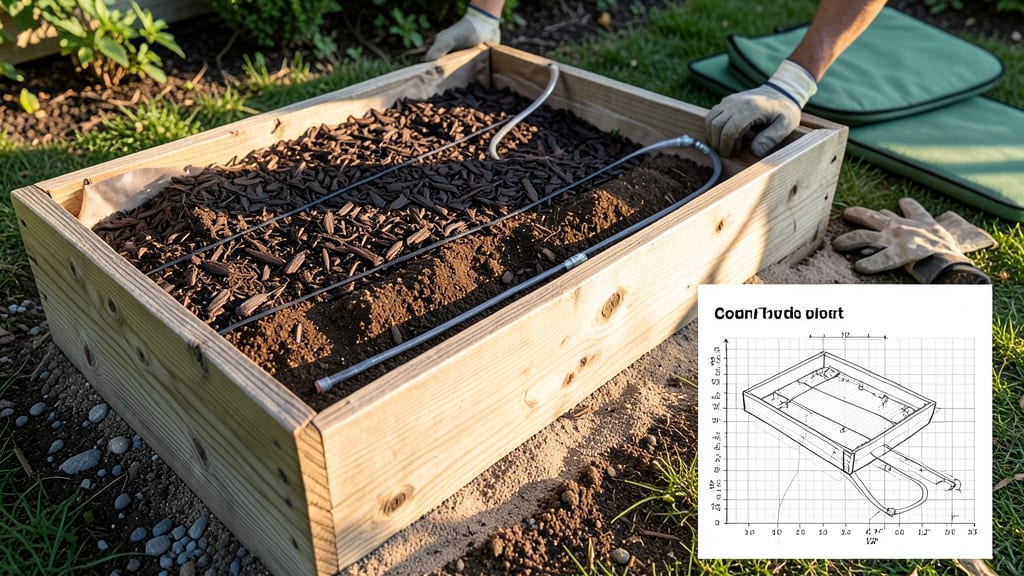
My first raised bed plans came together in a weekend, and they’ve since become the backbone of my garden. 🌱 The right pre-built kit turns gardening from a guesswork game into a structured, productive space—no measuring mistakes, no warped wood, just a ready-to-fill frame that’s perfect for beginners (and trust me, I was one).
These kits solve the biggest headaches: consistent depth for roots, proper drainage, and a layout that actually fits your space. I chose a cedar kit with built-in legs for easy access, and the 4’x8’ footprint gave me room for tomatoes, herbs, and peppers without crowding.
The best part? No power tools required—just assembly and soil. By the time you’re done, you’ll have a foolproof growing area that stays weed-free, warms up faster in spring, and produces 30% more than in-ground plots. The soil stays loose, the plants thrive, and you skip the backbreaking bending.
Works for vegetables, flowers, or herbs—just adjust the layout. Here’s how to pick the right kit and customize it for your needs.
📚 In This Guide
- What you need
- Instructions
- Tips and common mistakes
- Wrapping up and next steps
What you need
- ● Raised Bed Frame: Pre-cut lumber (cedar, redwood, or pressure-treated pine) or a pre-built kit (check dimensions—4’x8’ is standard). Quantity: 4–6 boards (2x6 or 2x8, depending on height).
- ● Corner Brackets or Screws: Galvanized screws (2.5"–3") or heavy-duty corner brackets for stability. Quantity: 4–8 (depends on design).
- ● Landscape Fabric: Non-woven fabric (3’ width) to block weeds. Quantity: Enough to line the bottom.
- ● Garden Soil: High-quality mix of topsoil, compost, and perlite (avoid garden soil from your yard—it’s often too dense!). Quantity: ~1 cubic foot per square foot of bed.
- ● Measuring Tape (25’ or longer)
- ● Circular Saw or Miter Saw (if cutting lumber yourself)
- ● Drill/Driver + Drill Bits (for screws)
- ● Level (to ensure your bed is even!)
- ● Work Gloves (because splinters and dirt are real)
- ● Wheelbarrow or Shovel (for hauling soil)
- ● Hardware Cloth (to deter burrowing pests like gophers)
- ● Wood Stain or Sealant (if using untreated wood—extends lifespan!)
- ● Drip Irrigation Kit (for easy watering)
- ● Edging Stones or Bricks (to define the bed’s perimeter)
Step-by-step guide to assembling pre-built raised bed kits
Here’s how to turn your kit into a sturdy, long-lasting garden bed in under an hour.
🪴 Step 1: Unpack and Check All Components
Spread everything out on a flat, dry surface to verify you have all pieces—corner posts, side panels, screws, and hardware. I always double-check the manufacturer’s assembly diagram against my kit to avoid missing parts. Look for any warped or cracked wood, especially on the corner posts, since they bear the most weight and stress.
If you’re working with cedar or redwood, these woods naturally contain oils that resist rot, but inspect for splits or knots that could weaken the structure. Pre-drill screw holes if your kit doesn’t already have them—this prevents wood from splitting when you drive in screws later. Use the included drill bit size or mark pilot holes with a pencil if you’re hand-drilling.
☀️ Step 2: Assemble the Frame Corners First
Start by attaching the corner posts to the side panels using the provided screws and hardware. I like to use a power drill with a countersink bit to bury screw heads slightly—this keeps them from snagging on gloves or garden tools later. Place a panel flat on the ground, align the corner post flush with the end, and secure it with two screws through the pre-drilled holes.
For a 4-foot by 8-foot bed, you’ll need four corner connections. Use a level to ensure each post stands perfectly vertical before tightening screws completely. If your kit includes locking tabs or notches, align these carefully—they’re designed to distribute weight evenly and prevent the bed from bowing over time. Double-check diagonal measurements to confirm the frame is square before moving to side panels.
🪴 Step 3: Attach Side Panels and Reinforce Stability
Connect the side panels to the corner posts, working one side at a time. For a 4-foot width, you’ll typically attach two panels per side. Use at least three screws per connection point—more if your kit includes long side panels. I reinforce the middle of long panels with an extra screw to prevent sagging, especially if you plan to fill the bed with heavy soil or compost.
Lift the assembled frame upright and position it where you want it permanently. Press down firmly to check for wobbling—if it feels unstable, add diagonal braces or extra screws to the corner connections. For windy areas, consider staking the corners to the ground with metal spikes or heavy-duty garden stakes. This keeps the bed from shifting during heavy rains or high winds.
✂️ Step 4: Add Edging and Final Touches
If your kit includes edging strips or trim pieces, attach these last to give the bed a polished look. These strips also help contain soil and prevent erosion. Use a staple gun or small nails to secure them, keeping them flush with the top of the frame. For a clean finish, I sand any rough edges with 120-grit sandpaper before adding soil—this prevents splinters and makes maintenance easier.
Now’s the time to add landscape fabric or cardboard to the bed’s base if you’re layering with compost or mulch. This blocks weeds and grass from invading your soil. Water the bed lightly before filling it with soil to help settle everything in place. You’ll know it’s ready when the frame feels stable and the corners don’t shift when you press down.
Tips & tricks for perfect raised bed assembly
Building a sturdy raised bed doesn't have to be intimidating—these practical tips will help you avoid common pitfalls and create a garden bed that lasts for years.
Material Inspection: Before you start, give every piece of wood a thorough once-over, especially the corner posts. Look for hidden cracks or knots that could compromise structural integrity over time. Cedar and redwood are naturally rot-resistant, but even these woods can develop weak points if damaged. I've learned the hard way that skipping this step can lead to sagging beds after just one growing season.
Precision Screwing: When attaching corner posts in Step 2, use a countersink bit to create slightly recessed screw heads. This small detail prevents those annoying snags when you're weeding or harvesting. For a 4-foot by 8-foot bed, I recommend using at least two screws per corner connection—more if your kit includes locking tabs. The key is to tighten screws gradually to avoid splitting the wood, especially near the ends where it's most vulnerable.
Reinforcement Strategy: In Step 3, don't be afraid to go beyond the minimum screws when attaching side panels. For long panels (especially those over 4 feet), add an extra screw in the middle to prevent sagging under heavy soil loads. I've found that pre-drilling pilot holes with a pencil or small drill bit makes all the difference when working with untreated wood—it gives the screws something to grip without splitting the fibers.
Final Stability Check: After fully assembling your bed, give it a good shake before adding soil. If it wobbles or feels unstable, add diagonal braces or extra screws to the corner connections. For windy locations, consider staking the corners with metal spikes or heavy-duty garden stakes. This simple step can save you from having to rebuild your bed later when high winds try to push it out of place.
Pro Tips for Raised Bed Plans
- Building a sturdy raised bed doesn't have to be intimidating—these practical tips will help you avoid common pitfalls...
- Material Inspection: Before you start, give every piece of wood a thorough once-over, especially the corner posts. Lo...
- Precision Screwing: When attaching corner posts in Step 2, use a countersink bit to create slightly recessed screw he...
Frequently asked questions
Got questions about raised bed plans and pre-built kits? You’re not alone! Here are answers to the most common queries to help you get started with confidence.
What’s the best time of year to build a raised bed?
Spring or early fall are ideal—mild weather makes assembly easier, and you can plant right away! Avoid winter (unless in a warm climate) or peak summer heat, which can make materials expand or warp. Pro tip: Start in late winter to prep soil and have everything ready for planting season.
Do I need a permit to build a raised bed?
Most raised beds under 4 feet tall and 100 sq. ft. don’t require permits, but check local building codes or zoning laws—especially if using treated wood or permanent structures. Call your city’s planning department to confirm! Always better to ask than risk fines later.
Are pre-built raised bed kits worth the cost?
Kits save time, ensure proper assembly, and often include high-quality materials like cedar or composite lumber that resist rot. While DIY plans can be cheaper, kits reduce mistakes and frustration—perfect for beginners! Weigh your budget against your time and skill level.
How do I prevent weeds and pests in a raised bed?
Use landscape fabric under the bed to block weeds, and line the bottom with cardboard (no tape/glue) to deter burrowing pests. Plant companion crops (like marigolds or basil) to repel insects naturally. Regular mulching also helps suppress weeds and retain moisture.
What if my raised bed starts sinking or collapsing?
Sinking often happens if the soil isn’t level or the frame isn’t sturdy enough. Reinforce corners with metal brackets or galvanized screws, and ensure the bed sits on a flat, stable base (like pavers or gravel). For cedar, check for wood rot—replace damaged planks promptly to avoid bigger issues.
How deep should my raised bed be for vegetables?
Aim for 6–12 inches deep—enough for root crops like carrots or potatoes. Deeper beds (12–18") work for trees/shrubs but aren’t necessary for most veggies. Add compost or aged manure to the bottom layer for nutrient-rich soil from day one!
Wrapping up and next steps
Building your first raised bed garden doesn’t have to be overwhelming—especially with pre-built kits designed for beginners! 🌱 From choosing the right materials to troubleshooting common questions, you now have all the tools to create a thriving, low-maintenance garden.
Whether you’re growing veggies, herbs, or flowers, your raised bed is ready to become the star of your outdoor space.
Ready to get started? Grab your kit, roll up your sleeves, and let your green thumb shine! For extra inspiration, check out our step-by-step guide or browse more raised bed ideas to customize your project further. Happy gardening! ✨