
Vegetables
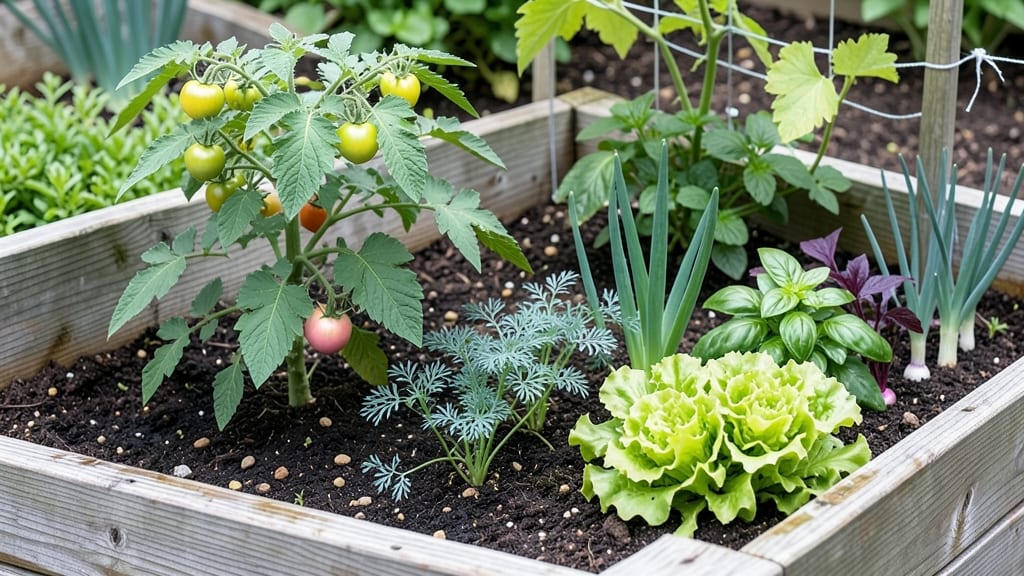
My raised bed vegetable plans start with a 4×8-foot footprint—because that’s the sweet spot for yield without backbreaking maintenance. 🌱 The key isn’t just dimensions; it’s how you layer the soil, space the plants, and pair them like a well-choreographed garden dance.
I’ve designed mine to grow everything from leafy greens to tomatoes, all while keeping weeds and pests at bay.
Most gardeners overlook soil depth, but 12 inches is your magic number—enough for deep-rooted veggies like carrots and potatoes while keeping the bed lightweight. I use cedar for the frame (rot-resistant and naturally pest-repellent) and fill it with a mix of compost, topsoil, and a handful of worm castings.
The result? Soil so rich, plants practically grow themselves.
By summer, you’ll be harvesting crisp lettuce, bush beans, and zucchini all from the same bed—no more chasing sun or fighting compacted soil. The layout maximizes every inch, so even small spaces produce like a pro’s plot.
And because the beds are elevated, your back stays happy while your harvest stays bountiful.
Whether you’re working with a sunny backyard or a shady patio, these plans adapt to your space. I’ll show you how to tweak the design for different climates, from frost-prone zones to sweltering summers. Let’s build a bed that works as hard as you do.
📚 In This Guide
- What you need
- Instructions
- Tips and common mistakes
- Wrapping up and next steps
What you need
- ● Wood or Building Materials: Untreated cedar, redwood, or composite lumber (2x6s or 2x8s, 8–10 ft long) – 4–8 pieces (depending on bed size). Avoid pressure-treated wood with arsenic.
- ● Screws or Nails: Galvanized deck screws (2.5–3 inches long) or exterior-grade nails – 50–100 pieces.
- ● Drill or Hammer: Cordless drill (with driver bit) or a sturdy hammer.
- ● Level: A 2–4 ft bubble level to ensure your bed is even.
- ● Measuring Tape: 25 ft tape measure for precise cuts.
- ○ Staple Gun (Optional but Helpful): For securing landscape fabric to the bottom.
- ● Landscape Fabric or Cardboard: To block weeds (1–2 sheets, cut to fit bed dimensions).
- ● Soil Mix: Topsoil: 2–3 cubic feet per square foot of bed (e.g., 12–18 cubic feet for a 4x8 ft bed).
- ● Compost: 1–2 cubic feet per square foot.
- ○ Perlite or Vermiculite (Optional): 1–2 bags to improve drainage.
- ● Garden Gloves: Heavy-duty work gloves for protection.
- ● Corner Brackets: Metal brackets to reinforce bed corners (4–8 pieces).
- ● Drip Irrigation Kit: For efficient watering (includes tubing, emitters, and connectors).
- ● Mulch: Straw or wood chips to retain moisture and suppress weeds.
- ● Plant Markers: Stakes or labels for tracking your veggies.
- ● Wood Stain or Sealant: If using treated wood (ensure it’s food-safe!).
Step-by-Step instructions for designing vegetable raised bed plans
Here’s how I build layered, productive raised beds that feed my family year-round.
🪴 Step 1: Plan Your Raised Bed Layout and Dimensions
Standard 4-foot-wide beds make gardening easy—you can reach the center without stepping inside. I build mine 8 feet long for a single bed, but you can extend them to 12 feet if space allows. Place beds on level ground with full sun exposure (at least 6-8 hours daily) for maximum vegetable production.
For 4 raised beds, arrange them in a square or rectangle to maximize space efficiency. Leave 2-3 feet of walking space between beds for easy access. Sketch your design first—this prevents costly mistakes later. I always mark the corners with stakes before building to ensure straight edges.
🌱 Step 2: Build the Frame Using Rot-Resistant Materials
Construct the frame with untreated cedar or redwood (both resist rot naturally) or galvanized metal edging. For a 4-foot-wide by 8-foot-long bed, use 2x6 boards for the sides and 4x4 posts at each corner for stability. Cut the boards to size—4-foot widths for the short ends and 8-foot lengths for the long sides.
Assemble the frame by screwing the corners together with 3-inch deck screws (not nails—they pull out over time). Elevate the bed 6-12 inches off the ground to prevent soil compaction and improve drainage. If building multiple beds, space them 1 foot apart for airflow and accessibility.
💧 Step 3: Layer the Soil for Optimal Drainage and Fertility
Start with a 2-inch layer of coarse gravel or landscape fabric at the bottom to prevent weeds from creeping up. Next, add 4-6 inches of compost (this feeds microbes and improves soil structure). Then, layer 6 inches of topsoil—I use a mix of garden soil and compost for balance.
Top it off with 2-3 inches of finished compost and mix everything lightly with a garden fork. Avoid filling the bed completely—leave 2 inches of space at the top to prevent soil spillage when watering. This layered approach ensures great drainage while retaining moisture for roots.
☀️ Step 4: Choose Vegetables Based on Sun, Space, and Season
Plan your 4 raised beds for year-round harvests by grouping plants with similar needs. In spring, plant leafy greens (lettuce, spinach) and cool-season crops (peas, radishes) on the north side (they tolerate partial shade). Reserve the south side for sun-loving tomatoes, peppers, and cucumbers planted in late spring.
Use succession planting—as soon as you harvest early crops like radishes or lettuce, replace them with summer squash, beans, or basil. In fall, switch to kale, carrots, or garlic for a late-season bounty. I always keep a planting calendar nearby to track rotations.
✂️ Step 5: Maintain Soil Health and Extend the Growing Season
Add 2-3 inches of mulch (straw or shredded leaves) after planting to retain moisture and suppress weeds. Water deeply 2-3 times per week, aiming for 1 inch of water per week (adjust for rain). Use drip irrigation to keep soil evenly moist without overwatering.
Rotate crops yearly to prevent disease and depletion of nutrients. In winter, cover beds with row covers or cold frames to extend the season. I also top-dress with compost every 3 months to keep soil fertile. This layered care keeps my beds productive for 10+ years.
Tips & tricks for perfect raised bed vegetable gardens
Here's what I've learned after years of building and maintaining these layered beds—tricks that make all the difference between a good harvest and an amazing one.
Sun Exposure Secret: Those 6-8 hours of daily sun are non-negotiable for most vegetables, but here's the thing: the south side of your beds gets the most intense light. I plant my heat-loving tomatoes and peppers there first, then work my way north with cooler-tolerant greens. If your yard gets afternoon shade, rotate your beds seasonally to follow the sun's path.
Material Matters: When building your 4-foot-wide by 8-foot-long frame, don't skimp on the corners. I've seen too many beds sag over time from weak corner connections. Use those 4x4 posts at each corner and pre-drill your screw holes—this prevents wood splitting and keeps everything square. For extra stability, add a diagonal brace inside each bed frame before adding soil.
Soil Layering Strategy: That 2-inch gravel base is your secret weapon against weeds. I like to use crushed stone rather than landscape fabric because it lasts longer and doesn't degrade over time. When mixing your 6 inches of topsoil with compost, think of it like making a lasagna—alternate layers of rich soil with compost for maximum nutrient distribution. The top 2-3 inches of finished compost should be fluffy, not packed down.
Seasonal Planting Hack: For year-round harvesting, I create a simple planting schedule using index cards. In Step 4, when you're planning your 4 raised beds, divide each bed into four quadrants. Plant one quadrant at a time, staggered by 2-3 weeks, so you always have something ready to harvest. This way, when your radishes are done in 30 days, you'll already have beans or squash ready to take their place.
Pro Tips for Raised Bed Plans Vegetables
- Here's what I've learned after years of building and maintaining these layered beds—tricks that make all the differen...
- Sun Exposure Secret: Those 6-8 hours of daily sun are non-negotiable for most vegetables, but here's the thing: the s...
- Material Matters: When building your 4-foot-wide by 8-foot-long frame, don't skimp on the corners. I've seen too many...
Frequently asked questions
Got questions about maximizing your raised bed vegetable garden?
Here are answers to the most common queries from gardeners—whether you're a beginner or looking to refine your approach.
What’s the best depth for a raised bed to grow vegetables?
Aim for 10–12 inches deep for most vegetables (like lettuce, herbs, and radishes). For deeper-rooted crops (carrots, potatoes, or tomatoes), 18–24 inches ensures they thrive. Shallow beds may stunt growth, while overly deep ones can dry out faster.
When is the ideal time to plant vegetables in raised beds?
Timing depends on your climate! Start 4–6 weeks before the last frost for cool-season crops (spinach, peas). Warm-season veggies (tomatoes, peppers) need soil at 60°F+—wait until after the last frost or use row covers. Check your USDA Plant Hardiness Zone for precision.
Can I reuse soil from my old raised bed for new plants?
Yes, but refresh it! Mix in 2–3 inches of compost and topsoil to replenish nutrients. Avoid overworking the soil—just loosen it gently. If pests or diseases were an issue, solarize the bed or add 10% sand to improve drainage.
What are the easiest vegetables to grow in raised beds for beginners?
Start with low-maintenance winners like:
- Leafy greens (lettuce, kale)—fast-growing and forgiving.
- Radishes—ready in 3–4 weeks!
- Bush beans—drought-tolerant and productive.
- Herbs (basil, parsley)—thrive in shallow beds.
How do I keep pests out of my raised bed vegetables?
Prevent pests with physical and natural barriers:
- Use row covers for early-season protection.
- Plant companion crops (e.g., marigolds deter nematodes).
- Encourage beneficial insects (ladybugs, lacewings) with dill or fennel.
- Check soil for grubs or slugs at planting—remove manually or use copper tape.
Wrapping up and next steps
Building your own raised bed garden is a rewarding way to grow abundant, healthy vegetables—no matter your green thumb level! By layering soil and choosing the right plants, you’re not just gardening; you’re creating a thriving ecosystem.
Start small, experiment with layouts, and soon you’ll be harvesting fresh, homegrown produce year-round.
Ready to dive in? Grab your tools, sketch your first design, and get planting! 🌱✨