
Tools
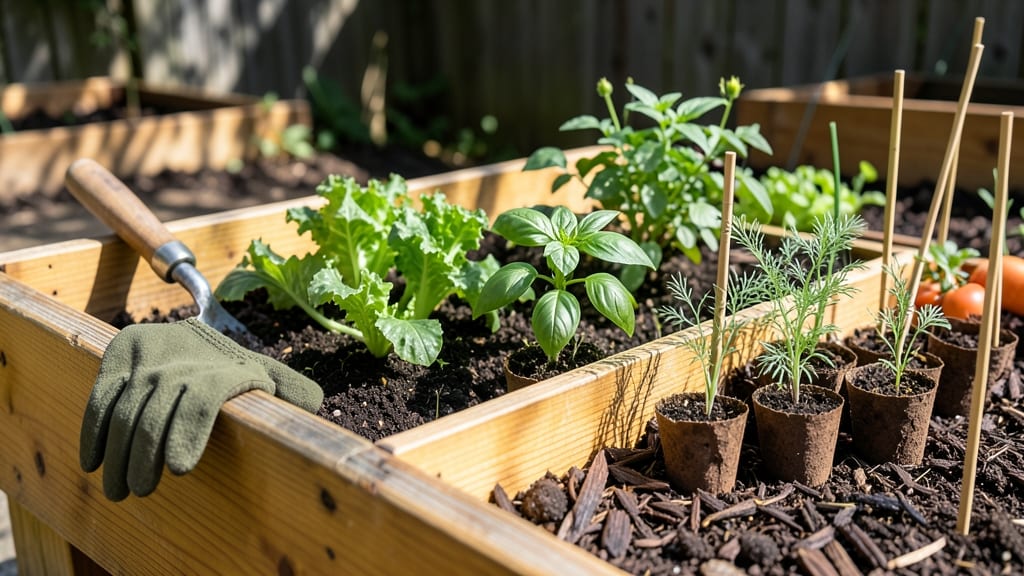
My raised bed garden plans transformed my backyard from a muddy mess to a high-yield vegetable paradise—all without backbreaking bending. 🌱 The secret? Adjustable heights that match plant needs, so tomatoes thrive at 12 inches while lettuce stays shallow at 6.
No more guessing about spacing or soil depth—just plug-and-plant precision that actually works.
I started with cedar frames because they resist rot, but stone or metal work too if you prefer durability over cost. The real game-changer? Stackable layers that let you expand vertically (great for small spaces) or horizontally (ideal for sprawling gardens).
My first bed went from 4x8 feet to 6x12 in a weekend—just added another layer and extended the length.
What you’ll end up with is a garden where every plant has the perfect spot: deep-rooted veggies in the bottom tiers, shallow greens on top. The soil stays loose and drains perfectly, and weeds?
Almost nonexistent when you build the beds right. Plus, the modular design means you can swap out sections if one gets worn out.
This system works for any yard size—urban balconies, suburban backyards, or rural homesteads. The key is starting small (even a 2x4-foot bed works) and scaling up as you master the spacing. Ready to design yours?
📚 In This Guide
- What you need
- Instructions
- Tips and common mistakes
- Wrapping up and next steps
What you need
- ● Lumber: Cedar or redwood (rot-resistant) – 4x4 posts (8 ft long, 4-6 pieces), 2x6 boards (8 ft long, 8-10 pieces)
- ○ Hardware: Galvanized screws (2.5" & 3"), corner brackets (4-6), landscape fabric (optional for weed barrier)
- ● Tools: Drill, circular saw or handsaw, measuring tape, level, post hole digger (if elevating), gloves
- ○ Soil & Amendments: High-quality garden soil (2-3 cubic feet per square foot of bed), compost (1-2 bags), perlite/vermiculite (optional for drainage)
- ● Wood stain or sealant (to extend lumber life)
- ● Drip irrigation kit or soaker hoses
- ● Edging stones or metal flashing (for a polished look)
- ● Plant labels & stakes (for organization)
Step-by-Step instructions for building a modular raised bed system
Here's how to create a flexible, high-yield raised bed system that adapts to any garden layout.
🪴 Step 1: Design Your Modular Layout
Start by sketching your space on paper. A standard modular system uses 4-foot wide beds (perfect for reaching across without stepping inside) with 2-foot walkways between them. This creates a 4:2 ratio that maximizes planting space while allowing easy access. For a 4-bed system, you'll need 16 feet of total width and 4 feet of depth—adjust based on your yard dimensions.
Plan for height variations by dividing your beds into sections. For example, one side could be 12 inches deep for root crops, while the other side is 6 inches deep for shallow plants. This modular approach lets you customize each section independently. I always mark my design on graph paper first to visualize how plants will interact—tall varieties on the north side to avoid shading shorter plants.
🌱 Step 2: Build the Frame Structure
Use untreated lumber (like cedar or redwood) cut to your dimensions—typically 2x6 boards for sides and 4x4 posts for corners. Assemble the frame by screwing the boards together at the corners, ensuring they're square (measure diagonals to confirm). For a 4-foot wide bed, you'll need two 4-foot lengths for the sides and two 8-foot lengths for the ends. Pre-drill holes to prevent wood splitting when attaching the screws.
For modular height sections, build dividers using 1x6 boards placed vertically at your desired depth breaks. For example, a 12-inch deep section would have a divider at 6 inches to create two 6-inch layers. Space dividers 1-2 inches from the bottom to allow roots to grow downward naturally. I reinforce all joints with galvanized screws—rust-proof and strong enough to hold heavy soil.
☀️ Step 3: Layer and Fill for Optimal Drainage
Line the bottom with landscape fabric to block weeds and grass from invading. Then add a 2-inch layer of gravel for drainage—critical in clay-heavy soils. Next, layer in cardboard (no tape or glossy print) to smother weeds, followed by 4-6 inches of compost to feed soil life as it breaks down. This is where your modular height system shines: deeper sections get an extra 4-6 inches of compost-rich soil for root crops like carrots or potatoes.
Top with 2-3 inches of finished potting mix for the top layer. Water everything thoroughly until it's evenly moist—no puddles, just damp soil that holds together when squeezed. I like to mix in a slow-release fertilizer here to give plants a nutrient boost right from the start. For a 4-bed system, you'll need about 1 cubic yard of soil mix total (roughly 27 cubic feet).
🌿 Step 4: Plan Your Planting Zones
Divide your modular sections by sun exposure and plant families. For example, the sunniest side (south or west) is perfect for tomatoes, peppers, and herbs, while the shadier side (north or east) works for leafy greens and brassicas. Use the dividers to separate plants with similar water needs—like grouping drought-tolerant herbs with succulents in shallower layers and water-loving lettuces in deeper, moister sections.
Leave 12-18 inches of space between plants based on their mature size. For instance, bush beans need 4 inches apart, while broccoli requires 18 inches. I sketch a quick grid on paper first to visualize spacing—this prevents overcrowding and makes thinning easier later. Label each section with plant names and dates to track rotations and avoid planting the same family in the same spot next year.
💧 Step 5: Water and Maintain for Long-Term Success
Water deeply once a week (or daily in 90°F+ heat) until the soil is 6 inches deep and moist. A drip irrigation system works best—place emitters at the base of plants to avoid wetting leaves (which spreads disease). For modular beds, I run lines along the long sides and angle them toward the center to ensure even distribution. Check moisture by digging a finger 2 inches deep—if it's dry, water again.
Top-dress with 2 inches of compost every spring and fall to replenish nutrients. Mulch with straw or wood chips to retain moisture and suppress weeds. Here's the thing—modular height systems let you rotate crops easily. For example, move shallow-rooted herbs to deeper sections in summer when they need more moisture, then shift them back in fall. This flexibility keeps your garden productive and adaptable year after year.
Tips & tricks for perfect modular raised bed gardens
Here's what nobody tells you about building a system that actually works year after year.
Design for Real-World Access: When planning your 4-foot wide beds, remember that the 2-foot walkways need to accommodate both your reach and tools. I always add an extra 6 inches to walkways if I'll be using a wheelbarrow—trust me, you'll thank yourself later when you're not fighting for space during harvest. For taller gardeners, consider extending walkways to 2.5 feet to prevent bending over constantly. The modular height sections are brilliant, but don't forget to mark your design with access paths—especially if you're creating multiple beds in a row.
Material Matters: While cedar and redwood are excellent choices for untreated lumber, I've found that pressure-treated lumber can work too if you use it only for the bottom frame (not the sections that will touch soil). If you're on a budget, consider using reclaimed wood for the sides—just make sure it's been properly cleaned and dried. For the dividers, I recommend using 1x6 boards that are at least 1 inch thick to prevent them from warping over time. The key is to use screws that are slightly longer than your board thickness to ensure they bite into the frame properly.
Soil Science Secrets: The 4-6 inches of compost in deeper sections is perfect for root crops, but don't skimp on the quality. I always mix in a handful of mycelium-rich soil or worm castings to boost microbial activity right from the start. For the finished potting mix top layer, consider adding perlite or vermiculite to improve aeration—especially if your local soil is heavy clay. The 2-inch layer of gravel is non-negotiable for drainage, but if you're in an area with extremely sandy soil, you might reduce this to 1 inch and add a layer of coconut coir instead for better moisture retention.
Planting Zone Pro Tips: When planning your planting zones in Step 4, think vertically as well as horizontally. Use the dividers to create microclimates—place taller plants like sunflowers on the north side of deeper sections to provide shade for heat-sensitive crops during peak summer. For the 12-18 inches of spacing between plants, I recommend using a simple string and stake system to mark planting locations before you put seeds or seedlings in the ground. This prevents overcrowding and makes it easy to visualize the mature plant sizes.
Pro Tips for Raised Bed Garden Plans
- Here's what nobody tells you about building a system that actually works year after year.
- Design for Real-World Access: When planning your 4-foot wide beds, remember that the 2-foot walkways need to accommod...
- Material Matters: While cedar and redwood are excellent choices for untreated lumber, I've found that pressure-treate...
Frequently asked questions
Got questions about raised bed gardens?
You’re not alone! Here are some of the most common queries—and their practical solutions—to help you get started with confidence.
What’s the best height for a raised bed?
Aim for 6–12 inches deep for most vegetables and herbs, while taller beds (12–18 inches) work well for root crops like carrots or potatoes. The modular height system in our plans lets you stack beds for deeper soil or better drainage—just ensure proper spacing between layers to avoid rot. Pro tip: Add a trellis or vertical supports if you’re growing vining plants like cucumbers or beans!
When is the best time to build and plant?
Build your raised bed in early spring or late fall when soil is workable but not frozen. For planting, start cool-season crops (like lettuce or spinach) 4–6 weeks before the last frost, while warm-season plants (tomatoes, peppers) thrive after soil reaches 60°F+. Check your local frost dates for precision!
Are raised beds more expensive than in-ground gardens?
Upfront costs are higher due to materials (lumber, soil, hardware), but they pay off long-term with less weeding, better drainage, and higher yields. Opt for affordable alternatives like recycled wood, straw bales, or even cinder blocks for the frame. Plus, you’ll save on soil amendments over time! Budget hack: Use free or low-cost compost from kitchen scraps or local green waste programs.
How do I keep pests out of my raised bed?
Prevent pests with healthy soil, companion planting, and physical barriers. Use row covers for early-season protection, plant pest-repelling herbs (like basil or marigolds), and avoid overcrowding. For slugs/snails, add a diatomaceous earth barrier or beer traps. Bonus: Rotate crops yearly to disrupt pest life cycles!
Do raised beds get too hot in summer?
Yes, but it’s easy to fix! Mulch with straw or wood chips to retain moisture and cool roots. Plant heat-tolerant veggies (like okra or Swiss chard) in hotter months, and water deeply in the early morning to reduce evaporation. Shade cloth (30–50% coverage) can also help in scorching climates.
Wrapping up and next steps
Creating a raised bed garden with a modular height system is a game-changer for maximizing plant spacing, yields, and ease of maintenance! Whether you're a beginner or a seasoned gardener, these plans offer flexibility, accessibility, and stunning results. 🌱
Now that you’re equipped with the knowledge and tools, it’s time to roll up your sleeves and build your dream garden. Start small—even one raised bed can transform your space—and watch your plants thrive like never before. Happy gardening! 🌿