
Tools
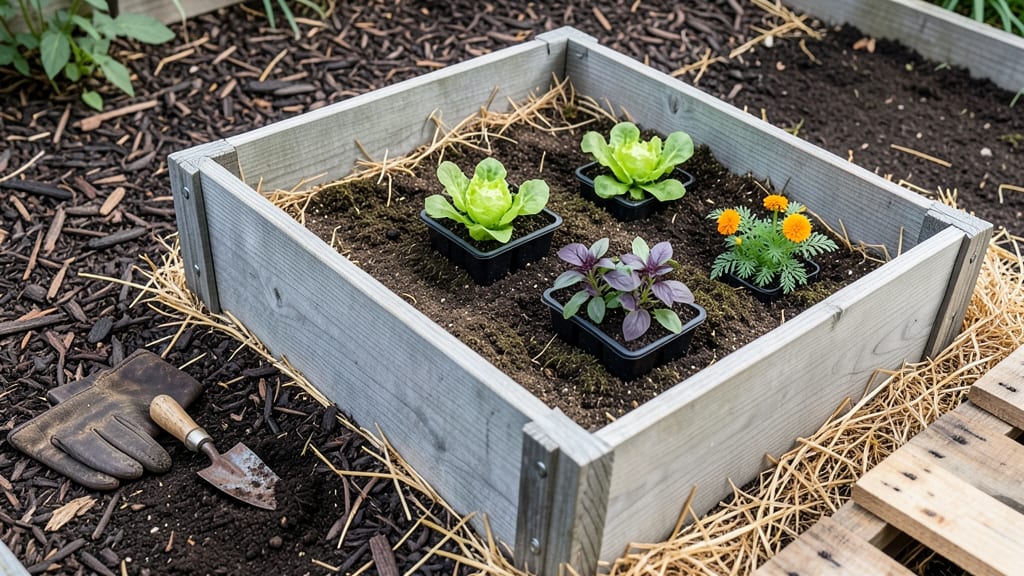
Your dream garden starts with inexpensive raised garden bed ideas—and a weekend’s worth of creativity. 🌱 I turned a pile of discarded wood into a thriving raised bed that costs less than $50 and holds more soil than my old in-ground plot.
The best part? You can customize it to fit any space, from a tiny balcony to a sprawling backyard. The secret is sourcing materials smartly: check local listings for free pallets, hit hardware stores for discounted lumber, or raid your garage for old bricks and cinder blocks.
A 4x8-foot bed uses about 6-8 pallets or 20-30 cinder blocks, and you can line it with landscape fabric to keep weeds at bay. No fancy tools needed—just a drill, screws, and some elbow grease.
By the time you're done, you'll have a sturdy, weather-resistant bed that warms up faster in spring, stays cooler in summer, and protects your plants from soil-borne diseases.
The first year, I grew twice as many tomatoes as I ever did in the ground—all from a bed that cost less than a single bag of store-bought soil. Works for herbs, veggies, or flowers, and scales from 2x4-foot containers up to full-size beds.
Here's how to build yours without breaking the bank!
📚 In This Guide
- What you need
- Instructions
- Tips and common mistakes
- Wrapping up and next steps
What you need
- ● 2-4 wooden pallets (heat-treated or untreated, but not chemically treated—check for "HT" stamps). Pro tip: 💡 Ask local businesses like breweries, hardware stores, or farms for free pallets!
- ● Wood screws or decking screws (2-3" long, galvanized or stainless steel to resist rust; ~50-100 screws total).
- ● Drill + drill bits (1/8" for pilot holes, 3/16" for screws).
- ● Hammer or mallet (for securing pallets if needed).
- ● Landscape fabric or cardboard (to block weeds; cut to fit the pallet base).
- ● Soil mix (60% topsoil, 30% compost, 10% perlite/sand for drainage; ~2-4 cubic feet per pallet, depending on depth).
- ● Wood stain or paint (outdoor-rated, non-toxic; for a polished look).
- ● Corner braces or metal brackets (for extra stability if pallets are wobbly).
- ● PVC pipes or trellis wire (for climbing plants like beans or cucumbers).
- ● Drip irrigation kit (to save water and time).
- ● Mulch (straw or wood chips) (to retain moisture and suppress weeds).
Step-by-Step instructions for building upcycled pallet raised beds
Here's how to create sturdy, budget-friendly raised beds using materials you might already have.
🪴 Step 1: Gather and Prepare Pallets
Start by collecting 4-6 untreated wooden pallets—check local hardware stores, construction sites, or Facebook Marketplace for free or low-cost options. Avoid chemically treated pallets (marked with "MB" stamps) as they can leach toxins into your soil. Look for pallets labeled "HT" (heat-treated) instead.
Use a circular saw or handsaw to cut pallets into 2-foot-wide planks—this gives you manageable pieces for your bed frame. Sand any rough edges or splinters to prevent injury. I like to arrange the planks in a 4x8-foot rectangle for a standard bed size, but adjust based on your space. A single pallet yields about 4-5 planks, so 2 pallets make a perfect 4-foot-wide bed.
☀️ Step 2: Assemble the Frame
Lay out your planks in the desired shape—rectangular beds work best for most vegetables. For a 4-foot-wide x 8-foot-long bed, you'll need 2 long sides (8 feet) and 2 short ends (4 feet). Use 2.5-inch deck screws to attach the corners, pre-drilling holes to prevent splitting. I space the screws 12 inches apart for maximum stability.
For extra reinforcement, add 2-3 crossbeams inside the frame (parallel to the short sides) to prevent sagging. This is especially important if you plan to fill the bed with heavy soil or compost. Test the frame by gently pressing down—it should hold its shape without wobbling. If it feels unstable, add more screws or additional crossbeams.
💧 Step 3: Line and Fill the Bed
Line the bottom of the frame with cardboard or landscape fabric to block weeds and grass from invading your soil. Cut it to fit snugly, leaving a 2-inch overhang on all sides. This also helps retain moisture and keeps your soil contained. For a 4-foot-wide x 8-foot-long bed, you’ll need about 30 square feet of fabric.
Fill the bed with a 12-inch layer of organic matter—start with 4 inches of coarse material like twigs or straw for drainage, then add 8 inches of a mix (50% garden soil, 30% compost, 20% perlite or sand). Avoid filling all the way to the top; leave 2 inches of space for settling. Water the layers lightly as you go to help them compact evenly.
🌱 Step 4: Plant and Maintain
Plant your vegetables or herbs in the center of the bed, spacing them according to their mature size. For example, tomatoes need 18-24 inches apart, while lettuce can be planted 6-8 inches apart. Water deeply after planting to settle the soil around the roots. In the first week, keep the soil consistently moist—stick your finger 1 inch deep to check; if it feels dry, water again.
Mulch the surface with 2-3 inches of straw or shredded leaves to retain moisture and suppress weeds. This is especially important in raised beds, where soil dries out faster. Replenish mulch every 4-6 weeks or after heavy rain. Over time, you’ll notice the soil stays looser and drains better than ground-level plots—ideal for root vegetables and delicate greens.
⏰ Step 5: Overwinter and Reuse
At the end of the season, remove plants and add a 4-inch layer of compost to replenish nutrients. Cover the bed with black plastic or a thick layer of straw to insulate the soil over winter. This protects your investment and keeps weeds at bay. In spring, simply remove the cover, fluff the soil, and replant—your bed is ready for another growing season.
If your pallets show signs of rot after a few years, replace them with new ones. With proper care, these beds last 5-7 years, giving you a low-cost, high-yield growing space that outlasts many store-bought options. The best part? You can customize the size, shape, and even stack them for vertical growing!
Tips & tricks for building upcycled pallet raised beds
Here's what nobody tells you about making these beds last—and how to avoid the most common mistakes.
Material Selection Matters: When choosing pallets, focus on the 2-foot-wide planks from the middle of the pallet—they're the sturdiest. I've found that pallets with HT (heat-treated) stamps hold up best over time. If you're unsure about a pallet's treatment, do a quick water test: spray it with water—if it soaks in quickly, it's likely untreated and safe for gardening. Avoid pallets with chemical smells or MB (methyl bromide-treated) stamps, which can contaminate your soil.
Screw Placement for Stability: In Step 2, when attaching the corners with 2.5-inch deck screws, pre-drill holes to prevent the wood from splitting. I've learned this the hard way—skipping this step can lead to weak joints that fail under the weight of wet soil. Space screws 12 inches apart and use at least 4 screws per corner for maximum stability. For extra reinforcement, add 2-3 crossbeams inside the frame before filling with soil—this prevents sagging over time, especially in heavier beds.
Soil Layering Secret: The 12-inch layer of organic matter in Step 3 is your bed's foundation, so don't skimp on quality. Start with 4 inches of coarse material like twigs or straw for drainage—this prevents waterlogging and root rot. For the 8-inch mix, I recommend using 50% garden soil, 30% compost, and 20% perlite or sand. This ratio gives you the perfect balance of nutrients, moisture retention, and aeration. Water each layer lightly as you go to help it settle evenly—this prevents air pockets that can lead to uneven growth.
Overwintering Hack: At the end of the season, don't just leave your bed empty! Add a 4-inch layer of compost to replenish nutrients, then cover with black plastic or straw. This insulation protects your soil from freezing and keeps weeds at bay. I've found that beds overwintered this way start the next season with healthier soil and fewer weeds—it's like giving your garden a head start!
Pro Tips for Inexpensive Raised Garden Bed Ideas
- Here's what nobody tells you about making these beds last—and how to avoid the most common mistakes.
- Material Selection Matters: When choosing pallets, focus on the 2-foot-wide planks from the middle of the pallet—they...
- Screw Placement for Stability: In Step 2, when attaching the corners with 2.5-inch deck screws, pre-drill holes to pr...
Frequently asked questions
about building inexpensive raised garden beds—especially with upcycled materials—can save you time and frustration. Here are answers to the most common queries!What’s the cheapest way to build a raised bed without buying lumber?
Use free or low-cost materials like wooden pallets, cinder blocks, bricks, or even straw bales (temporary!). Check local listings (Facebook Marketplace, Craigslist) for discarded lumber, fencing, or old decking. Repurpose scrap wood from construction sites or ask neighbors for cutoffs. A bed frame can cost as little as $10–$30 if you’re resourceful!
How long does it take to assemble a pallet raised bed?
Most DIY pallet beds take 1–3 hours to assemble, depending on complexity. A simple 4’x8’ pallet bed with basic screws and hardware can be done in under an hour with two people. Factor in extra time for prepping materials (sanding, treating wood) or filling with soil. Pro tip: Pre-drill holes to save time and prevent wood splitting!
Can I use untreated pallets for a vegetable garden?
Only if they’re HT (Heat-Treated) or MB (Methyl Bromide-Treated)—never use chemically treated pallets (marked “MB”) for edible gardens. Untreated pallets can harbor mold or pests. For extra safety, line the bed with cardboard or landscape fabric before adding soil. Alternatively, use cedar or redwood (naturally rot-resistant) for long-term beds.
What’s the best soil mix for a raised bed on a budget?
Skip expensive bagged soil! Combine 60% topsoil, 30% compost (homemade or free from local farms), and 10% perlite or sand for drainage. Test your soil first—raised beds dry out faster, so add peat moss or coconut coir if your area has heavy clay. Free options: Leaf mold, grass clippings (aged), or manure (well-composted).
How do I keep pests out of a pallet garden bed?
Pests love pallet wood’s crevices! Seal gaps with copper tape (deters slugs) or steel wool (keeps rodents out). Use row covers or diatomaceous earth for insects. Plant marigolds or basil around edges as natural repellents. Elevate beds slightly (6–12 inches) to reduce burrowing pests like voles. Rotate crops yearly to break pest cycles!
Are pallet beds good for winter growing?
Yes! Pallet beds warm up faster in spring and retain heat better than ground soil. Extend the season by adding straw mulch (3–4 inches) or black plastic sheeting in fall. Choose cold-hardy crops like kale, spinach, or garlic. For extreme winters, use mini hoop tunnels with row covers. Pro tip: Fill beds in late fall so soil has time to settle before planting!
Wrapping up and next steps
Creating an inexpensive raised garden bed from upcycled pallets is a rewarding way to grow fresh produce without breaking the bank! With just a few materials and a little creativity, you can build a functional, year-round growing space that’s both eco-friendly and budget-conscious.
Whether you’re a beginner or a seasoned gardener, these pallet designs make it easy to get started.
Now that you’re inspired, roll up your sleeves and start building! 🌱 Start small—even a single bed can make a big difference. Need more ideas? Explore local recycling centers for free materials or browse DIY forums for custom tweaks. Happy gardening!