
Landscaping
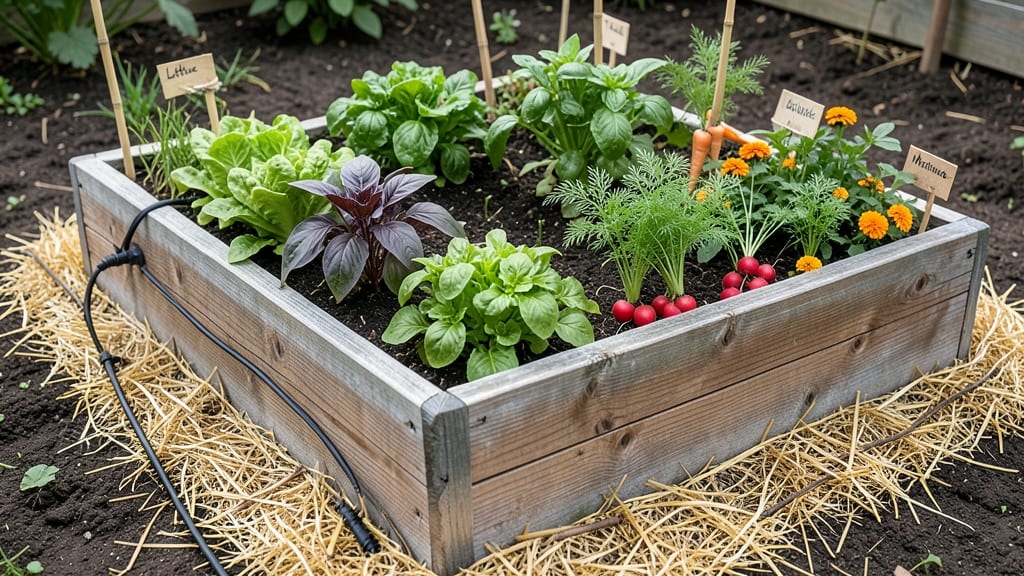
A fence-line raised garden bed turns wasted space into a privacy shield and harvest hub. 🌿 My first attempt along a chain-link fence transformed a barren strip into a lush, productive border—no more peeking neighbors or wasted yard real estate.
The key? Matching bed height to fence height while ensuring proper drainage and sunlight access.
Start with cedar or composite lumber for durability—both resist rot and pests better than untreated wood. A 12-inch height works well for most fences, giving you knee-friendly planting while blocking views.
Line the bottom with landscape fabric to prevent weeds from creeping up, and add gravel drainage if your yard stays soggy after rain.
You’ll end up with a year-round green screen that produces food, flowers, or both. Tall sunflowers and hollyhocks hide the fence while providing cut flowers, while dwarf fruit trees or berry bushes thrive in the contained soil. Even herbs like rosemary and thyme stay compact and fragrant along the edge.
Watch out for wind exposure—fence lines can be drafty. Plant wind-resistant varieties like Russian sage or ornamental grasses on the exposed side, and consider a low trellis along the inner edge to add vertical interest.
With the right setup, this design works for urban backyards, suburban lots, or rural properties alike.
📚 In This Guide
- What you need
- Instructions
- Tips and common mistakes
- Wrapping up and next steps
What you need
- ● Lumber: Pressure-treated cedar or redwood (1x6 or 2x6 boards, 8–12 feet long—quantity depends on bed size). Pro tip: 💡 Use 4x8-foot boards for standard-sized beds (e.g., 4x8 ft or 3x6 ft).
- ● Corner braces: Galvanized metal or heavy-duty plastic (4 corners).
- ● Screws: Deck screws (2.5–3 inches long, stainless steel or galvanized, ~50–100 screws depending on size).
- ● Landscape fabric: 10–15 sq. ft. (to block weeds and retain moisture).
- ● Garden soil: High-quality raised bed mix (avoid regular garden soil—aim for 1–2 cubic yards for a 4x8 ft bed, 6–12 inches deep).
- ○ Optional: Hardware cloth (1/4-inch mesh) if protecting against burrowing pests.
- ● Measuring tape and pencil (for precise cuts).
- ● Circular saw or miter saw (for clean lumber cuts).
- ● Drill/driver with screw attachment.
- ● Level (to ensure your bed is even against the fence).
- ● Staple gun (for securing landscape fabric).
- ● Wheelbarrow (for hauling soil).
- ● Gloves and safety glasses (because DIY safety first!).
- ● Fence clearance: Ensure your fence is stable and has 3–4 inches of space between the bed and fence for airflow (unless attaching directly).
- ● Sunlight access: Check sunlight exposure—6+ hours/day for veggies, 4–6 hours for ornamentals.
- ● Drainage: If your fence line is low-lying, consider adding a gravel layer (2–3 inches) at the bottom.
- ● Permits: Check local regulations—some areas require permits for structures over 30 inches tall.
How to build raised garden beds along a fence line
Here's my go-to method for creating functional, attractive raised beds that maximize small spaces while providing privacy and year-round greenery.
🪴 Step 1: Plan the Layout and Measure Precisely
Start by marking your fence line with spray paint or a garden hose. I recommend 4-foot-wide beds for easy reach from both sides—this gives you 16 square feet of growing space per 4-foot length, perfect for most vegetables and herbs. Measure the length of your fence line and divide it into equal sections based on your desired bed dimensions.
Check for underground utilities with a $20 call to 811 before digging. You'll want to place your beds at least 12 inches away from the fence to avoid root competition and allow for proper drainage. Sketch a simple layout showing bed placement, pathways, and any existing plants you want to preserve.
🌱 Step 2: Prepare the Base and Install Edging
Remove any grass or weeds within your marked area using a shovel or sod cutter—this prevents future competition. For edging, I use rot-resistant cedar boards (cut to 8-10 inches tall) or galvanized metal edging strips for a cleaner look. Lay the first board flush against the fence and secure it with 4-inch deck screws driven into the ground at 12-inch intervals.
For the remaining sides, create a slightly tapered design (1-2 inches taller on the outer edge) to prevent soil from spilling out. Leave 3-inch gaps between boards to allow for drainage. If using metal edging, bend it slightly inward at the base to create a 1-inch lip that holds soil.
💧 Step 3: Build the Frame and Add Support
Construct the frame using 2x6 pressure-treated lumber cut to your bed dimensions. Assemble the frame on the ground first, then lift it into place. For extra stability along the fence, add diagonal braces (2x4s) from the bottom corners to the fence line. Space beds 18-24 inches apart to allow for maintenance access.
If your fence is tall (over 4 feet), consider adding vertical trellises (using 1x2 cedar slats) to the fence side of the bed. This creates a living privacy screen while giving climbing plants like beans or cucumbers room to grow. Secure trellises with stainless steel screws to avoid rust.
☀️ Step 4: Layer and Fill With Soil
Begin with a 4-inch layer of coarse gravel at the bottom for drainage. This prevents waterlogging, especially important if your fence line has poor natural drainage. Next, add a 2-inch layer of landscape fabric to block weeds while allowing water to pass through.
Fill the remaining space with a custom soil mix: start with 2 inches of compost, then 6 inches of high-quality garden soil, and top with 2 inches of finished compost. Mix in a slow-release organic fertilizer (like 10-10-10) at a rate of 1 pound per 100 square feet. Water thoroughly after filling to settle the layers.
🌿 Step 5: Plant for Privacy and Productivity
For immediate privacy, plant fast-growing annuals like sunflowers (along the fence side) or bush beans in the first season. In the back row, add shrubs like boxwood or dwarf lilacs for long-term structure. For edible privacy, try blueberry bushes or currants—they produce fruit while blocking views.
In the growing area, plant deep-rooted vegetables (like tomatoes or carrots) in the center and shallow-rooted crops (like lettuce or radishes) near the edges. Leave 6-12 inches of space between the fence and plants to allow for airflow and maintenance. Mulch with 3 inches of shredded bark to retain moisture and suppress weeds.
Tips & tricks for building raised garden beds along fence lines
Here's what nobody tells you about creating functional, privacy-enhancing raised beds that actually work in tight spaces.
Precision Planning Pays Off: Before marking your 4-foot-wide beds, walk the fence line and test reachability from both sides. I've seen people plan for 4-foot beds only to realize they can't comfortably reach the center—especially if you're working with a narrow pathway. Mark your layout with stakes first, then use a string line to visualize the spacing before digging. This prevents costly adjustments later.
Edging Stability Secrets: When securing your cedar boards or metal strips with 4-inch deck screws, drive them at a 45-degree angle into the ground for maximum hold. For extra security, especially in windy areas, add a second screw on the opposite side of each board. I learned this the hard way when a storm tilted one of my original beds—now I double-screw everything near fence lines where wind pressure is strongest.
Soil Layering Strategy: The 4-inch gravel base is non-negotiable for drainage, but don't skimp on the landscape fabric. Use a heavy-duty woven fabric (not the cheap plastic variety) to prevent weeds while allowing water to pass. I've found that adding a 1-inch layer of perlite mixed into the bottom 2 inches of garden soil helps with aeration, especially in clay-heavy soils. This subtle upgrade makes a noticeable difference in root development for deep-rooted plants.
Privacy Planting Hacks: For that immediate privacy screen along the fence side, interplant sunflowers with fast-growing ornamental grasses like fountain grass or maiden grass. The grasses fill gaps while sunflowers provide height. In the growing area, place taller plants (like tomatoes) on the outer edge of the bed and shorter crops (like lettuce) near the center—this creates natural shade for heat-sensitive plants while maximizing sunlight exposure.
Pro Tips for Raised Garden Bed Along Fence Line
- Here's what nobody tells you about creating functional, privacy-enhancing raised beds that actually work in tight spa...
- Precision Planning Pays Off: Before marking your 4-foot-wide beds, walk the fence line and test reachability from bot...
- Edging Stability Secrets: When securing your cedar boards or metal strips with 4-inch deck screws, drive them at a 45...
Frequently asked questions
Got questions about creating a raised garden bed along your fence line? You’re not alone—this space-saving solution sparks curiosity (and maybe a few concerns!). Here are answers to the most common queries to help you plan like a pro:
What’s the best time of year to build a raised bed along a fence?
Spring or early fall are ideal for building, as the soil is workable and plants can establish roots before extreme weather. Avoid winter (frozen ground) or peak summer (heat stress). If your fence is new or unstable, wait until it’s fully settled—usually 6–12 months after installation.
Will a raised bed damage my fence over time?
Not if you plan carefully! Use landscape fabric under the bed to prevent soil erosion against the fence, and avoid placing heavy materials (like bricks) directly against wood or vinyl fences. For chain-link or wood, elevate the bed slightly with pavers or gravel to allow airflow and reduce moisture buildup.
Can I grow vegetables or flowers in a fence-line raised bed?
Just choose plants based on sunlight exposure (check your fence’s shading) and root depth. Shallow-rooted veggies (lettuce, herbs, strawberries) thrive in narrow beds, while tall plants (tomatoes, sunflowers) need space to avoid shading neighbors. Climbers like cucumbers or beans can even use the fence as support!
Are there cheaper alternatives to cedar or redwood for fence-line beds?
Yes! Consider:
- Recycled plastic lumber: Durable, rot-proof, and budget-friendly (though less "rustic").
- Untreated pine: Cheaper upfront but needs sealing/staining yearly.
- Cinder blocks or bricks: Stacked with landscape fabric lining for a sturdy, DIY-friendly option.
- Pallet wood: Free/low-cost but requires sanding and sealing to avoid chemicals.
My fence-line bed keeps drying out—how do I fix it?
Fence-line beds often dry faster due to wind exposure. Mulch heavily (2–3 inches of straw or wood chips) to retain moisture, and water deeply 2–3 times a week (early morning is best). For extra protection, add a drip irrigation system or group plants with similar water needs together.
Wrapping up and next steps
A raised garden bed along your fence line is more than just a space-saving hack—it’s a privacy shield, a productivity booster, and a year-round green escape all in one. Whether you’re growing veggies, herbs, or flowers, this setup maximizes small spaces while adding beauty and function to your outdoor area.
Now that you’ve got the know-how, it’s time to roll up your sleeves and turn that fence into a lush, thriving garden!
Ready to start? Sketch your design, gather your materials, and plant with confidence—your future self (and your neighbors!) will thank you. 🌱✨