
Tools
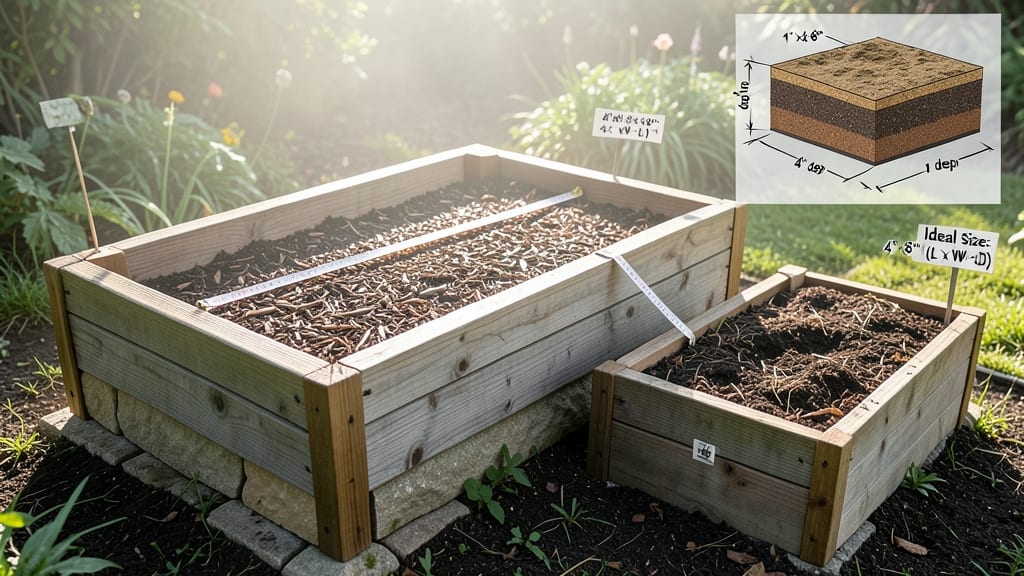
A 3-foot width in the ideal raised garden bed size makes all the difference in your garden—no more reaching awkwardly or missing spots between plants. 🌱 I learned this the hard way after wrestling with a 4-foot bed where my arm got tired halfway through weeding.
The right size balances accessibility, sunlight, and plant spacing without sacrificing yield. Most gardeners aim for 4x8 feet as a sweet spot: 3 feet wide lets you reach the center from either side, while 8 feet long fits most wheelbarrows for easy soil delivery.
Vegetables like tomatoes and peppers thrive in this setup, while herbs and greens can share smaller sections. The key is avoiding widths over 4 feet—your back (and your plants) will thank you. You’ll notice plants grow fuller and straighter when spaced properly, with no wasted corners.
A 12-inch tall bed also helps—it warms up faster in spring and keeps weeds at bay. For small spaces, try 2x4 feet with vertical trellises for vining plants. This size works for vegetables, herbs, and flowers, whether you’re growing in a backyard, balcony, or community plot.
The goal? A bed so easy to maintain, you’ll actually enjoy the process. Let’s break down the perfect dimensions for your space.
📚 In This Guide
- What you need
- Instructions
- Tips and common mistakes
- Wrapping up and next steps
What you need
- ● Lumber: 2x6 or 2x8 pressure-treated or cedar boards (rot-resistant) – 12–14 pieces (4 corners, 4 sides, and 4–6 cross supports, depending on height). Total length: ~12–16 feet (adjust based on bed length).
- ● Galvanized screws or decking nails: 2.5–3 inches long – ~50–70 screws (for securing corners and supports).
- ● Corner brackets or metal L-brackets: 4–6 pieces (for extra stability).
- ● Landscape fabric or hardware cloth: 1 roll (to line the bottom and deter weeds/burrowing pests).
- ● Garden soil or compost: ~1–2 cubic yards (depends on bed depth—aim for 10–12 inches).
- ○ Mulch (optional but recommended): Straw, wood chips, or shredded leaves – ~1–2 bags.
- ● Measuring tape (for precise cuts).
- ● Circular saw or handsaw (to cut lumber to size).
- ● Drill or hammer (for assembling the frame).
- ● Level (to ensure your bed is even).
- ● Work gloves (for handling screws and soil).
- ● Wheelbarrow or shovel (for moving soil/compost).
- ● Wood stain or paint: For longevity (choose non-toxic options).
- ● Drip irrigation kit: For efficient watering.
- ● Pathway materials: Gravel, pavers, or stepping stones (to define garden edges).
- ● Knee pads: For comfort during assembly or planting.
Step-by-step guide to designing your perfect 3-Foot raised garden bed
Here's how to create a raised bed that maximizes growth while keeping maintenance effortless.
🪴 Step 1: Determine Your Bed Dimensions and Layout
Standard 3-foot widths let you reach the center without stepping inside, preventing soil compaction. For a single bed, aim for 4 feet long—this gives you enough planting space while keeping the bed manageable. If you're creating multiple beds, arrange them in rows with 18-24 inches between beds for easy access and airflow.
I like to sketch my design first. Mark the area with stakes and string to visualize the layout before digging. This prevents mistakes and helps you see how the beds will fit in your space. Remember, the depth should be at least 6-12 inches—this gives roots plenty of room to grow without needing deep soil.
☀️ Step 2: Choose the Optimal Location for Sun Exposure
Your bed needs 6-8 hours of direct sunlight daily for most vegetables and herbs. Scout your yard to find the sunniest spot—south-facing areas get the most light. If your yard has partial shade, opt for shade-tolerant plants like lettuce, spinach, or Swiss chard in those areas.
Watch how sunlight moves across your yard over a few days. You'll notice shadows shift, especially in the morning and late afternoon. Place taller plants like tomatoes or peppers on the north side of the bed so they don’t shade shorter plants like carrots or radishes. A 3-foot width ensures even sunlight distribution across the entire bed.
🌱 Step 3: Build or Assemble Your Raised Bed Frame
Use rot-resistant wood like cedar or redwood, or durable materials like composite lumber or galvanized metal. Cut your wood to the dimensions you planned—3 feet wide, 4 feet long, and at least 6 inches deep for most vegetables. Assemble the frame using 2.5-inch deck screws or galvanized nails to ensure stability.
Elevate the bed off the ground with cinder blocks, bricks, or landscape timbers to improve drainage and prevent soil erosion. Leave a 2-inch gap between the bed frame and the ground to allow for airflow and easy weeding. If you're using untreated wood, line the inside with landscape fabric to block weeds from growing up into your bed.
💧 Step 4: Fill the Bed with the Right Soil Mix
Fill your bed with a balanced mix of topsoil, compost, and organic matter—aim for about 2/3 topsoil, 1/3 compost. This combination gives plants the nutrients they need while improving drainage. Avoid garden soil, which can compact easily and suffocate roots. Fluff the soil with a garden fork to break up clumps and create air pockets.
Water the soil lightly after filling the bed to help it settle. You’ll notice the soil level drop slightly—this is normal. Top it off with an additional 1-2 inches of compost before planting. This layer will decompose over time, feeding your plants and improving soil structure. A well-prepared bed ensures your plants grow strong and healthy from the start.
✂️ Step 5: Plan Your Planting Layout for Easy Maintenance
Arrange plants based on their height, sunlight needs, and growth habits. Place tall plants like corn or sunflowers at the north end of the bed, medium-height plants like peppers or bush beans in the middle, and low-growing plants like lettuce or radishes at the south end. This prevents shading and makes harvesting easier.
Leave 12-18 inches of space between plants to allow for airflow and reduce disease risk. A 3-foot width makes it simple to rotate crops next season without overcrowding. Label your plants with biodegradable markers to keep track of what’s growing where—this saves time and prevents confusion later.
Tips & tricks for perfect raised garden bed design
These simple adjustments will help you create a raised bed that's both functional and productive year after year.
Sunlight Strategy: Pay attention to how sunlight shifts throughout the day—morning sun is cooler and less intense than afternoon sun. If you notice one side of your 3-foot bed getting more shade by late afternoon, consider adding a trellis on that side for vertical plants like cucumbers or beans that can thrive in partial shade. This maximizes your growing space without sacrificing sunlight exposure for your main crops.
Material Matters: For the 6-12 inch depth mentioned in Step 1, cedar and redwood are excellent choices because they naturally resist rot, but if you're on a budget, pressure-treated lumber works too—just avoid the arsenic-treated varieties. I've found that adding a layer of hardware cloth at the bottom before filling with soil prevents burrowing pests like gophers from moving in, especially important if your bed sits near their known pathways.
Soil Settlement: When you first fill your bed with that 2/3 topsoil, 1/3 compost mix, don't be surprised if the soil level drops by an inch after watering. This is completely normal as the soil particles settle. To account for this, I always add an extra 2 inches of compost on top after the initial settling—this gives your plants immediate nutrients while the compost decomposes and improves soil structure over time.
Plant Rotation: The 3-foot width isn't just about reach—it's also perfect for crop rotation. I mark my beds with biodegradable stakes indicating what was planted each season. This prevents soil depletion and reduces disease buildup. For example, after growing tomatoes in one bed, I'll plant beans the next year since they don't share the same nutrient needs or disease vulnerabilities.
Pro Tips for Ideal Raised Garden Bed Size
- These simple adjustments will help you create a raised bed that's both functional and productive year after year.
- Sunlight Strategy: Pay attention to how sunlight shifts throughout the day—morning sun is cooler and less intense tha...
- Material Matters: For the 6-12 inch depth mentioned in Step 1, cedar and redwood are excellent choices because they n...
Frequently asked questions
Got questions about raised garden beds? You’re not alone! Here are some of the most common concerns—and their answers—to help you plan the perfect space for your green thumb.
What’s the best depth for a raised garden bed?
Aim for 6–12 inches deep for most vegetables and herbs. Root crops like carrots or potatoes need 12+ inches, while shallow plants (e.g., lettuce, strawberries) thrive in 6–8 inches. Deeper beds improve drainage and root growth, but avoid exceeding 2 feet unless planting trees.
Can I build a raised bed without wood? What are my alternatives?
Use cinder blocks, bricks, or metal edging for durability. For a budget-friendly option, try landscape fabric + rocks or galvanized steel troughs. Just ensure your material resists rot and allows airflow to the soil. Avoid plastic—it can trap heat and degrade quickly.
How long does it take to fill a raised bed with soil?
Plan for 1–2 days for a standard 4’x8’ bed (3-foot width). You’ll need ~1 cubic yard of soil mix (compost + topsoil + perlite/sand). Pro tip: Order soil in advance—retailers often sell it by the bag (2–3 cubic feet per bag). Rent a wheelbarrow to save your back!
Will a 3-foot-wide bed work in partial shade?
A 3-foot width is ideal for full sun (6+ hours/day), but you can adapt it for partial shade. Choose shade-tolerant plants like leafy greens, ferns, or hostas. Just monitor moisture—shady beds stay damp longer, so amend soil with compost + perlite to prevent rot.
How do I keep pests out of a raised bed?
Prevent pests with physical barriers (row covers, hardware cloth) and natural deterrents:
- Interplant marigolds or basil to repel bugs.
- Use diatomaceous earth around edges for crawling pests.
- Encourage beneficial insects (ladybugs, lacewings) with dill or cilantro.
Wrapping up and next steps
Finding the ideal raised garden bed size—especially a 3-foot width—can transform your gardening experience into a breeze! 🌱 Whether you're maximizing space, accessibility, or sunlight, the right dimensions make all the difference.
Now that you’re armed with the perfect measurements, materials, and pro tips, it’s time to roll up your sleeves and build!
Start by sketching your design, gathering supplies, and enjoy the process—your future harvests will thank you! Need inspiration? Check out our step-by-step guide to turn your plans into a thriving garden. Happy digging! 🌿