
Tools
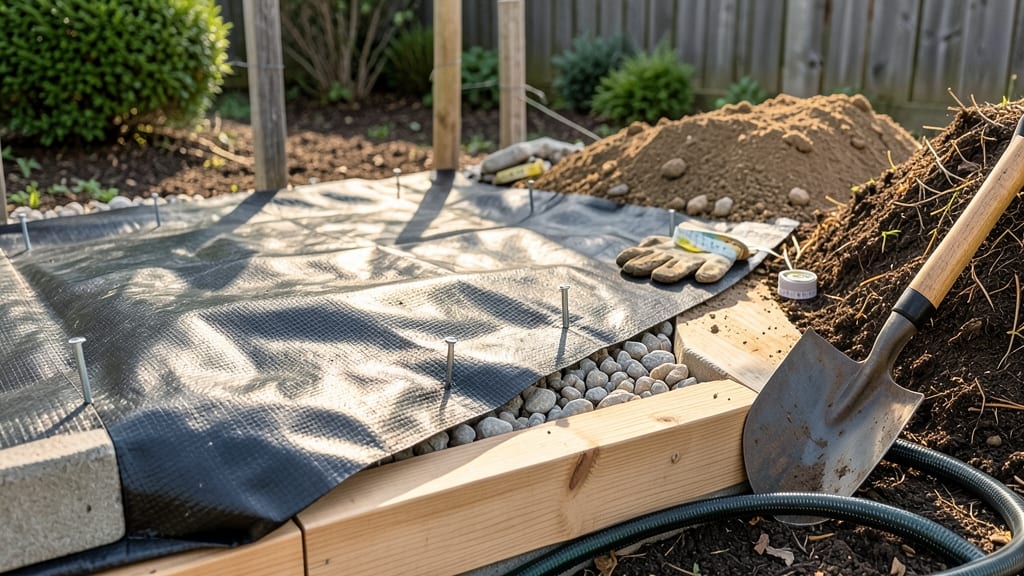
Building a garden bed on a slope turns what looks like wasted space into perfect growing real estate—no more watching rain wash away your soil or plants sliding downhill. 🌿 I learned the hard way when my first attempt turned into a muddy mess after the first heavy rain, but these terraced layers create stable, productive beds that actually hold your plants in place.
The secret isn’t just digging—it’s layering materials the right way. You’ll need sturdy borders (wood, stone, or even cinder blocks), landscape fabric to prevent soil loss, and a mix of topsoil and compost that drains well but holds moisture.
Most people overlook the drainage layer at the bottom, which is what keeps your terraces from turning into soggy ditches.
By the time you’re done, you’ll have flat planting surfaces where vegetables thrive, flowers bloom without toppling, and even herbs grow strong—all while preventing erosion that ruins other parts of your yard.
The best part? These beds last for years with minimal upkeep, and you can adjust the height to match your slope’s steepness.
Whether you’re dealing with a gentle incline or a steep hillside, this method works—just scale the materials to your space. Let’s get those plants growing where they belong, not sliding away!
📚 In This Guide
- What you need
- Instructions
- Tips and common mistakes
- Wrapping up and next steps
What you need
- ● Lumber: Pressure-treated 2x6 or 2x8 boards (quantity depends on bed size; ~10–15 pieces for a 4’x8’ bed).
- ● Screws: Deck screws (2.5–3 inches long, galvanized or stainless steel; ~50–100 screws total).
- ● Landscape Fabric: Heavy-duty, non-woven fabric (10–20 sq. ft., depending on bed size).
- ● Soil: High-quality garden soil or a mix of topsoil and compost (1–2 cubic yards for a 4’x8’ bed).
- ● Gravel or Sand: 1–2 inches of coarse gravel or sand for drainage layer (1–2 bags).
- ● Stakes or Posts: 4x4 wooden posts or metal stakes (4–6, spaced 6–8 feet apart for support).
- ● String or Mason’s Line: For marking slope levels (50–100 ft. long).
- ● Circular saw or handsaw (for cutting lumber).
- ● Drill/driver (for screws).
- ● Shovel and garden rake (for soil prep).
- ● Level (to ensure even terraces).
- ● Measuring tape (25 ft. long).
- ● Wheelbarrow (for moving soil/gravel).
- ● Work gloves and safety glasses (because safety first!).
- ● Corner braces (for extra stability on steep slopes).
- ● Edging material (landscape timbers or metal edging for a polished look).
- ● Retaining wall blocks (if building permanent terraces).
- ● Drip irrigation kit (for watering efficiency on slopes).
- ● Mulch (straw or wood chips to retain moisture).
Step-by-step instructions for building a terraced garden bed on a slope
Here's how to transform a tricky slope into a stable, beautiful garden with terraced layers.
🪴 Step 1: Assess and Mark Your Slope for Terraces
Start by walking your slope and identifying natural breaks or contours where terraces can sit. I like to use a garden hose or string line to mark where each terrace will begin and end—this helps visualize the final shape. For a 4-foot vertical drop, aim for terraces that are 3-4 feet wide (horizontal) and 1-2 feet deep (vertical). This balance prevents erosion while keeping soil manageable.
Use wooden stakes and string to outline each terrace. Space stakes every 3-4 feet along the slope to keep the string taut. The top edge of each terrace should follow the contour line—never cut straight across the slope, or water will rush through. I always step back to check my lines from the bottom of the slope upward; this ensures the terraces will actually hold water.
💧 Step 2: Build Containment for Each Terrace
For each terrace, create a barrier to hold back soil using landscape fabric, cinder blocks, or wooden planks. I prefer cinder blocks because they’re sturdy and allow water to drain through gaps. Arrange them in a staggered pattern along the marked contour line, leaving a 4-6 inch gap between blocks for drainage. Fill the gaps with small rocks or gravel to prevent soil from washing through.
For steeper slopes, reinforce the back edge of each terrace with heavy-duty landscape fabric tucked behind the blocks. This extra layer catches soil and prevents erosion. If using wood, treat it with a non-toxic sealant to protect against rot—especially in damp climates. The key here is to build slightly higher than your desired soil level so you have room to add mulch and plants later.
✂️ Step 3: Layer Soil and Add Drainage
Begin filling the lowest terrace first, working upward. Start with a 4-inch layer of coarse gravel or crushed stone at the bottom of each terrace—this ensures water drains away from plant roots. Next, add a 2-inch layer of organic matter, like compost or leaf mold, to improve soil structure. This layer helps retain moisture while allowing excess water to filter through.
Top off each terrace with 6-8 inches of high-quality garden soil mixed with compost. I like to blend 50% topsoil, 30% compost, and 20% perlite for a lightweight, fertile mix. Avoid filling terraces completely—leave a 2-inch gap at the top to accommodate mulch and seasonal soil settling. Pack the soil gently with your hands or a tamper to eliminate air pockets, but don’t compact it too tightly.
🌱 Step 4: Plant and Stabilize the Terraces
Plant deep-rooted, erosion-resistant ground covers like creeping thyme, clover, or ornamental grasses along the front edge of each terrace. These plants spread quickly, holding soil in place while adding beauty. For the main planting area, choose drought-tolerant perennials or shrubs—they’ll thrive with less frequent watering and help stabilize the soil over time.
Top each terrace with a 2-3 inch layer of mulch, such as wood chips or straw, to suppress weeds and retain moisture. Water deeply after planting to settle the soil and encourage root growth. Here’s the thing—mulch prevents erosion better than bare soil, so don’t skip this step. Over the first few weeks, monitor the terraces for signs of slippage or water pooling. Adjust drainage or add more mulch as needed to keep everything perfect.
☀️ Step 5: Maintain and Expand Your Terraced Garden
Check your terraces after heavy rains to ensure water isn’t pooling or eroding the edges. If needed, add more gravel to drainage layers or reinforce containment with extra blocks. Once established, terraces require minimal upkeep—just top off mulch annually and replant as needed. I’ve seen terraces last 10+ years with proper care, and they’re far more stable than sloped beds.
Use the finished terraces to create layers of color and texture, like a cascading flower garden or a vegetable patch with raised edges. The beauty of terraces is that they turn a challenging slope into a functional, stunning feature—one that actually improves with time. Now, grab your tools and start building! You’ll love the results.
Tips & tricks for perfect terraced garden beds
Transforming a slope into terraced garden beds takes planning—and these pro tips will help you avoid common pitfalls while creating a stunning, functional design.
Contour Check: Use a level or a long board to verify your terrace edges follow the exact contour of the slope. I learned this the hard way after building terraces that pooled water—always double-check with a level before filling. For extra precision, lay a garden hose along your marked contour line and adjust until it lies flat. This small step prevents water runoff and erosion down the road.
Material Matters: When choosing containment materials, prioritize durability and drainage. Cinder blocks with their built-in gaps are my go-to because they allow water to seep through while holding soil securely. If using wooden planks, opt for pressure-treated lumber and space them with small gaps to prevent water buildup. For slopes over 30 degrees, add an extra layer of landscape fabric behind the containment to catch any soil that might slip through.
Soil Strategy: The 4-inch gravel layer in Step 3 is non-negotiable—it's your first line of defense against waterlogging. For clay-heavy soils, increase this to 6 inches to improve drainage even more. When mixing your topsoil, consider adding 10% coarse sand if your native soil is dense, as this prevents compaction over time. The 2-inch gap at the top of each terrace is just as important—it gives plants room to grow without spilling over the edges.
Plant Selection: Don't overlook the power of native plants! They've evolved to thrive in your local climate and soil conditions, making them perfect for terraces. For example, creeping thyme spreads aggressively, creating a living carpet that holds soil beautifully. If you're planting vegetables, choose varieties like rosemary or lavender for the edges—they're drought-tolerant and help stabilize the soil while adding fragrance to your garden.
Pro Tips for Build A Garden Bed On A Slope
- Transforming a slope into terraced garden beds takes planning—and these pro tips will help you avoid common pitfalls ...
- Contour Check: Use a level or a long board to verify your terrace edges follow the exact contour of the slope. I lear...
- Material Matters: When choosing containment materials, prioritize durability and drainage. Cinder blocks with their b...
Frequently asked questions
Got questions about building garden beds on slopes? You’re not alone!
Here are answers to the most common concerns—from drainage to timing—to help you tackle your project with confidence.
What’s the best time of year to build a sloped garden bed?
Spring or early fall are ideal! Avoid extreme heat (which can dry out soil too fast) or freezing temps (which may slow progress). If you’re in a mild climate, you can build year-round—but plan for rain delays.
How do I prevent erosion in my sloped garden?
Use terracing (like in this guide!) and layer landscape fabric under rocks or logs to block soil runoff. Add mulch or ground covers (like clover) to stabilize the soil naturally over time.
Can I use cinder blocks or bricks instead of wood for the edges?
Cinder blocks or bricks are durable and great for heavy slopes. Just ensure they’re level and stacked securely. For extra stability, fill the gaps with gravel or crushed stone to improve drainage.
What if my slope is too steep for traditional terracing?
Try retaining walls (wood, stone, or metal) or contour planting—curving beds along the slope to follow natural lines. For extreme angles, consider swales (shallow trenches) to capture rainwater.
My garden bed keeps collapsing—what am I doing wrong?
Check for poor compaction (tap soil firmly with a board) or insufficient support (add more logs/rocks). If water pools, improve drainage by adding sand or gravel layers. Over time, roots will help bind the soil!
Wrapping up and next steps
Building a garden bed on a slope doesn’t have to be a challenge—it’s all about planning, terracing, and a little creativity! 🌿 With the right materials, drainage solutions, and layered design, you’ll create a stable, beautiful space that even works with nature’s incline.
Whether you’re a beginner or a seasoned gardener, your new terraced beds will reward you with thriving plants and a stunning landscape.
Now that you’re armed with the know-how, roll up your sleeves and start digging! 💪 Ready to take the next step? Sketch your design, gather your tools, and watch your slope transform into a lush, functional garden oasis. Happy gardening!