
Tools
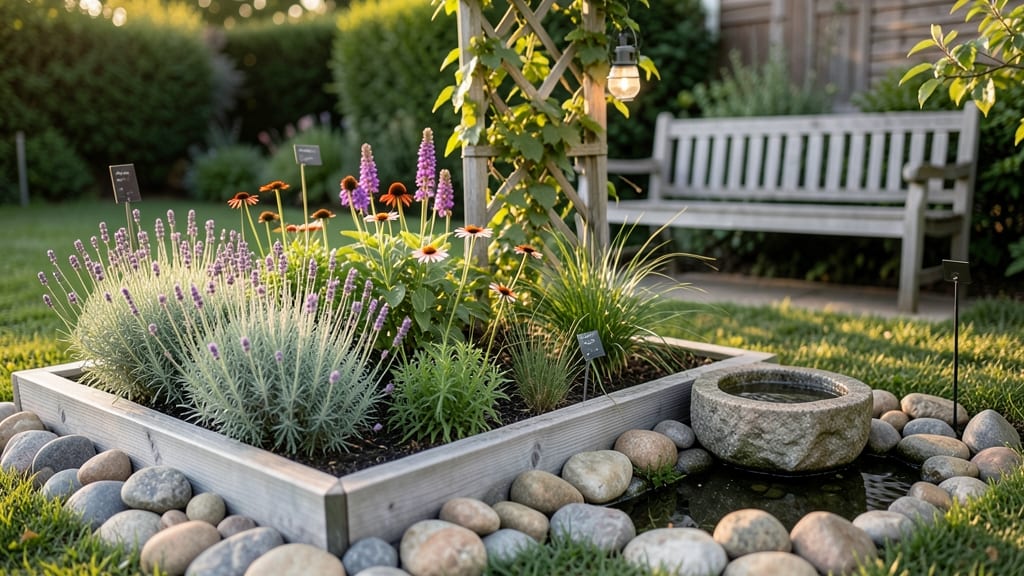
Your garden bed decor isn't just for plants—it's the canvas of your outdoor space. ✨ A few strategic decorative elements can turn a simple flower bed into a showstopper that reflects your style while keeping maintenance easy.
I've tested everything from rustic stone borders to modern metal edging, and these ideas work for any yard size or budget.
Start with mulch and stones—they're the foundation of any polished look. A 2-inch layer of mulch keeps weeds at bay while adding color, and pebbles or decomposed granite create clean lines.
For a bolder statement, try upcycled materials like broken terra cotta pots or driftwood slices as edging. These options are budget-friendly and add instant texture without overwhelming your plants.
Add thematic accents like weather-resistant sculptures, solar-powered lights, or even painted stepping stones to guide visitors through your garden. A single statement piece—like a mosaic birdbath or a vertical planter—can elevate the whole space.
The key is balance: let your plants shine while using decor to highlight their natural beauty.
Seasonal swaps keep things fresh—swap summer's bright mulch for autumn's rich leaves or winter's evergreen boughs. Even small changes, like swapping out seasonal flowers or adding twinkle lights, make your garden feel alive year-round. The best part? These ideas work for raised beds, in-ground plots, or container gardens alike.
📚 In This Guide
- What you need
- Instructions
- Tips and common mistakes
- Wrapping up and next steps
What you need
- ● Elevated Planter Boxes: Pre-made wooden planters (2–4 ft wide, 10–12 ft long) or
- ● Cedar, redwood, or composite lumber (1x12 or 2x12 boards, 8 ft long) for DIY builds
- ● Hardware: Galvanized or stainless steel screws (2.5–3 inches, 20–30 pieces)
- ● Corner brackets or L-brackets (4–8 pieces, depending on size)
- ● Drill with driver bit (for pre-made) or drill + ¼-inch drill bit (for DIY)
- ● Landscape Fabric: 3–4 ft wider than your planter bed to block weeds
- ● Drainage: Perforated drain pipe (½-inch diameter, 1–2 ft per planter) or
- ● Landscape gravel (5–10 lbs, ½-inch size)
- ● Soil & Mulch: High-quality potting mix (2–3 cubic feet per planter)
- ● Mulch (pine bark or shredded leaves, 1–2 bags)
- ● Decorative trim (metal, PVC, or painted wood for edges)
- ● Outdoor paint or stain (weather-resistant, in your choice of color)
- ● Solar-powered landscape lights (for evening ambiance)
- ● Herbs, flowers, or veggies (pre-planted starter kits save time!)
- ● Watering system (drip irrigation kit for low-maintenance hydration)
Elevated planter styles to transform your garden beds
Here's how to choose and arrange planters that add sophistication while keeping your garden functional and thriving.
🪴 Step 1: Select Planters That Match Your Garden's Scale
Start with planters that complement your space's proportions. For small yards, I recommend 6-8 inch square or rectangular planters—they create visual interest without overwhelming the area. Larger yards can handle 12-18 inch rectangular troughs or 24-inch diameter round planters for bold impact. Choose materials that align with your garden's aesthetic: cedar or redwood for natural elegance, wrought iron for classic charm, or fiberglass for lightweight durability.
Pay attention to height as well. Tiered planters add depth and work beautifully for trailing plants like ferns or ivy. If your yard has a modern vibe, sleek, low-profile planters in concrete or metal will elevate the look. Here's the thing—measure your space first. A planter that's too wide will look cluttered, while one that's too narrow will disappear in the landscape.
☀️ Step 2: Position Planters for Optimal Light and Flow
Place planters where they'll receive the light conditions your chosen plants need. Most ornamental grasses and succulents thrive in full sun, while ferns and impatiens prefer partial shade. I like to group planters along pathways or near seating areas—this creates a natural flow while making your garden more inviting. Avoid placing them directly against walls or fences; instead, leave 12-18 inches of space for airflow and easy maintenance.
Think about how sunlight moves across your yard throughout the day. If a planter will cast a shadow over a sun-loving plant, reposition it or choose shade-tolerant varieties. For example, a tall 18-inch rectangular planter placed north of a sunny bed won't block light, but one placed south will. Use this as a guide: if the planter's shadow extends beyond its own height, it's in the wrong spot.
🌿 Step 3: Layer Plants for Texture and Seasonal Interest
Fill planters with a mix of thrillers, fillers, and spillers to create depth and movement. Start with a thriller—a tall, eye-catching plant like a black mondo grass or a dwarf bamboo—placed in the center or back. Next, add fillers like heuchera or dusty miller to soften the structure and fill gaps. Finally, incorporate spillers such as trailing lobelia or sweet potato vine to cascade over the edges.
Choose plants that offer year-round interest. For example, evergreen ferns provide structure in winter, while spring bulbs like daffodils add color early in the season. In summer, heat-loving plants like lantana or salvia take center stage. I always include at least one fragrant plant, like lavender or jasmine, to engage the senses. The key is variety—mix heights, colors, and textures so the planter looks dynamic from every angle.
✂️ Step 4: Maintain Planters for Long-Lasting Beauty
Water planters deeply once or twice a week, depending on your climate and the plants' needs. Most elevated planters dry out faster than ground beds because they're exposed to wind and sun. I use a soaker hose for even moisture distribution—it delivers water directly to the roots without wetting the foliage, which helps prevent fungal diseases. Check the soil 1 inch below the surface; if it's dry, it's time to water.
Fertilize planters every 4-6 weeks during the growing season with a balanced, slow-release fertilizer. Elevated planters deplete nutrients faster than in-ground beds because they have limited soil volume. I also top-dress with 2-3 inches of compost in early spring to replenish organic matter. Prune spent blooms regularly to encourage new growth and keep the planter looking tidy. Here's the thing—neglecting maintenance will turn a stunning planter into a sad, leggy mess in no time.
🎨 Step 5: Add Finishing Touches for Cohesion
Use mulch or decorative stones to tie the planter into the surrounding landscape. A 2-inch layer of mulch suppresses weeds, retains moisture, and adds a polished look. For a modern vibe, try small pebbles or crushed gravel in neutral tones. If your garden has a rustic feel, wood chips or bark work beautifully. Avoid bright-colored mulches—they can clash with the plants and make the space feel busy.
Consider adding lighting to highlight your planters at night. Solar-powered spotlights or string lights create a magical ambiance. Place them near seating areas or along pathways to guide visitors through your garden. I also like to incorporate metal or ceramic accents, like vases or sculptures, to add an artistic touch. The goal is harmony—every element should complement the planter and the overall garden design without competing for attention.
Tips & tricks for elevated planter design
Transforming your garden beds with stylish planters takes thoughtful planning—here's how to elevate every detail.
Scale and Proportion: When selecting planters, consider the visual weight of your space. For a cohesive look, I recommend using planters that are proportional to your plants—a 12-inch rectangular trough works beautifully with medium-height plants like dusty miller, while a 24-inch round planter can anchor a bold statement plant like black mondo grass. The key is balance: if your planter is too large, it will dominate the space; if it's too small, it will disappear. Measure your space first—this simple step prevents costly mistakes.
Lighting Strategy: Position planters to maximize their impact while considering sunlight patterns. In Step 2, when placing your 18-inch rectangular planters, remember that their shadows will extend beyond their height. For sun-loving plants like lantana or salvia, position them north of taller structures or on the east side of your garden to avoid blocking sunlight. I also recommend grouping planters near seating areas—this creates an inviting focal point while ensuring they receive adequate light throughout the day.
Layering Techniques: The thriller-filler-spiller method in Step 3 is a game-changer for creating depth. Start with your thriller—like a dwarf bamboo—as the backbone of your design. Then, add fillers like heuchera to create texture, and finish with spillers such as trailing lobelia to soften edges. Here's what nobody tells you: the height of your thriller should be roughly two-thirds the height of your planter. This creates a natural balance that draws the eye upward while keeping the design harmonious.
Maintenance Made Easy: In Step 4, the instructions mention watering deeply once or twice a week, but timing matters just as much as quantity. I've found that early morning watering prevents fungal diseases by allowing foliage to dry before nightfall. For elevated planters, use a soaker hose to deliver water directly to the roots—this method reduces evaporation and ensures even moisture distribution. Pro tip: place a 1-inch layer of mulch on top of the soil after watering to lock in moisture and suppress weeds, saving you time and effort in the long run.
Pro Tips for Garden Bed Decor
- Transforming your garden beds with stylish planters takes thoughtful planning—here's how to elevate every detail.
- Scale and Proportion: When selecting planters, consider the visual weight of your space. For a cohesive look, I recom...
- Lighting Strategy: Position planters to maximize their impact while considering sunlight patterns. In Step 2, when pl...
Frequently asked questions
Got questions about elevating your garden bed decor?
Here are answers to the most common ones—so you can create a stunning outdoor space without the guesswork!
What’s the best time of year to install decorative garden beds?
Spring and fall are ideal! Spring lets you start fresh with warm soil, while fall gives plants time to establish roots before winter. Avoid extreme heat (summer) or frozen ground (winter), as both can stress plants and materials. Pro tip: Check your local frost dates to plan accordingly!
Are there affordable alternatives to raised garden beds?
Instead of pricey cedar or composite beds, try:
- DIY pallet beds: Stack and secure wooden pallets with screws or brackets.
- Bricks or cinder blocks: Stack them to create tiered or low-profile beds.
- Upcycled materials: Old tires, wine barrels, or even shipping crates can add rustic charm.
- Natural borders: Use stones, logs, or even driftwood for a low-cost, organic look.
Just ensure materials are non-toxic and safe for plants!
How do I keep pests out of my decorative garden beds?
Pests hate surprises! Try these tricks:
- Physical barriers: Copper tape around edges deters slugs; fine mesh keeps bugs out of raised beds.
- Natural repellents: Plant pest-resistant flowers (like marigolds or basil) near your veggies.
- Cleanliness: Remove debris and weeds regularly—pests love hiding spots!
- Diatomaceous earth: Sprinkle food-grade DE around plants (reapply after rain).
Rotate crops yearly to break pest life cycles too!
Can I mix different styles (e.g., modern + rustic) in one garden?
Yes! The key is balance. Pair sleek metal planters with weathered wooden crates, or combine smooth stone borders with a vintage wagon wheel trellis. Stick to a cohesive color palette (e.g., earthy neutrals or bold jewel tones) to tie everything together. Think of it like an art gallery—variety is great, but harmony makes it pop!
What’s the easiest way to fix a sagging or uneven raised bed?
Sagging beds happen—but don’t stress! Here’s a quick fix:
- Remove plants and check for weak spots (often near corners or supports).
- Add cross-bracing: Screw in 2x4s diagonally inside the bed for stability.
- Level the frame: Use a rubber mallet to tap uneven sections gently into place.
- Reinforce the base: Add gravel or pavers underneath if the ground is soft.
- Fill with fresh soil and replant—your bed will be as sturdy as ever!
Pro tip: Use corner braces or metal brackets for extra support on larger beds.
Wrapping up and next steps
Transforming your garden bed decor doesn’t have to be complicated—just creative! From raised planters to vertical gardens, the right style can turn your yard into a stunning outdoor oasis. Whether you’re drawn to rustic charm, modern elegance, or whimsical touches, there’s a planter design to match your vision.
Ready to elevate your space? Start small—pick one garden bed or planter to experiment with, gather your materials, and let your creativity shine. Your dream garden is just a few steps away! 🌿✨