
Planting
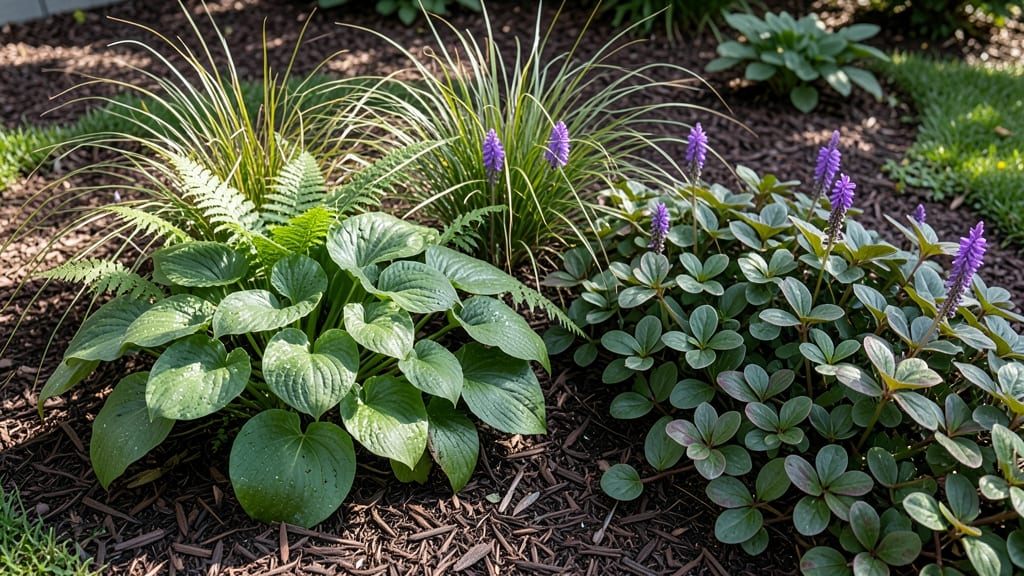
Your flower bed filler plants should do more than just fill space—they should create a buzzing, blooming ecosystem that lasts all season. 🌸 I’ve learned the hard way that the wrong combo leads to bare spots and wilted dreams, but the right mix turns a patch of dirt into a pollinator paradise with minimal effort.
The secret lies in pairing fast-spreading annuals like impatiens or petunias with tough perennials such as ajuga or heuchera. These plants handle shade, crowd out weeds, and keep your bed looking lush without constant deadheading.
Start with a 3:1 ratio of fillers to focal plants, and you’ll avoid the "empty middle" look that ruins so many gardens. By summer, your bed will be a riot of color and texture—creeping thyme’s silvery carpet under tall snapdragons, vinca’s deep purple spilling over edges.
The best part? Bees, butterflies, and hummingbirds will show up like clockwork, turning your garden into a thriving little ecosystem. Works for sun or shade, small borders or big swaths. Here’s how to pick the perfect mix for your space!
📚 In This Guide
- What you need
- Instructions
- Tips and common mistakes
- Wrapping up and next steps
What you need
- ● Flower bed filler plants: 5–10 Lavender (dwarf varieties like 'Munstead' or 'Hidcote')
- ● 3–5 Coneflower (Echinacea) (purple, white, or pink)
- ● 3–5 Black-eyed Susan (Rudbeckia) (golden or orange)
- ● 3–5 Salvia (e.g., 'May Night' or 'Victoria Blue')
- ● 3–5 Yarrow (Achillea) (compact varieties like 'Moonshine')
- ● 2–3 Russian Sage (Perovskia) (for height and texture)
- ● Soil amendments: 1–2 bags compost (5–10 cubic feet)
- ○ 1 bag perlite or sand (for drainage, optional but helpful)
- ● Mulch: 2–3 bags organic mulch (e.g., shredded bark or pine straw)
- ● Watering supplies: 1 garden hose with adjustable nozzle
- ○ 1 watering can (optional, for delicate plants)
- ● 1 garden trowel (for planting)
- ● 1 pruners (for trimming)
- ● 1 garden gloves (to protect your hands)
- ● 1 measuring tape (to plan spacing)
- ● 1 wheelbarrow (for hauling soil/mulch)
- ● Pollinator-friendly seeds (e.g., cosmos, alyssum, or bachelor’s buttons for gaps)
- ● Stakes or plant markers (to label and support taller plants)
- ● Slow-release fertilizer (for extra nutrition)
- ● Birdbath or small water feature (to attract pollinators)
How to create a pollinator-friendly flower bed filler layer
Here's the easy way to fill gaps and attract bees, butterflies, and hummingbirds—without overcrowding your main plants.
🌱 Step 1: Choose Fast-Spreading, Low-Maintenance Fillers
Pick plants that grow quickly to fill empty spaces but won’t outcompete your showstoppers. I love sweet alyssum (white or purple) for its tiny flowers and honey scent, or lobelia for its trailing habit and bright blue blooms. Both spread gently and bloom early, giving pollinators a head start.
For height variation, add cosmos or zinnia—they self-seed easily and keep blooming all season. Avoid anything invasive like mint or creeping Charlie; instead, opt for snapdragons or marigolds, which stay contained but still buzz with activity. Plant these in clusters of 3-5 per square foot to create a dense, inviting carpet for pollinators.
🌿 Step 2: Plant in Phased Blooming Groups
Stagger your fillers so there’s always something in bloom. Start with early bloomers like lobelia or sweet alyssum in spring, then add cosmos and zinnia as summer approaches. This ensures pollinators have a continuous buffet from April through October.
Dig small holes just wider than the root ball—about 1-2 inches deep—and space plants 6-12 inches apart, depending on their mature size. Press soil firmly around each plant to eliminate air pockets, then water deeply to settle the roots. You’ll see new growth within 7-10 days if moisture and light are right.
☀️ Step 3: Provide Sun and Water for Nonstop Blooms
Most pollinator fillers thrive in full sun (6+ hours daily), but a few like impatiens or begonias tolerate partial shade. If your bed gets afternoon shade, swap in fuchsia or coleus for color and texture. Water deeply 2-3 times per week until established, then taper to once weekly once roots spread.
Mulch with 2-3 inches of shredded bark to retain moisture and suppress weeds. Avoid thick mulch piles against stems—keep it 1-2 inches away to prevent rot. You’ll know your fillers are happy when they produce nonstop blooms with minimal deadheading.
💧 Step 4: Maintain with Minimal Effort
Deadhead spent blooms weekly to encourage more flowers, but don’t overdo it—letting some seeds form feeds late-season pollinators. Fertilize lightly with a balanced 10-10-10 formula every 4-6 weeks to keep growth vigorous without encouraging leafy overgrowth.
Watch for pests like aphids or spider mites—hose them off with water if you spot them. Aphids love tender new growth, so check undersides of leaves regularly. Healthy fillers bounce back quickly, so don’t stress if a few leaves yellow or wilt.
⏰ Step 5: Plan for Seasonal Renewal
By late fall, some fillers like sweet alyssum or lobelia may fade. Pull these out and replace them with pansies or kalmiopsis for winter color. Save seeds from your best performers—cosmos and zinnia self-seed reliably, so you’ll have next year’s fillers ready to go.
Take notes on what thrived and what flopped. I always mark my best combos with plant markers so I can recreate the same pollinator magnet next season. With this approach, your flower bed will stay lush, colorful, and buzzing year after year.
Tips & tricks for perfect pollinator-friendly flower beds
Transforming empty spaces into buzzing pollinator havens takes just a few smart strategies—here’s how to make it effortless and effective.
Plant Placement Matters: In Step 1, when arranging your clusters of 3-5 plants per square foot, place taller varieties like cosmos or zinnias toward the back of your bed. This creates a layered look that pollinators love to navigate. I always group plants with similar water needs together—this way, you won’t accidentally overwater or underwater any section.
Soil Prep Secret: Before planting, mix a handful of compost into each hole you dig for your fillers. This gives them a nutrient boost right from the start, especially important for early bloomers like lobelia and sweet alyssum. I like to use worm castings for a gentle, slow-release fertilizer that won’t burn tender new roots.
Seasonal Swap Strategy: For Step 5's seasonal renewal, I recommend keeping a few pansies or kalmiopsis in pots over winter. This way, you can transplant them directly into empty spots as soon as spring arrives—no waiting for seeds to germinate! The key is to have these cold-hardy options ready before your spring fillers like sweet alyssum start fading.
Pest Prevention: The underside of leaves is where aphids and spider mites love to hide. In Step 4, when you're checking for pests, use a soft toothbrush dipped in soapy water to gently scrub affected areas. This targeted approach works better than spraying the whole plant, which can harm beneficial insects too. I check every other week during peak growing season.
Pro Tips for Flower Bed Filler Plants
- Transforming empty spaces into buzzing pollinator havens takes just a few smart strategies—here’s how to make it effo...
- Plant Placement Matters: In Step 1, when arranging your clusters of 3-5 plants per square foot, place taller varietie...
- Soil Prep Secret: Before planting, mix a handful of compost into each hole you dig for your fillers. This gives them ...
Frequently asked questions
Got questions about choosing the perfect flower bed filler plants? You’re not alone! Here are some of the most common queries—and straightforward answers—to help you create a pollinator-friendly paradise with confidence.
What are the best low-maintenance filler plants for beginners?
Start with hardy, self-spreading options like ajuga (bugleweed), sedum (stonecrop), or heuchera (coral bells). These thrive in partial shade, handle drought, and suppress weeds—ideal for busy gardeners! Pair them with easy annuals like zinnia or marigold for instant color.
When is the best time to plant filler plants?
Spring (after the last frost) and early fall are the sweet spots! Planting in cooler months gives roots time to establish before summer heat. For annuals, sow seeds after your area’s last frost date—check your local USDA zone for precision. Perennials can also be planted in late fall in mild climates.
How do I ensure my filler plants attract pollinators?
Choose native plants first—they’ve co-evolved with local bees and butterflies! Look for nectar-rich flowers like coneflower, bee balm, or milkweed. Avoid pesticides, and add a shallow water source (like a saucer with pebbles) to give thirsty pollinators a drink. Pro tip: Plant in clusters (3+ of the same type) to maximize visibility for bees!
Can I use ground cover plants as fillers instead of traditional bedding plants?
Ground covers like creeping thyme, lamium, or liriope (monkey grass) are fantastic fillers—they spread quickly, suppress weeds, and often bloom. For height variety, layer them with mid-height perennials like catmint or Russian sage. Just ensure your ground cover’s light/sun needs match the bed’s exposure.
What should I do if my filler plants look leggy or sparse?
Leggy or sparse fillers often need a boost! Trim back overgrown stems by 1/3 to encourage bushier growth. For annuals, pinch back tips early to promote branching. If soil looks poor, amend with compost or a slow-release fertilizer. Pro tip: Rotate filler plants every 2–3 years to prevent soil depletion and keep your bed vibrant!
Are there seasonal alternatives for year-round interest?
Yes! Layer plants with staggered bloom times: Start with heather (winter), add crocus (early spring), then transition to black-eyed Susan (summer), and finish with chrysanthemums (fall). Evergreens like boxwood or holly add structure in off-seasons. Mulch with wood chips to protect roots in winter.
Wrapping up and next steps
Transforming your flower bed into a buzzing, blooming paradise is easier—and more rewarding—than you think! 🌸 By choosing the right flower bed filler plants, you’ll create a thriving ecosystem that delights pollinators, boosts biodiversity, and keeps your garden vibrant year-round.
Whether you’re a seasoned gardener or just starting, these pollinator-magnet combos make the process simple and fun.
Ready to take the next step? Sketch your design, gather your plants, and get ready to watch your garden come alive with color and life. Happy planting! 🌿✨