
Lawn
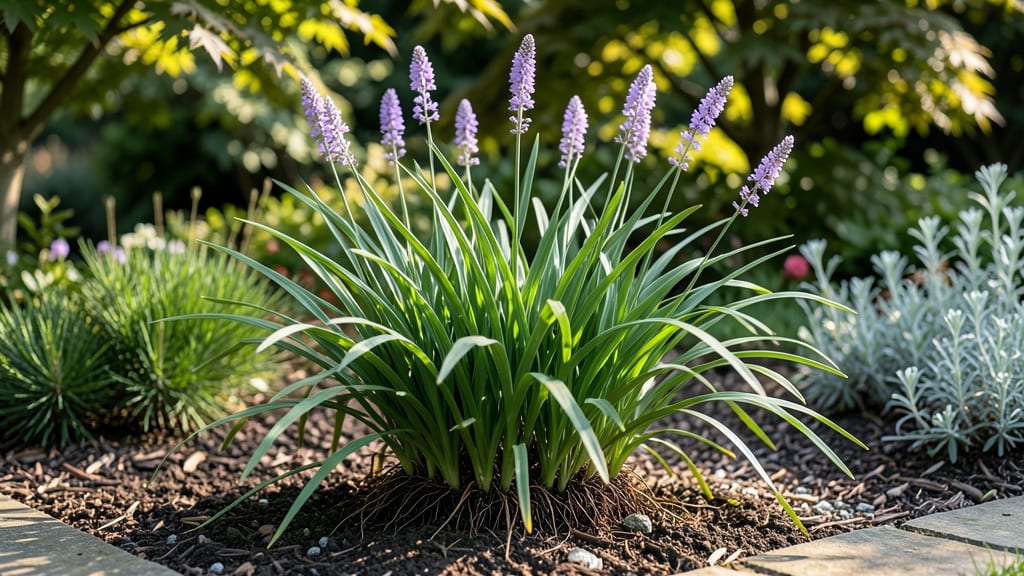
A monkey grass border transforms your flower beds into a vibrant, textured masterpiece—no fence required. ✨ I’ve used Liriope muscari to create a lush, low-maintenance edge that adds height, movement, and year-round interest while keeping weeds at bay.
The secret lies in spacing, complementary plants, and a few strategic cuts to encourage that signature arching habit. This border thrives in both formal and cottage gardens, pairing beautifully with perennials like coneflowers or ornamental grasses. Plant in 12-inch clusters with 18 inches between groups for a natural, flowing look.
For modern spaces, keep it tight and structured; for cottage charm, let it spill slightly. The key is balancing the grass’s upright growth with softer, trailing plants to create visual depth.
By late summer, your border will be a dense, swaying wall that frames flowers while adding movement to still landscapes. It stays evergreen in mild winters and blooms with tiny purple spikes in summer—a bonus for pollinators. The best part? It grows fast, crowds out weeds, and requires minimal trimming.
Works for sunny or partially shaded beds, urban courtyards, or sprawling rural gardens. Ready to give your flower beds that polished, professional edge? Here’s how to make it happen—without breaking a sweat.
📚 In This Guide
- What you need
- Instructions
- Tips and common mistakes
- Wrapping up and next steps
What you need
- ● Monkey grass (Liriope muscari or Liriope spicata): 10–20 plants (depending on border length; spacing ~12–18 inches apart)
- ● Choose compact or spreading varieties for full coverage
- ● Soil amendments: 5 lbs. compost or well-rotted manure per 10 linear feet
- ● 1 lb. slow-release fertilizer (10-10-10 or organic option)
- ● Mulch: 2–3 bags pine straw, cypress mulch, or shredded bark (for moisture retention)
- ● Tools: Garden trowel or spade
- ● Measuring tape
- ● Garden shears or pruners
- ● Gloves (to protect your hands!)
- ● Edging material (e.g., landscape fabric or metal edging to define borders)
- ● Decorative stones or pebbles (for a modern contrast)
- ● Drip irrigation kit (for low-maintenance watering)
- ● Slow-release plant food tablets (mixed into soil at planting)
Step-by-Step guide to creating a monkey grass border
Here's how to craft a striking, low-maintenance green barrier that frames your flower beds beautifully.
🌱 Step 1: Measure and Mark Your Border Layout
First, measure the perimeter of your flower bed where you want the monkey grass to grow. Use a 24-inch spacing between each plant for a dense, continuous border—this gives them room to spread while maintaining a lush, uniform look. I like to use stakes and twine to mark the exact line where the grass will go, especially if you're working with curves or irregular shapes.
Drive the stakes about every 4-6 feet along your marked line, then stretch the twine tightly between them. This creates a visual guide that prevents over-planting or gaps. If you're outlining a circular bed, use a hula hoop or garden hose to trace the curve before marking stakes. The key is to keep your line straight and consistent—monkey grass will follow your guidance beautifully once established.
🪴 Step 2: Prepare the Soil Along the Border
Monkey grass thrives in well-draining soil, so loosen the top 4-6 inches of soil along your marked line using a garden fork or tiller. Break up any compacted areas—this helps the roots spread deeper and faster. I like to mix in a 2-inch layer of compost into the topsoil to give the grass a nutrient boost right from the start.
If your soil is particularly heavy or clay-like, add a 1-inch layer of coarse sand to improve drainage. Monkey grass is drought-tolerant once established, but it appreciates a good start. Water the prepared soil lightly before planting to help settle the amendments. Avoid overwatering now—you want the soil to be moist but not soggy when you plant.
🌿 Step 3: Plant the Monkey Grass Clumps
Dig small holes along your marked line, spacing them 18-24 inches apart for a full, dense border. The holes should be just deep enough to accommodate the root ball of each clump—usually about 2-3 inches deep. Gently remove each clump from its container and place it in the hole, ensuring the top of the root ball sits level with the surrounding soil. Press the soil lightly around the base to eliminate air pockets.
I tap the soil down with my fingers to firm it gently—this helps the roots make immediate contact with the soil. If you're planting in a windy area, consider staking the tallest clumps temporarily until they establish. Water each newly planted clump deeply to encourage root growth. You'll know you've done it right when the soil around the base looks evenly moist but not saturated.
☀️ Step 4: Water and Mulch for Establishment
After planting, water the entire border deeply to settle the soil and encourage root development. Monkey grass is tough once established, but it needs consistent moisture for the first 4-6 weeks to take root. Water every 2-3 days during this period, checking that the soil stays evenly moist but not waterlogged. You'll see new growth emerge within 2-3 weeks—that's your signal everything is working.
Spread a 2-inch layer of mulch (like shredded bark or pine straw) over the soil, keeping it 6 inches away from the base of each clump to prevent rot. Mulch helps retain moisture, suppress weeds, and regulate soil temperature. Avoid piling mulch directly against the stems—this can trap too much moisture and cause rot. Once the grass is established, you can reduce watering to once a week, depending on your climate.
✂️ Step 5: Maintain and Shape the Border
Monkey grass grows quickly, so trim it back in early spring by about one-third to encourage bushier growth. Use sharp pruning shears to cut just above a leaf node—this prevents the plant from looking ragged. I like to trim after the first flush of new growth appears, usually in late April or early May, depending on your zone.
Throughout the growing season, remove any dead or yellowing leaves to keep the border looking tidy. If the grass spreads beyond your desired line, simply dig up and transplant any stray clumps to fill in gaps elsewhere. This plant is incredibly forgiving—even if you skip a season of trimming, it bounces back with minimal effort. The goal is to keep it dense and full, not perfectly manicured.
Tips & tricks for perfect monkey grass borders
Creating a stunning monkey grass border takes just a few smart tricks to ensure your privacy barrier thrives from day one.
Precision in Plant Spacing: The 24-inch spacing between plants in Step 1 isn't just arbitrary—it's the sweet spot for dense growth without overcrowding. If you're working with a narrow bed, you can reduce spacing to 18 inches, but be prepared for slightly more frequent trimming. For wider borders, stick to the full 24 inches to prevent competition between plants. A simple string line with stakes helps maintain perfect spacing, especially when working with curves.
Soil Prep Secrets: In Step 2, that 2-inch layer of compost isn't optional—it's the foundation for healthy roots. I've found that adding a handful of slow-release fertilizer granules mixed into the compost gives an extra boost during the critical establishment phase. For clay-heavy soils, consider adding a 1-inch layer of perlite instead of sand for even better drainage without altering the soil structure too dramatically.
Planting Technique: When planting in Step 3, the key is to handle those root balls gently. I like to soak them in water for 10-15 minutes before planting to ensure they're fully hydrated. This helps them establish faster in the first 2-3 weeks. Also, if you notice any damaged roots during planting, simply trim them with clean scissors—this prevents disease and encourages new root growth.
Mulching Strategy: That 2-inch layer of mulch in Step 4 serves multiple purposes beyond just aesthetics. It creates a microclimate that retains moisture while preventing soil compaction from foot traffic. I've found that using pine straw mulch actually acidifies the soil slightly over time, which monkey grass loves. Just remember to keep it 6 inches away from plant bases to prevent rot—this is where most beginners go wrong.
Pro Tips for Flower Bed Monkey Grass Border
- Creating a stunning monkey grass border takes just a few smart tricks to ensure your privacy barrier thrives from day...
- Precision in Plant Spacing: The 24-inch spacing between plants in Step 1 isn't just arbitrary—it's the sweet spot for...
- Soil Prep Secrets: In Step 2, that 2-inch layer of compost isn't optional—it's the foundation for healthy roots. I've...
Frequently asked questions
Got questions about creating a flower bed monkey grass border? You’re not alone! Here are some of the most common queries—and their straightforward answers—to help you get started with confidence.
What’s the best time of year to plant monkey grass for a border?
Plant monkey grass in early spring (after the last frost) or late summer (before fall’s first chill). This gives roots time to establish before harsh weather. Avoid planting in winter—it struggles with cold soil. If you’re in a warm climate, spring is your best bet!
How quickly does monkey grass grow, and when can I expect privacy?
Monkey grass grows fast—up to 12 inches per year! With consistent watering, you’ll see noticeable height in 3–4 months. For a privacy barrier (6–8 feet tall), expect full coverage in 2–3 years. Patience pays off with lush, dense growth!
Can I use alternatives if monkey grass isn’t available?
Try these low-maintenance, fast-growing options:
- Pampas grass – Tall, feathery, and drought-tolerant (but invasive in some areas).
- Bamboo (clumping types) – Privacy in 1–2 years, but choose non-invasive varieties.
- Horsetail reed (Equisetum) – Unique texture, thrives in wet soil.
- Ornamental millet – Adds height and color (annual, but fast!).
Why is my monkey grass turning brown or dying?
Brown patches? Don’t panic—it’s usually one of these fixes:
- Underwatering – Keep soil consistently moist (not soggy) for the first year.
- Overwatering – Roots rot in waterlogged soil. Ensure good drainage!
- Frost damage – Young plants may brown in winter; mulch to protect roots.
- Pests (rare) – Check for grubs or slugs; use organic pest control if needed.
How far apart should I space monkey grass plants for a dense border?
Plant 18–24 inches apart for a tight, natural look. Closer spacing (12–18") speeds up fill-in but may require thinning later. For a hedge-style border, aim for 12–15 inches between plants. Mulch around bases to suppress weeds and retain moisture!
Wrapping up and next steps
Creating a flower bed monkey grass border is your ticket to a lush, low-maintenance privacy barrier that adds beauty and function to your garden. 🌿 With its fast growth and striking texture, monkey grass transforms any space into a serene retreat in no time—plus, it’s budget-friendly and eco-friendly!
Whether you’re a seasoned gardener or a newbie, this project is simple, rewarding, and perfect for adding that wow factor to your yard.
Ready to roll up your sleeves? Start by gathering your supplies, then dive in—your dream garden awaits! For extra inspiration, browse monkey grass varieties or check out local landscaping trends to keep your project fresh and unique.