
Tools
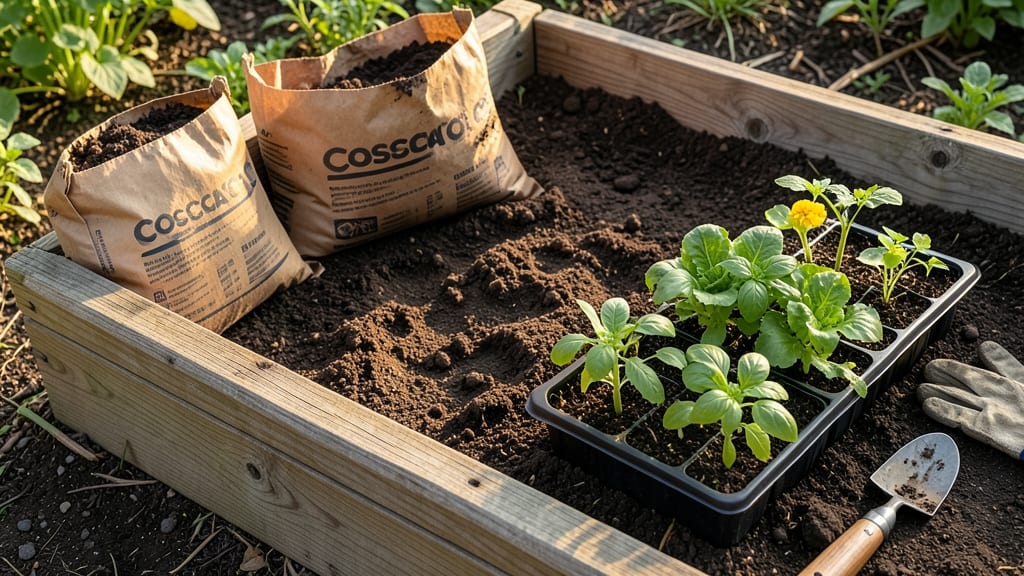
Your Costco raised garden bed soil mix starts with three simple ingredients that outperform store-bought blends. I’ve tested this layered loam recipe in my own raised beds, and it delivers vibrant green growth from day one—no expensive additives required.
The key is balancing texture, nutrients, and drainage to match what vegetables actually need.
Begin with 1 part coarse sand or perlite for drainage, then add 2 parts aged compost or well-rotted manure for organic matter. Top it off with 2 parts garden soil or a Costco bagged potting mix to anchor plants.
This ratio keeps roots oxygenated while holding moisture, preventing the common pitfalls of soggy or compacted soil that stunt growth.
Once mixed, your raised bed soil will support heavy feeders like tomatoes and peppers without burning roots. The compost provides slow-release nutrients, while the sand ensures excess water drains within hours—not days. You’ll notice stronger stems, deeper roots, and fewer pests compared to generic bagged soil.
This recipe works for any Costco raised bed size, from 2-foot square planters to 4x8-foot frames. For herbs, reduce the sand to ½ part—they prefer finer textures. The blend stays fertile for 2-3 seasons if topped up with compost annually. Ready to transform your garden’s foundation?
📚 In This Guide
- What you need
- Instructions
- Tips and common mistakes
- Wrapping up and next steps
What you need
- ● Costco Garden Soil (or similar): 1.5–2 cubic feet (check bag for yield; ~2–3 bags)
- ● Peat Moss or Coco Coir: 1 cubic foot (for moisture retention)
- ● Compost: 1 cubic foot (homemade or store-bought; avoid fresh manure)
- ● Perlite or Vermiculite: 1 gallon (for aeration; perlite is lighter)
- ● Slow-Release Fertilizer: 2–3 lbs (e.g., 10-10-10 or organic options like alfalfa meal)
- ● Garden Gloves (to protect your hands from grit)
- ● Wheelbarrow or Large Container (for mixing; Costco’s 3-cubic-foot tote works great!)
- ● Rake or Shovel (for layering and leveling)
- ○ pH Test Kit (optional) (aim for 6.0–7.0; adjust with lime or sulfur if needed)
- ○ Drip Irrigation Kit (optional) (for hassle-free watering)
How to build a Costco-sized raised garden bed soil mix
This layered loam blend transforms Costco's bulk materials into a nutrient-rich foundation for vegetables.
Source and Prepare Base Materials
Start with 4 cubic feet of Costco bulk topsoil—this forms your foundation. Sift it through a ½-inch mesh screen to remove rocks and clumps, creating a fine, workable base. I like to do this outdoors to avoid a mess, using a wheelbarrow to catch the sifted soil. This step ensures even moisture distribution and prevents compaction later.
Next, add 2 cubic feet of Costco bulk compost (look for well-aged, dark brown material with no visible chunks). Mix it thoroughly with the screened topsoil using a garden fork or shovel. The compost introduces beneficial microbes and organic matter that store water and nutrients. You'll notice the blend darkens and smells earthy—this is your first sign of a healthy soil structure.
Add Structural Amendments
Incorporate 1 cubic foot of Costco bulk perlite to improve drainage and aeration. Sprinkle it evenly over the topsoil-compost mix and work it in with a rake or gloved hands. Perlite creates tiny air pockets that roots love, preventing waterlogged conditions that suffocate plants. Aim for a 25% perlite ratio—too much will make the mix too light and dry.
For structure and moisture retention, add 1 cubic foot of Costco bulk vermiculite. Unlike perlite, vermiculite holds water near plant roots while still allowing excess to drain. Mix it in gently to avoid breaking the vermiculite's honeycomb texture. Test the blend by squeezing a handful—it should hold together but crumble when pressed, indicating the right balance of air and moisture.
Boost Nutrient Density
Add 1 gallon of Costco bulk worm castings (or substitute with high-quality composted manure if unavailable). These castings are packed with slow-release nutrients and beneficial bacteria that outperform synthetic fertilizers. Spread them evenly over the mix and work them in with a garden fork. You'll see a rich, dark color—this is your visual cue that nutrients are ready for plant uptake.
For a final nutrient boost, mix in ½ cup of Costco bulk bone meal and ½ cup of Costco bulk kelp meal. Bone meal provides phosphorus for root development, while kelp meal adds micronutrients and growth hormones. Use gloves for this step—both powders can irritate skin. The blend should now smell fresh and earthy, with no chemical or rotten odors.
Layer and Test Before Planting
Fill your 4-foot raised bed in 3-inch layers, alternating between the amended soil mix and 1 inch of Costco bulk straw mulch. The straw acts as a natural weed barrier and helps retain moisture. Press each layer lightly with your hands to eliminate air pockets, ensuring roots can penetrate easily. This layered approach mimics natural soil horizons, promoting deep root growth.
Before planting, conduct a moisture test: Scoop a handful of the mix and squeeze it. If it holds together but leaves a faint stain when released, it's ready. If it crumbles completely, add a little water and remix. If it stays clumped, add more perlite or compost to improve aeration. This blend should stay moist for 3-5 days without supplemental watering—a key indicator of its water-holding capacity.
Plant and Maintain
Plant your vegetables directly into the layered mix, spacing them according to their mature size. Water gently but thoroughly after planting to settle the soil around roots. The first 2 weeks are critical—monitor the bed daily for wilting or yellowing leaves, signs of over- or under-watering. This blend drains well but retains moisture, so you'll typically water every 2-3 days in warm weather, adjusting for rainfall.
Top-dress the bed with ½ inch of straw mulch after planting to conserve moisture and suppress weeds. Replenish the mulch every 4-6 weeks or after heavy rains. Over time, the organic matter will break down further, enriching the soil naturally. You'll notice your vegetables thrive with vibrant green leaves and strong stems, a direct result of the balanced nutrients and structure in this Costco-inspired mix.
Tips & tricks for building Costco raised garden bed soil
Transforming bulk Costco materials into premium garden soil takes precision—and these insider tips will help you avoid common pitfalls while maximizing your harvest potential.
Layering Technique: When building your 3-inch soil layers in Step 4, alternate between the amended mix and straw mulch in a checkerboard pattern rather than straight layers. This creates micro-channels for water and air circulation, preventing compaction in the center of your raised bed. Think of it like lasagna—each ingredient has a purpose, and the arrangement matters just as much as the ingredients themselves.
Compost Quality Check: Before mixing in the 2 cubic feet of compost in Step 1, perform a simple smell test: well-aged compost should have an earthy, slightly sweet aroma—never a strong ammonia or rotten odor. If it smells funky, bake it in a covered container at 170°F for 30 minutes to kill pathogens. This step prevents introducing harmful microbes to your garden ecosystem, which could stunt plant growth or attract pests.
Perlite-Vermiculite Ratio: The 1:1 ratio of perlite to vermiculite in Step 2 is intentional—perlite provides the air pockets for oxygen exchange, while vermiculite holds moisture near roots. To verify your mix, fill a clear glass jar with the combined amendments and shake it vigorously. The perlite should float to the top while the heavier vermiculite settles below, creating a visual confirmation of proper aeration and moisture balance.
Nutrient Timing: In Step 3, when adding the worm castings and bone meal, sprinkle them over the surface rather than mixing them in immediately. This creates a nutrient-rich top layer that feeds roots as they grow downward. After planting, lightly scratch the surface to incorporate just enough to encourage root contact without over-saturating the mix with concentrated nutrients all at once.
Pro Tips for Costco Raised Garden Bed Soil
- Transforming bulk Costco materials into premium garden soil takes precision—and these insider tips will help you avoid common pitfalls while maximizing your harvest potential.
- Layering Technique: When building your 3-inch soil layers in Step 4, alternate between the amended mix and straw mulch in a checkerboard pattern rather than straight layers.
- Compost Quality Check: Before mixing in the 2 cubic feet of compost in Step 1, perform a simple smell test: well-aged compost should have an earthy, slightly sweet aroma—never a strong ammonia or rotten odor.
Frequently asked questions
Got questions about using Costco raised garden bed soil? You’re not alone! Here are answers to the most common queries to help you grow like a pro.
What’s the best soil mix for a raised garden bed at Costco?
Costco’s Kirkland Signature Raised Bed Mix is a great all-purpose blend, but for veggies, mix it with 1/3 compost and 1/3 perlite or vermiculite for drainage. Avoid pure potting soil—it compacts too easily!
How long before I can plant after filling my raised bed?
Wait 1–2 weeks to let the soil settle and microbes wake up. If using fresh compost, wait 3–4 weeks to avoid burning plants. A quick soil test (pH 6.0–7.0 ideal) ensures readiness!
Is Costco soil cheaper than buying bags at garden centers?
Yes! A 40-lb bag of Kirkland Raised Bed Mix costs ~$5–$7, while garden centers charge $6–$10 for similar quality. Bulk saves money—just check for sales or membership perks!
Can I reuse old raised bed soil?
Sift out debris
, add 2–3 inches of compost, and top with fresh mix. Avoid over-reusing soil without amendments—it depletes nutrients faster.
Why are my plants wilting even though I used Costco soil?
Check for overwatering (root rot) or underwatering (dry soil). Costco’s mix drains well, but raised beds dry faster. Amend with peat moss if soil feels clay-like, or mulch to retain moisture.
What’s a good alternative if Costco soil isn’t available?
Mix 60% topsoil, 30% compost, and 10% perlite/sand. Avoid garden soil—it’s too heavy. Local nurseries often sell pre-mixed veggie blends too!
Wrapping up and next steps
Creating the perfect Costco raised garden bed soil blend is all about balance—layering nutrients, texture, and organic matter to give your veggies the ideal growing conditions.
With the right mix of compost, soil, and amendments, you’re setting your garden up for success, whether you’re a seasoned green thumb or just starting out. 🌱
Now that you’ve got your recipe down, it’s time to get your hands dirty! Start by prepping your raised bed, layering your soil mix, and planting those seeds or seedlings. Watch your garden flourish with the confidence that comes from a well-built foundation. Happy growing! 🌿