
Flowers
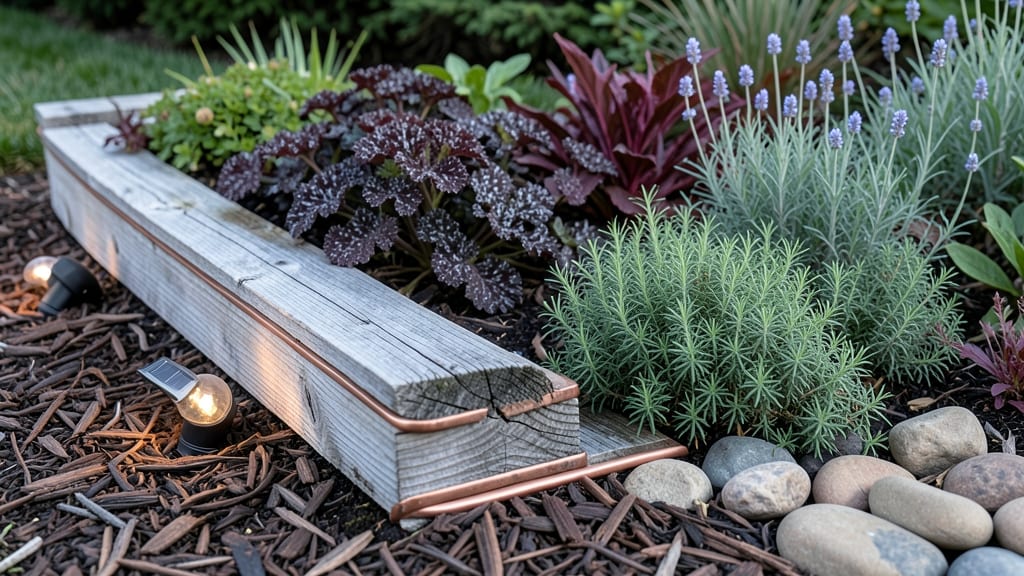
Wooden flower bed borders transform a simple garden into a cozy, storybook-style retreat—the kind where every walk feels like a stroll through a cottage garden. 🌿 I’ve tested cedar, redwood, and pressure-treated pine over the years, and the right wood makes all the difference between a border that lasts a decade and one that crumbles by summer’s end.
The key is matching wood to your climate: cedar resists rot naturally, while redwood adds that rich, aged charm. Stain or paint? I lean toward natural finishes—let the wood weather to gray for that authentic rustic look—but a bold color can make borders pop against perennials like coneflowers or lavender.
By the time you’re done, your beds will have defined edges that frame plants beautifully, while the wood’s texture adds warmth to any layout. Plus, the installation is simpler than you’d think—no heavy lifting required.
For small gardens, low borders hug the ground; for statement pieces, try tall, boxy designs. The best part? You can mix and match styles—some sections rustic, others sleek—for a garden that’s uniquely yours.
📚 In This Guide
- What you need
- Instructions
- Tips and common mistakes
- Wrapping up and next steps
What you need
- ● Wooden boards: Untreated cedar, redwood, or pine (2x4s or 2x6s, 6–12 feet long, depending on border size). Quantity: 4–8 boards (adjust based on bed dimensions).
- ● Galvanized screws: 2.5–3" deck screws (100–200 screws, depending on project scale).
- ● Wood glue: Outdoor-rated, waterproof (1 small bottle).
- ● Sandpaper: 80–120 grit (1 sheet for smoothing edges).
- ○ Wood stain/sealer: Non-toxic, weather-resistant (1 quart). Optional: Choose a natural or tinted finish for extra flair!
- ● Circular saw or miter saw: For precise cuts. Rent if needed!
- ● Drill/driver: Cordless for convenience.
- ● Measuring tape: 25-foot tape for accuracy.
- ● Speed square: For marking 90° angles.
- ● Clamps: 2–4 to hold boards during assembly.
- ● Paintbrush or roller: For applying stain/sealer.
- ● Safety gear: Gloves, goggles, and ear protection.
- ● Measure twice, cut once! Sketch your flower bed layout first to avoid material waste. 📏
- ● Check wood moisture: Store boards in a dry place for 48+ hours before assembly to prevent warping.
- ● Pre-drill screw holes: Prevents splitting in wooden boards. Drill holes 1/16" smaller than screw diameter.
- ● Level your base: Use a 4-foot level to ensure borders sit straight before securing.
- ● Eco-friendly sealant: Opt for linseed oil or beeswax blend for a non-toxic, natural finish.
Step-by-Step instructions for building wooden flower bed borders
Here's how to create borders that blend rustic charm with lasting durability—no fancy tools required.
🪴 Step 1: Measure and Mark Your Flower Bed Layout
Start by sketching your flower bed shape on paper first. I always measure twice—once for the outer edge and again for the inner edge—because uneven borders look sloppy and waste wood. Use wooden stakes and string to outline the perimeter in your garden. The string gives you a perfect straight line to follow, and you can adjust the width as you go.
For a classic look, I recommend a 4-inch wide border—narrow enough to keep the focus on plants but wide enough to hide soil edges neatly. Mark the corners with stakes and use a level to ensure they're perfectly square. If your bed has curves, bend the string gently to create smooth arcs instead of sharp turns.
🔨 Step 2: Cut Wood to Size and Prepare the Base
Choose 2x6 or 2x8 pressure-treated lumber for longevity—it resists rot and insects better than untreated wood. Cut the boards to length using a circular saw or miter saw, and round the corners slightly with a jigsaw for a softer, more natural look. Always wear a dust mask when cutting—wood particles are tough on your lungs.
Before assembling, lay the boards in your marked layout to check the fit. Adjust as needed, then dig a trench along your marked line that's 2-3 inches deep and 2 inches wide. This keeps the border sturdy and hidden beneath the soil line. I like to add a 1-inch layer of landscape fabric at the bottom of the trench to prevent weeds from creeping up between the wood and soil.
☀️ Step 3: Assemble and Secure the Border Frame
Place the first board in the trench and use a galvanized nail or deck screw to secure it to a hidden stake driven into the ground. Space screws every 12 inches along the length of the board. For corners, cut 45-degree angles on the ends of two boards and screw them together tightly. A corner brace adds extra stability if your bed is large.
As you work, check the level frequently—even a slight tilt will make the border look uneven. For extra strength, I recommend adding a second row of boards on the inside of the first row, offset by 1-2 inches (like brickwork). This creates a deeper, more substantial border that holds up better over time. Fill any gaps between boards with landscape fabric to keep soil from leaking through.
🌱 Step 4: Backfill and Finish the Edges
Once the frame is secure, backfill the trench with native soil mixed with compost to encourage root growth against the border. Tamp the soil lightly with your hands or a tamper to eliminate air pockets. For a polished look, I like to add edging stones along the top inside edge of the wood—this hides the raw wood and adds a decorative touch.
Finally, water the soil thoroughly to settle everything in place. Over the next few weeks, you may notice slight settling, so check the level occasionally and add more soil if needed. To extend the life of your wooden border, apply a non-toxic wood sealant every 1-2 years—this protects against moisture and UV damage while keeping that rustic charm intact.
Tips & tricks for perfect wooden flower bed borders
These simple strategies will help you build borders that last for years while keeping that charming rustic look.
Material Selection: Pressure-treated lumber is your best friend for longevity, but if you want a more natural look, cedar or redwood resist rot naturally and need less maintenance. Just know untreated wood will need sealing every 6-12 months. For curved sections, use flexible landscape fabric strips between boards to prevent cracking as they settle.
Precision Cutting: When cutting your boards in Step 2, mark the cut lines with a pencil and use a straightedge for perfect lines. For curves, draw your design directly on the board with a fine-tip marker before cutting with a jigsaw. I always cut a test piece first—this helps you adjust the jigsaw speed to avoid splintering.
Stability Secrets: In Step 3, don't skip the corner braces—they're worth the extra 10 minutes of assembly. For extra-large beds, add hidden metal brackets at midpoints along straight sections. If your garden has slopes, bury the bottom row of boards 4 inches deep and use longer screws to anchor them securely.
Maintenance Tip: That non-toxic wood sealant in Step 4 should be applied on a dry, cloudy day to prevent UV exposure during curing. I like to use a brush rather than a sprayer—it gives me better control over the wood grain. Reapply every 1-2 years or when the wood starts looking dull, and always sand lightly with 120-grit sandpaper before resealing.
Pro Tips for Wooden Flower Bed Borders
- These simple strategies will help you build borders that last for years while keeping that charming rustic look.
- Material Selection: Pressure-treated lumber is your best friend for longevity, but if you want a more natural look, c...
- Precision Cutting: When cutting your boards in Step 2, mark the cut lines with a pencil and use a straightedge for pe...
Frequently asked questions
Got questions about wooden flower bed borders?
You’re not alone! Here are answers to the most common queries to help you create a stunning, long-lasting garden edge with ease.
What type of wood is best for outdoor flower bed borders?
For durability, opt for cedar, redwood, or pressure-treated pine—they resist rot, insects, and warping. Cedar and redwood are naturally rot-resistant, while pressure-treated pine is budget-friendly but may need sealing. Avoid untreated softwoods like pine or fir unless sealed, as they’ll degrade faster.
How long do wooden flower bed borders last?
With proper care, cedar or redwood borders last 10–15 years, while pressure-treated pine can last 7–10 years. Lifespan depends on wood quality, sealant use, and exposure to moisture. Reapply a waterproof sealant every 2–3 years to extend their life.
Can I install wooden borders myself, or should I hire a pro?
DIY is totally doable! If your border is straight and low (under 12 inches), you can cut and assemble it yourself with basic tools. For curved designs, steep slopes, or heavy wood, hiring a pro ensures precision and safety. Rent a circular saw or miter box for clean cuts.
Do wooden borders need special maintenance?
Yes! Start by sealing the wood before installation to block moisture. Check annually for cracks, splits, or mold—sand rough spots and reapply sealant as needed. Avoid letting soil pile against the wood to prevent rot. For extra protection, paint or stain the borders every few years.
Are there eco-friendly alternatives to traditional wood?
Consider reclaimed wood, bamboo, or composite lumber (made from recycled wood fibers). For a zero-waste option, use stacked stones, bricks, or even repurposed pallets. Just ensure any alternative resists weather and matches your garden’s aesthetic.
Why is my wooden border warping or rotting?
Warping or rot usually means excess moisture or lack of sealant. Ensure proper drainage around the border, and elevate it slightly if planted in wet soil. If already warped, reinforce with metal brackets or replace damaged sections. Always pre-treat wood before installation!
Wrapping up and next steps
Transforming your garden with wooden flower bed borders is a rewarding project that blends creativity with natural beauty! Whether you’re a seasoned DIYer or just starting, these rustic borders add warmth and structure to any outdoor space.
The best part? You can customize them to match your garden’s style—from sleek modern to cozy cottagecore.
Ready to take the next step? Sketch your design, gather your tools, and start building! Your garden will thank you with a fresh, elevated look that’s as functional as it is charming. 🌿✨