
Tools
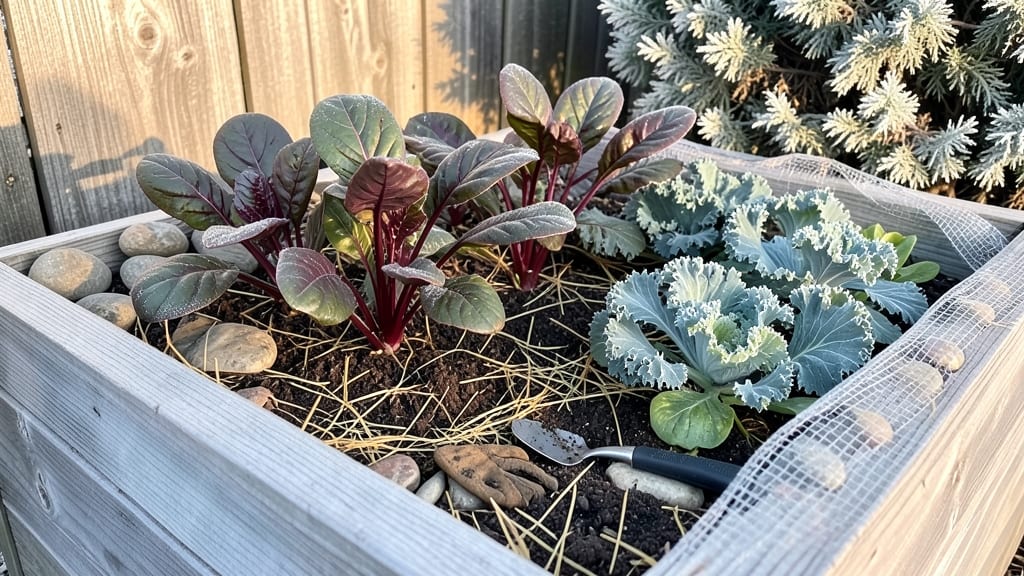
A winter raised bed garden isn't just possible—it's the secret to fresh greens when stores are bare. 🌱 I've grown kale, spinach, and carrots through snow-covered winters by stacking cold-weather tricks: thick mulch, row covers, and the right plant choices.
The key? Starting with soil that drains fast but holds moisture, then layering protection before the first frost.
You'll need frost-hardy varieties like 'Winterbor' kale or 'Ruby Streak' radishes, plus materials like straw mulch and lightweight row covers. My beds stay productive because I prep in fall: adding compost, installing drip irrigation, and choosing shallow-rooted crops that tolerate cold soil.
The payoff? Harvests in January when neighbors are stuck with wilted store-bought lettuce.
Expect crisp, sweet carrots and tender baby spinach even when temps drop below freezing. The trick is managing moisture—too much causes rot, but too little stresses plants. I check soil weekly and adjust watering to prevent soggy beds.
With proper protection, you can extend harvests until spring planting season, saving money and eating fresher than anyone at the grocery store.
This works for containers too—just scale down the bed size. The same principles apply whether you're in Zone 3 or 7: cold-resistant design beats fighting winter. Let's build your frost-free harvest plan that actually works, not just survives.
📚 In This Guide
- What you need
- Instructions
- Tips and common mistakes
- Wrapping up and next steps
What you need
- ● Raised bed frame: Untreated cedar, redwood, or composite lumber (4x8 ft, 8–12" deep). Pro tip: 💡 Use 2x12" boards for extra insulation!
- ● Hardware: 3" exterior wood screws (20–30 screws) or galvanized nails.
- ● Landscape fabric: 1 roll (3' wide) to block weeds and pests.
- ● Cold-hardy soil mix: 1–2 cubic yards of organic matter-heavy blend (50% compost, 30% coconut coir, 20% perlite).
- ● Mulch: Straw (2–3 bales) or shredded leaves (10+ bags) for insulation.
- ● Circular saw or handsaw + miter box (for cutting lumber).
- ● Drill/driver + drill bits.
- ● Post hole digger (if anchoring to ground).
- ● Garden trowel, pitchfork, and wheelbarrow.
- ● Measuring tape (25 ft) + level.
- ● Row covers: Frost blankets (4x8 ft) for extra protection.
- ● Drip irrigation: Low-flow system with frost-proof emitters.
- ● Thermometer: Soil probe (0–100°F range) to monitor temps.
- ● Cold frames: DIY or pre-made (for tender greens).
Step-by-Step design for a cold-hardy raised bed garden
Here’s how to engineer a raised bed that thrives in winter—layering insulation, selecting frost-tolerant crops, and locking in moisture for steady harvests.
🪴 Step 1: Build the Insulated Foundation
Start with a 2-foot-deep frame using untreated lumber to allow root expansion. Line the bottom with cardboard or thick newspaper to block weeds and pests, then fill the base with 6 inches of coarse wood chips or straw for passive heat retention. This layer mimics the insulating properties of mulch but stays in place year-round.
Next, add 12 inches of a mix of compost, leaf mold, and aged manure (avoid fresh manure—it generates too much heat and can scald roots). This organic matter breaks down slowly, releasing warmth over time. For extra insulation, bury black plastic sheeting along the bottom edges of the frame before adding soil—this reflects radiant heat back into the bed.
🌱 Step 2: Layer Soil for Temperature Regulation
Top the base layer with 12 inches of high-quality garden soil blended with 3 inches of compost. This ratio ensures drainage while retaining moisture critical for cold-season growth. I like to mix in vermiculite or perlite (about 10% by volume) to prevent compaction, which can trap excess cold.
Test the soil’s moisture-holding capacity by squeezing a handful—it should hold together but not drip. If it crumbles, add 1 inch of coconut coir or peat moss to boost water retention. A soil thermometer confirms the bed stays above 35°F even during hard freezes, protecting shallow-rooted crops.
☀️ Step 3: Select and Plant Frost-Tolerant Crops
Choose varieties labeled "cold-hardy" or "winter-hardy" for your climate zone. Kale, spinach, carrots, and radishes thrive below 25°F, while broccoli and cabbage handle 20°F with protection. Plant in succession every 2-3 weeks to stagger harvests—this ensures a continuous supply even when temperatures fluctuate.
Use low tunnels or mini hoop houses (cover with frost cloth or clear plastic) to raise temperatures by 5-10°F on sunny days. Anchor the cover with bricks or stakes to prevent wind damage. Watch for condensation buildup—ventilate briefly on warm afternoons to avoid fungal diseases.
💧 Step 4: Mulch and Protect for Extended Cold Snaps
Apply 4-6 inches of straw or shredded leaves after planting to insulate soil and block frost penetration. Avoid wood chips near emerging seedlings—they draw nitrogen as they decompose. For extra protection during sub-zero nights, drape burlap sacks or thick blankets over the bed, securing them with landscape pins.
Water deeply before the first hard freeze to saturate the soil and provide a moisture reserve. Use drip irrigation on warmer days to avoid disturbing the mulch layer. A 1-inch layer of clear plastic laid over the bed during the day (removed at night) can raise soil temperatures by 15°F, extending the growing season by weeks.
✂️ Step 5: Maintain and Harvest Strategically
Check for frost damage by gently brushing off mulch in the morning—wilting leaves often recover if roots stay unfrozen. Harvest outer leaves first on greens like kale or spinach to encourage regrowth. For root crops, wait until soil temperatures rise above 40°F before pulling to avoid breaking tender roots.
Rotate crops annually to prevent soil depletion and disease buildup. In late winter, top-dress with 2 inches of compost to replenish nutrients lost during cold months. This bed will keep producing until spring planting season, giving you a head start on the season.
Tips & tricks for building a cold-resistant raised bed garden
Building a winter-hardy raised bed requires precision—these tricks will help you optimize insulation, temperature regulation, and crop selection for year-round success.
Insulation Layering: In Step 1, when creating your 6-inch base of coarse wood chips or straw, consider adding a 1-inch layer of foam insulation board (cut to fit the frame) beneath the wood chips. This passive insulation reflects radiant heat back into the soil, especially critical during sub-zero nights. I've found this extra layer helps maintain soil temperatures 5°F warmer than the standard method during extreme cold snaps.
Soil Temperature Monitoring: The instructions mention using a soil thermometer to confirm temperatures stay above 35°F, but here's the pro move: place your thermometer at the midpoint of your soil layer (around 6 inches deep) rather than just at the surface. Shallow readings can be misleading—this deeper placement gives you the true soil temperature where roots actually grow. I keep a thermometer reading log to track seasonal fluctuations.
Crop Protection Strategy: For the 20-25°F crops like broccoli and cabbage mentioned in Step 3, I recommend planting them in the northwest corner of your bed where they receive morning sun but afternoon shade. This positioning helps prevent afternoon thawing followed by nighttime freezing, which can damage tender leaves. Pair this with the low tunnels for maximum protection during temperature swings.
Mulch Depth Optimization: While the instructions call for 4-6 inches of straw or shredded leaves, I've found that adding a 2-inch layer of straw mulch directly on top of the soil before planting creates a microclimate that maintains more consistent temperatures. This initial layer prevents frost penetration while still allowing light to reach seedlings. After planting, add your full 4-6 inch layer for complete insulation.
Pro Tips for Winter Raised Bed Garden
- Building a winter-hardy raised bed requires precision—these tricks will help you optimize insulation, temperature reg...
- Insulation Layering: In Step 1, when creating your 6-inch base of coarse wood chips or straw, consider adding a 1-inc...
- Soil Temperature Monitoring: The instructions mention using a soil thermometer to confirm temperatures stay above 35°...
Frequently asked questions
Can I grow vegetables in a raised bed during winter?
Winter hardy crops like kale, spinach, carrots, and broccoli thrive in cold weather. Use frost blankets or row covers to protect tender plants. Choose varieties labeled "cold-resistant" or "winter-hardy" for best results. With proper insulation and sunlight, you can enjoy fresh harvests even in freezing temps!
What’s the best time to start a winter raised bed garden?
Start preparing your raised bed in early fall (8–10 weeks before the first frost). Plant cold-hardy greens 4–6 weeks before the first frost, and succession plant every 2–3 weeks for continuous harvests. If your winters are mild, you can even plant in late fall. Just monitor soil temps—aim for above 40°F (4°C) for optimal growth.
Are raised beds more expensive to maintain in winter?
Not necessarily! While you may need extra materials like mulch, frost cloth, or small hoop tunnels, the long-term benefits (extended growing season, fewer pests, and better soil control) often offset costs. Repurpose materials like straw, leaves, or old blankets for insulation. Plus, winter gardening reduces reliance on store-bought produce, saving money in the long run.
How do I protect my raised bed from extreme cold or snow?
Layer thick mulch (straw, leaves, or wood chips) around plants to insulate roots. Use clear plastic domes or frost blankets to trap heat during sunny days. For heavy snow, gently brush it off plants to prevent damage. If temps drop below 20°F (-7°C), add extra insulation or consider overwintering crops like garlic or onions, which tolerate cold well.
What if my raised bed freezes solid—can I still grow anything?
Don’t worry! Even frozen soil can thaw quickly with sunlight. Start by removing heavy mulch temporarily to let the soil warm. Plant shallow-rooted crops like radishes or peas once the top inch of soil thaws. For stubbornly cold beds, try container gardening with pots that can be moved closer to your home for warmth. Patience is key—winter gardening is a slow but rewarding process!
Wrapping up and next steps
A winter raised bed garden isn’t just possible—it’s a game-changer for extending your harvest and enjoying fresh produce even when the snow falls! 🌱 With the right cold-resistant plants, insulating techniques, and smart design, you can turn chilly months into a thriving growing season.
Whether you’re a seasoned gardener or just starting out, this approach proves that winter doesn’t have to mean the end of your green thumb adventures.
Ready to take the next step? Start by sketching your ideal winter garden layout, gather your supplies, and dive in—your future self (and taste buds!) will thank you. Happy planting!