
Landscaping
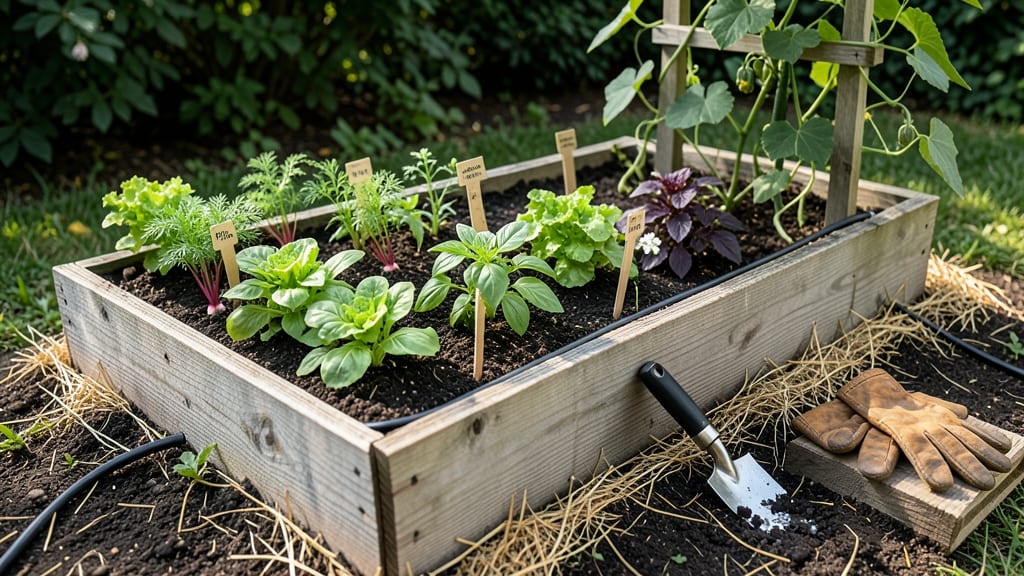
Raised veg bed ideas using modular cedar frames let you build a vegetable garden that grows with your needs—no more wasted space or awkward shapes. 🌱 I spent years wrestling with fixed raised beds that never quite fit my yard or my changing crop plans, until I discovered how modular sections transform gardening into a flexible, satisfying puzzle. The beauty of this system is its adaptability: expand a single bed into a long row, create multiple small plots for companion planting, or even rearrange sections yearly to refresh the soil. Cedar resists rot and looks stunning, while the modular design keeps costs down by letting you start small and add sections as your skills (or appetite) grow. By summer’s end, you’ll harvest more efficiently with dedicated zones for leafy greens, root crops, and vining plants—all within arm’s reach. The beds stay weed-free, drain perfectly, and elevate your plants away from soil-borne pests that plague ground-level gardens. Best of all, this approach works for tiny urban patios or sprawling backyard plots. Here’s how to design yours without breaking the bank or your back.
📚 In This Guide
- What you need
- Instructions
- Tips and common mistakes
- Wrapping up and next steps
What you need
- ● Cedar lumber (recommended): 2x6 boards (for sides and ends) – 10–12 feet per bed (adjust based on bed size)
- ● 1x6 boards (for bottom frame) – 4–6 feet per bed
- ● Hardware: 3-inch exterior wood screws (stainless steel) – 20–30 screws per bed
- ○ Galvanized corner braces – 4 per bed (optional but recommended for stability)
- ● Landscape fabric or hardware cloth – 1 piece to cover bed bottom (prevents weeds/rodents)
- ● Soil & Amendments: High-quality garden soil – 2–3 cubic feet per square foot of bed
- ● Compost or aged manure – 1–2 cubic feet per bed (boosts fertility)
- ○ Perlite or vermiculite (optional) – 1–2 bags (improves drainage)
- ● Circular saw or miter saw (for precise cuts)
- ● Drill/driver (with screw attachment)
- ● Tape measure (at least 6 feet)
- ● Level (to ensure beds are even)
- ● Staple gun (for securing landscape fabric)
- ● Wheelbarrow (for hauling soil)
- ● Gloves & safety glasses (because safety first!)
- ● Wood stain or sealant (to protect cedar from weather)
- ● Drip irrigation kit (for easy watering)
- ● PVC pipes or trellis (for vertical gardening)
- ● Bench or seat integrated into the frame (for cozy gardening)
Step-by-Step guide to designing modular cedar raised veg beds
Here's how to create flexible, customizable harvest zones that adapt to your space and crops.
🪴 Step 1: Plan Your Modular Layout and Dimensions
Start by sketching your garden space and deciding how many 4-foot wide beds you'll need—this width lets you reach the center without stepping in soil. I like to use 8-foot long sections first, since they're easy to work with and fit most patios or yard edges. Measure your available area, then mark out your bed locations with stakes and string.
For customization, plan for movable sections. For example, you might have one permanent bed near your kitchen for herbs, and another on wheels that you can shift to follow the sun or accommodate different crops each season. Remember, cedar naturally resists rot, so you can build these beds to last 10-15 years with proper sealing.
🌱 Step 2: Build Your Cedar Frames with Precision
Cut cedar boards to your planned dimensions—typically 2x6s or 2x8s for sides, with 4x4 posts at each corner for stability. Pre-drill holes to avoid splitting the wood, then assemble the frames using 3-inch exterior screws. I always add a ½-inch gap between the boards at the corners to allow for natural expansion and contraction.
For modularity, leave one long side open on each frame so you can connect sections later with simple corner brackets. This lets you expand your beds as your gardening skills grow. Seal all raw cedar edges with an outdoor-rated wood sealant to protect against moisture and pests—this step prevents rot and extends your beds' lifespan significantly.
☀️ Step 3: Position for Optimal Sun and Access
Place your beds where they'll receive at least 6-8 hours of sunlight daily, with south-facing exposure ideal for most vegetables. I position mine so the long sides run north-south, which maximizes sunlight exposure and makes it easier to reach across the width. Leave at least 2 feet of walking space between beds for easy maintenance and harvesting.
For customizable harvest zones, consider adding a movable drip irrigation system that you can adjust as your crops change. This way, you're not limited to just one planting scheme—you can shift your irrigation lines to match whatever you're growing in each section. Test your bed positions by walking through them at different times of day to ensure comfortable access.
💧 Step 4: Fill with the Right Soil Mix for Your Climate
Fill your beds with a mix of equal parts topsoil, compost, and perlite or coarse sand to create a loose, fertile growing medium. I like to add a 2-inch layer of compost at the bottom for drainage, then build up with the soil mix. This layering prevents waterlogging while providing nutrients right where the roots need them.
For customizable growing zones, consider dividing your bed fill by sections. For example, the first half could be rich in compost for leafy greens, while the second half might have more sand for root vegetables. This way, you're tailoring each part of your bed to the specific needs of the crops you plan to grow there.
✂️ Step 5: Install Pathways and Finishing Touches
Create pathways between your beds using gravel, stepping stones, or even wood chips to keep your feet clean and prevent soil compaction. I like to use 3-4 inches of gravel for pathways, as it drains well and stays firm underfoot. For a polished look, add a border of edging stones around the outside of your beds to keep soil contained.
Finally, add labels or a simple map of your beds to track what you're growing where. This helps with crop rotation and makes it easy to remember which section gets which care. With your modular cedar beds, you can rearrange everything next season to try new layouts or accommodate different plants—making your vegetable garden truly customizable.
Tips & tricks for perfect modular cedar raised veg beds
Took me a while to figure these out, so here goes—these tricks will help you avoid common pitfalls and maximize your customizable harvest zones.
Layout Precision: When sketching your 4-foot wide beds in Step 1, I recommend using a tape measure to verify your space before marking with stakes. Many people forget to account for the 2-foot walking space between beds mentioned in Step 3—this can make your garden feel cramped later. Trust me, it's worth measuring twice before cutting your cedar boards.
Woodworking Wisdom: In Step 2, pre-drilling those holes before screwing together your 2x6s or 2x8s makes all the difference. I've seen cedar split when people skip this step, especially with the 4x4 corner posts. Use a drill bit slightly smaller than your 3-inch screws, and always clamp your boards securely before driving screws to prevent warping. The ½-inch gaps at corners are crucial too—they prevent the wood from buckling as it expands in humidity.
Sunlight Strategy: For the 6-8 hours of sunlight requirement in Step 3, I suggest testing your bed locations at different times of day. Shadows change throughout the year, so what seems sunny in summer might get shaded in winter. Place taller plants on the north side of your beds (in the Northern Hemisphere) to prevent shading shorter crops. This simple adjustment can double your harvest potential in smaller spaces.
Soil Layering Secret: When filling your beds in Step 4, don't just dump the equal parts topsoil, compost, and perlite all at once. Build it up in layers—start with that 2-inch compost base, then alternate between topsoil and perlite every 4-6 inches. This creates better drainage channels while keeping nutrients available to roots. The compost at the bottom also helps prevent waterlogging, which is especially important in clay-heavy soils.
Pro Tips for Raised Veg Bed Ideas
- Took me a while to figure these out, so here goes—these tricks will help you avoid common pitfalls and maximize your ...
- Layout Precision: When sketching your 4-foot wide beds in Step 1, I recommend using a tape measure to verify your spa...
- Woodworking Wisdom: In Step 2, pre-drilling those holes before screwing together your 2x6s or 2x8s makes all the diff...
Frequently asked questions
Got questions about creating your own raised veg bed? Here are some of the most common ones—and their answers—to help you get started with confidence!
What’s the best height for a raised veg bed?
A standard 6–12 inches height works for most vegetables, but taller beds (12–18") are ideal for root crops like carrots or potatoes. If mobility is a concern, 12–18" beds make gardening easier on your back. Just ensure proper drainage—avoid water pooling at the bottom!
When is the best time to build a raised veg bed?
Spring or early fall are the sweet spots! Building in spring lets you plant immediately, while fall gives your soil time to settle before next year. Avoid winter construction—frozen ground can shift your frame. Pro tip: If you’re in a warm climate, year-round building is possible, but prioritize soil prep first.
Can I use alternatives to cedar for raised beds?
Pressure-treated lumber (untreated, CCA-free) or redwood are durable options, while galvanized metal or composite materials resist rot. For budget-friendly choices, try untreated pine (seal it!) or reclaimed wood. Just avoid chemically treated wood—it can leach toxins into your soil.
How do I keep pests out of my raised veg bed?
Start with hardware cloth or mesh at the bottom to block burrowing critters. Companion planting (e.g., marigolds with tomatoes) deters insects naturally. For slugs/snails, add copper tape around edges. A 3-inch mulch layer (straw or wood chips) also confuses pests while retaining moisture.
Do raised beds stay warm longer in cold climates?
Yes! Raised beds warm up faster in spring due to better drainage and sunlight exposure. For extra warmth, add compost or manure before planting. In cold snaps, row covers or cloches create microclimates. Black plastic mulch can raise soil temps by 10–15°F—perfect for early seedlings!
Wrapping up and next steps
Creating a raised veg bed with modular cedar frames is a game-changer for any gardener! 🌱 You’ve got the tools, the know-how, and now the confidence to design a space that’s as functional as it is beautiful.
Whether you’re a beginner or a seasoned green thumb, these customizable harvest zones will help you grow your best crops yet.
Ready to get started? Sketch your layout today, gather your materials, and watch your garden transform into a thriving, organized oasis. Happy planting! 🌿