
Tools
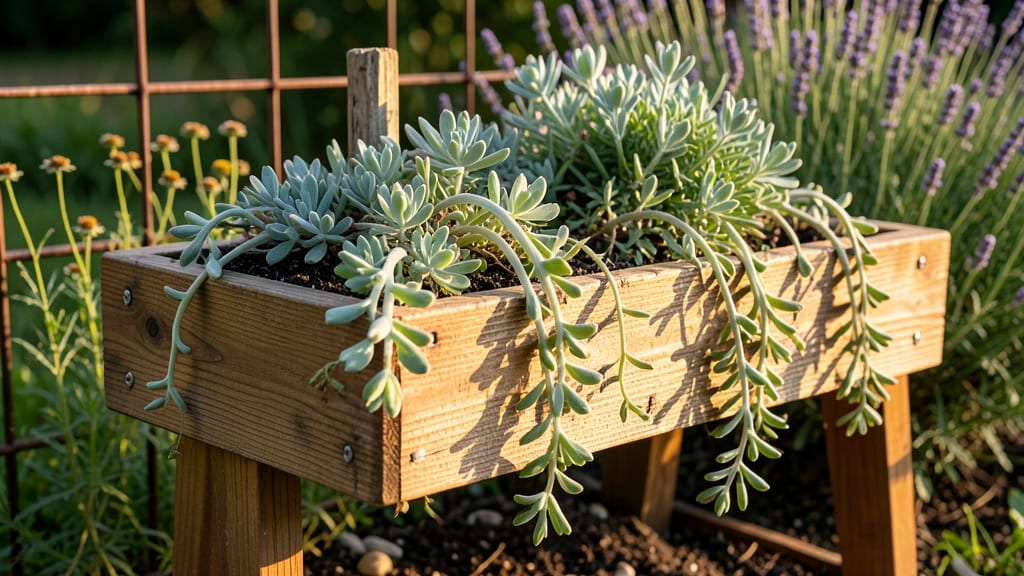
A raised garden bed with shelf turns your tiny yard into a lush, productive paradise—without taking up extra ground space. 🌱 I built mine after realizing my patio could grow twice as much if I just added shelves to the sides, and now I fit herbs, lettuce, and even small tomatoes where I once had bare concrete.
The magic happens with 2x4s and plywood—simple materials that create sturdy planting levels while keeping everything accessible. You’ll love how it doubles your growing area vertically, letting you tuck in strawberries on the bottom shelf while succulents cascade over the edges.
My setup even includes a small shelf at the back for storing tools, so everything stays organized. By the end of the project, you’ll have a customizable, multi-level garden that’s easier to maintain than traditional in-ground beds.
The shelves prevent soil spillage, deter pests from reaching the ground, and let you grow plants with different sunlight needs in one spot. Perfect for balconies, small backyards, or urban gardens where space is at a premium. Let’s get your shelves built—your future harvest will thank you!
📚 In This Guide
- What you need
- Instructions
- Tips and common mistakes
- Wrapping up and next steps
What you need
- ● Untreated lumber (cedar or redwood recommended) – 2x6 boards (8 ft long) for framing (4 pieces), 1x12 boards (8 ft long) for bed panels (2 pieces), and 1x6 boards (4 ft long) for the shelf (2 pieces). Total: ~12 ft of 2x6, 16 ft of 1x12, and 8 ft of 1x6.
- ● Galvanized screws or deck screws – 2.5-inch (for framing) and 1.5-inch (for attaching panels and shelf). ~50 screws total.
- ○ Corner braces (optional but recommended) – 4 pieces for extra stability.
- ● Landscape fabric – 1 roll (to line the bed and block weeds).
- ● Garden soil or potting mix – 1–2 cubic feet (depending on bed size).
- ● Wood glue – 1 small bottle (for reinforcing joints).
- ● Measuring tape – 25 ft.
- ● Circular saw or handsaw – For cutting lumber to size.
- ● Drill/driver – With Phillips head bit.
- ● Speed square – For marking precise angles.
- ● Level – 24-inch (to ensure your bed is even).
- ● Work gloves & safety goggles – Because DIY safety first! 🛡️
- ● Stain or sealant – To protect wood from weather.
- ● Drip irrigation kit – For hassle-free watering.
- ● Trellis or lattice – To add vertical gardening space.
- ● Paint or chalkboard panel – For labeling plants (fun and functional!).
Step-by-Step instructions for building a raised garden bed with shelf
Here's how to create a space-saving vertical garden that doubles your planting area without taking up extra yard space.
🪴 Step 1: Choose and Prepare Your Materials
Start with untreated lumber—2x6s and 2x4s work best for durability. Cut four 8-foot-long boards for the bed frame and two 4-foot-long boards for the shelf supports. You'll also need 1-inch deck screws, 2x4 corner braces, and landscape fabric to line the bottom. I like cedar because it naturally resists rot, but pressure-treated wood works too if you avoid planting edibles directly against it.
Pre-drill screw holes to prevent splitting, especially at the corners. Lay out your boards in an 8-foot-long by 4-foot-wide rectangle, leaving a 12-inch gap between the bottom frame and shelf. This gap creates space for planting shallow-rooted herbs or flowers on the shelf while deeper-rooted veggies thrive below. Mark the screw locations with a pencil before assembling.
🌱 Step 2: Assemble the Frame and Shelf Structure
Attach the corner braces to the inside of each corner using 3-inch deck screws. These braces add stability, especially important if you plan to fill the bed with heavy soil. Next, screw the shelf supports—two 4-foot-long 2x4s—horizontally across the inside of the frame, about 12 inches from the bottom. This creates your planting shelf while leaving room for deeper roots below.
Double-check that everything is square by measuring diagonally from corner to corner. If one diagonal is longer than the other, adjust the boards until both measurements match. Once the frame is square, pre-fill the bed with 12 cubic feet of high-quality garden soil (a mix of topsoil, compost, and perlite works well). This weight will help stabilize the structure before you add plants.
☀️ Step 3: Install the Shelf and Add Planting Layers
Lay a 1-inch-thick landscape fabric over the bottom of the frame before adding soil. This prevents weeds from creeping up from the ground while allowing water to drain through. Now, add a 2-inch layer of coarse gravel or broken pottery pieces for drainage, then fill the bottom section with 6 cubic feet of soil. This lower layer is perfect for root crops like carrots or potatoes.
For the shelf, use 1-inch-thick landscape fabric again to line the top surface. Fill it with a lighter, well-draining mix—4 cubic feet of potting soil blended with compost. This lighter mix is ideal for shallow-rooted plants like lettuce, strawberries, or herbs. Water everything thoroughly before planting to help the soil settle and eliminate air pockets.
🌿 Step 4: Plant and Maintain Your Vertical Garden
Start by planting deeper-rooted crops in the bottom section, like tomatoes, peppers, or bush beans. These will have plenty of room to grow downward. On the shelf, place shallow-rooted plants like lettuce, radishes, or thyme. Water the shelf first, then the bottom section, to ensure even moisture distribution. I like to use a soaker hose for the bottom layer to keep the soil consistently damp without overwatering.
After planting, mulch the shelf with 1-2 inches of straw or shredded leaves to retain moisture and suppress weeds. For the bottom layer, use 3-4 inches of mulch to help regulate soil temperature and reduce evaporation. Check the soil moisture daily—shelves dry out faster than ground-level beds, so they may need watering every 1-2 days depending on your climate.
⏰ Step 5: Monitor and Adjust for Long-Term Success
Weigh down the corners of the bed with bricks or cinder blocks if you notice it shifting in wind or when watering. This is especially important if your bed is on uneven ground. Every 2-3 weeks, check the shelf for signs of drying out—you'll see leaves curling or soil pulling away from the edges as a warning. Adjust your watering schedule accordingly.
Rotate crops annually to prevent soil depletion and disease buildup. If you notice plants on the shelf struggling, try moving them to the bottom section the following year. The shelf is perfect for early spring planting—it warms up faster than the ground, giving you a head start on the growing season. With proper care, your raised bed with shelf will produce twice the harvest in half the space!
Tips & tricks for perfect raised garden beds with shelves
Building this vertical garden is all about maximizing space without sacrificing quality—here's how to avoid common pitfalls and get the most from your setup.
Material Selection: Cedar is my top recommendation for untreated lumber because it naturally resists rot and insects, but if you prefer pressure-treated wood, avoid planting edibles directly against it. For the shelf supports, use two 4-foot-long 2x4s—this creates that perfect 12-inch gap between shelf and bottom that prevents root competition between shallow and deep-rooted plants. I've seen people use thinner boards, but they bend under the weight of soil and plants over time.
Stability is Key: In Step 2, when attaching corner braces, don't skimp on the 3-inch deck screws. I've seen beds collapse when gardeners use shorter screws or skip the corner braces entirely. For extra stability on uneven ground, pre-drill pilot holes slightly smaller than your screws—this prevents wood splitting and ensures everything stays square. After filling with soil, weigh down corners with bricks if your yard gets windy.
Soil Layering Strategy: The 2-inch drainage layer of gravel or broken pottery in Step 3 is non-negotiable—it prevents waterlogging that can rot roots. For the shelf's 4 cubic feet of potting soil, I blend in 20% perlite to improve aeration. This lighter mix prevents compaction that would smother shallow roots. Water everything thoroughly before planting to help soil settle—this eliminates air pockets that can stunt growth.
Watering Wisdom: Shelves dry out faster than ground-level beds, so check moisture daily in hot weather. I use a soaker hose for the bottom layer to maintain consistent dampness without overwatering. For the shelf, water gently from above—this prevents soil erosion while delivering moisture directly to roots. Mulching with 1-2 inches of straw on the shelf helps retain moisture between waterings, while the 3-4 inches on the bottom layer regulates temperature better.
Pro Tips for Raised Garden Bed With Shelf
- Building this vertical garden is all about maximizing space without sacrificing quality—here's how to avoid common pi...
- Material Selection: Cedar is my top recommendation for untreated lumber because it naturally resists rot and insects,...
- Stability is Key: In Step 2, when attaching corner braces, don't skimp on the 3-inch deck screws. I've seen beds coll...
Frequently asked questions
Got questions about raised garden beds with shelves? You’re not alone!
Here are some of the most common concerns—and straightforward answers—to help you get the most out of your vertical gardening space.
What’s the best time of year to install a raised garden bed with shelves?
Install your raised bed with shelves in early spring (before planting season) or late fall (after harvest). This gives soil time to settle, prevents erosion, and ensures shelves are sturdy before heavy planting. If you’re in a mild climate, late winter works too!
Can I add shelves to an existing raised bed, or do I need to build from scratch?
Yes! Many DIYers retrofit shelves to existing beds using L-brackets or sturdy wooden planks. Just ensure the bed’s frame can support the extra weight (aim for 12–16 inches of depth per shelf). Pre-built kits with built-in shelves are also a great option for beginners.
What plants thrive on shelves in a raised bed?
Shelves are perfect for shallow-rooted, compact plants like:
- Herbs (basil, thyme, parsley)
- Leafy greens (lettuce, spinach, kale)
- Strawberries or dwarf tomatoes
- Peppers and bush beans
How do I prevent shelves from sagging or collapsing under plant weight?
Sagging shelves usually mean weak support or uneven weight distribution. Reinforce with:
- Extra 2x4 crossbeams under shelves (every 2–3 feet).
- Heavy-duty metal brackets (not just screws).
- Balancing lightweight mulch (straw, not rocks) on top.
Are there affordable alternatives to built-in shelves?
Try these budget-friendly hacks:
- Hanging planters (macramé or wire baskets) for herbs/trailers.
- Tiered plant stands (IKEA or thrifted) on the bed’s edge.
- Vertical trellises (for cucumbers, peas) to free up shelf space.
- Pallet gardens (repurposed wood pallets with built-in gaps).
Wrapping up and next steps
A raised garden bed with shelf is your secret weapon for turning small spaces into thriving green oases! 🌱 Whether you’re a first-time gardener or a seasoned pro, this design maximizes vertical space while keeping your plants happy and organized.
With the right materials and a little creativity, you’ll soon be harvesting fresh herbs, veggies, or flowers—without sacrificing your backyard’s square footage.
Ready to get started? Sketch your design, gather your supplies, and build your dream bed today! Your future self (and your plants) will thank you. 🚀