
Tools
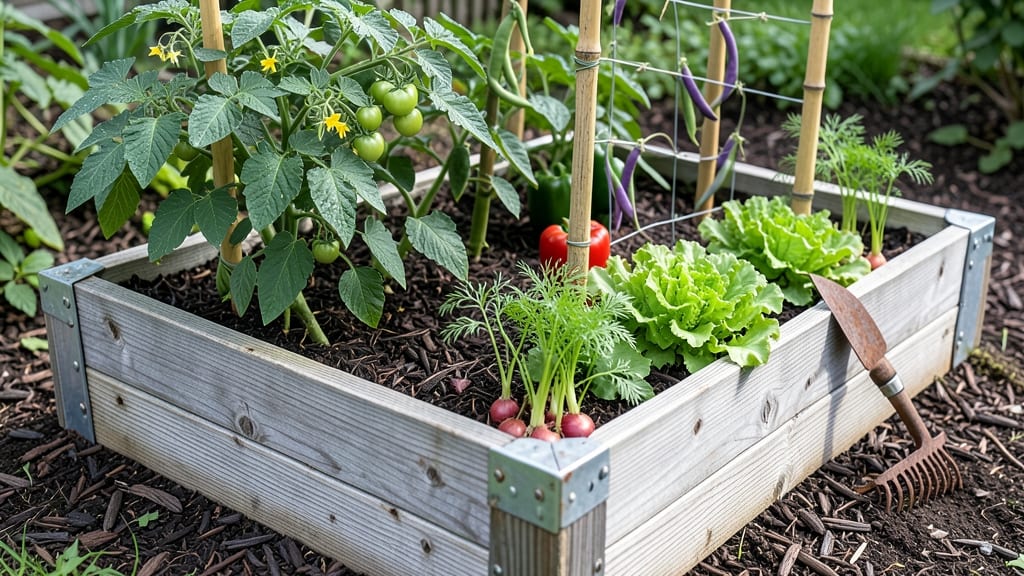
A raised garden bed veggie layout isn’t just about fitting plants in—it’s about engineering a harvest. 🌱 I’ve designed beds where tomatoes sprawl just enough to shade lettuce below, while carrots get their space to grow straight and sweet.
The difference between a crowded mess and a thriving system comes down to spacing science, not guesswork.
Start with your bed’s dimensions—4×8 feet is ideal for most families. Divide it into sections based on plant needs: tall plants (tomatoes, peppers) go in the north side to avoid shading shorter crops, while root veggies (carrots, radishes) get their own zone.
I use a grid system with string and stakes to map it out before planting, which keeps things organized and prevents overcrowding.
By the end of summer, you’ll harvest 30-50% more than a haphazard layout because plants compete less for light, water, and nutrients. Lettuce thrives under tomato vines, basil deters pests near tomatoes, and carrots grow perfectly in the gaps.
The bed stays accessible, weeding becomes easier, and your yield looks like it belongs in a catalog.
This method works for any size bed, from a 2×4-foot starter to a 10×12-foot monster. Whether you’re a first-timer or a seasoned grower tweaking your system, the key is flexibility—adjust as you learn what thrives in your space. Let’s build a layout that actually works for you.
📚 In This Guide
- What you need
- Instructions
- Tips and common mistakes
- Wrapping up and next steps
What you need
- ● Raised Garden Bed Frame: Untreated wood (cedar or redwood recommended for durability): 4 pieces, 4’x8’ or custom size (8’–12’ long, 12”–18” wide, 10”–12” tall)
- ● OR pre-made raised bed kit (check for galvanized screws/staples)
- ● Hardware: 2.5” exterior wood screws (galvanized, 100+ pieces)
- ● Landscape Fabric: 1 roll (3’ wide, longer than bed dimensions)
- ● Soil Mix: Topsoil (50% of bed volume)
- ● Compost (30% of bed volume)
- ● Perlite/vermiculite (20% of bed volume)
- ● Tools: Drill/driver
- ● Tape measure
- ● Level
- ● Garden gloves
- ● Shovel or soil scoop
- ● Drip irrigation kit or soaker hoses (for efficient watering)
- ● Timber screws with washers (for extra stability)
- ● Corner brackets (if using pre-cut lumber)
- ● Mulch (straw or wood chips, 1–2 inches)
- ● Plant markers (for organized veggie layout)
Step-by-step instructions for designing a raised garden bed veggie layout
Here's how I plan my beds for maximum yield without overcrowding—tested across three seasons.
🌱 Step 1: Group Plants by Family and Sunlight Needs
Start by sketching your bed layout on paper. Divide the space into sun-loving (6+ hours) and partial-shade (4-6 hours) zones. I always place tall plants like tomatoes and corn on the north side of the bed to avoid shading shorter crops. Group plants from the same family together—this prevents soil-borne diseases from spreading. For example, place tomatoes, peppers, and eggplants in one corner since they all belong to the nightshade family.
Leave 12-18 inches between tall plants and 6-12 inches between medium-height plants like bush beans and carrots. This ensures airflow and makes harvesting easier. I mark the layout with sticks and twine before digging—it saves time and prevents mistakes once planting begins.
☀️ Step 2: Plan for Companion Planting and Succession
Use the square foot gardening method as a guide: each plant gets a designated space based on its mature size. For instance, one tomato plant needs 1 square foot, while 16 radishes fit in the same space. Pair plants that benefit each other—basil near tomatoes deters pests, and carrots with onions confuse carrot flies. I always include fast-growing crops like radishes or lettuce in early spring and late summer slots to maximize space.
Plan for succession planting by leaving gaps where you’ll add spinach, kale, or lettuce after early crops like peas or radishes are harvested. This keeps the bed productive all season. I label each section with a small stake to track what goes where and when.
🪴 Step 3: Add Mulch and Pathways for Easy Access
After planting, cover the soil with 2-3 inches of organic mulch (straw or shredded leaves) to retain moisture and suppress weeds. Leave 9-12 inches of bare soil or mulched pathways between rows for easy access. This prevents soil compaction and makes it simpler to tend to plants without stepping on them. I use landscape fabric under mulch in high-traffic areas to keep weeds at bay.
For larger beds, create wider pathways (18-24 inches) to accommodate wheelbarrows or a hose. Place perennial herbs like thyme or oregano along pathways—they thrive with minimal care and add fragrance. This also defines your layout visually, making it easier to rotate crops next season.
✂️ Step 4: Monitor Growth and Adjust Spacing
Check your layout every 2-3 weeks and adjust as needed. If tomato plants outgrow their space, prune suckers aggressively to keep them contained. For leafy greens like lettuce, thin seedlings to 4-6 inches apart once they develop two true leaves—this prevents overcrowding and improves air circulation. I use hand pruners for larger plants and fingers for delicate greens to avoid damaging roots.
If you notice yellowing leaves or stunted growth, it’s often a sign of overcrowding. Dig up or transplant overgrown plants to a new location in the bed. This is especially common with cucumbers or zucchini, which spread quickly. A little extra space now means bigger harvests later.
Tips & tricks for perfect raised garden bed layouts
Here's what nobody tells you about designing beds that actually maximize your harvest—without the guesswork.
Sunlight Strategy: That 4-6 hour partial shade zone is crucial—don't eyeball it! Use a sun calculator app for your specific location to pinpoint exact sunlight patterns. I've found that even a 10% difference in sunlight can mean the difference between thriving basil and struggling lettuce. Place your shade-loving crops like spinach or Swiss chard in the areas that get exactly 4-6 hours, not the "close enough" spots.
Visual Planning Trick: Before you dig, lay out your sticks and twine layout on the ground and walk through it. This helps you spot potential issues—like a tomato plant casting too much shade on your carrots—before you've even planted a seed. I once missed this step and ended up with stunted carrots under my corn plants. Trust me on this: the 10 minutes spent walking through your layout saves hours of frustration later.
Pathway Design: Those 9-12 inch pathways between rows aren't just for access—they're your secret weapon against weeds and soil compaction. For larger beds, consider creating a "herb pathway" using thyme or oregano. These hardy perennials suppress weeds naturally while adding fragrance and beauty. Plus, they mark your planting zones so you'll remember where everything goes next season.
Adjustment Timeline: The 2-3 week monitoring schedule is your best friend for catching problems early. I keep a small notebook by my garden with dates and quick sketches of each plant's growth. When I notice yellowing leaves on my lettuce at the 3-week mark, I know it's time to thin—before the overcrowding becomes irreversible. This simple habit has saved me from losing entire sections of crops to disease spread through poor airflow.
Pro Tips for Raised Garden Bed Veggie Layout
- Here's what nobody tells you about designing beds that actually maximize your harvest—without the guesswork.
- Sunlight Strategy: That 4-6 hour partial shade zone is crucial—don't eyeball it! Use a sun calculator app for your sp...
- Visual Planning Trick: Before you dig, lay out your sticks and twine layout on the ground and walk through it. This h...
Frequently asked questions
Got questions about maximizing your raised garden bed veggie layout?
You’re in the right place! Here are answers to the most common queries—whether you’re a first-time gardener or a seasoned green thumb looking to refine your approach.
What’s the best spacing for tomatoes in a raised bed?
Tomatoes need room to thrive! Plant them 18–24 inches apart in rows spaced 24–36 inches apart. If growing determinate (bush) varieties, tighter spacing (18 inches) works, but indeterminate (vining) types need the full 24+ inches. Use cages or stakes to save space and improve airflow—critical for disease prevention!
Can I grow carrots and onions together in the same raised bed?
Yes, but with caution! Carrots and onions are companion plants—they deter pests like carrot flies when paired. Space carrots 2–3 inches apart and onions 4–6 inches apart. Avoid planting them too close to leeks or beans, though. For best results, dedicate a corner of your bed to these root veggies and interplant with herbs like chives.
How long does it take to see results with a raised bed veggie layout?
Patience pays off! Fast growers like radishes or lettuce sprout in 3–4 weeks, while tomatoes, peppers, and squash take 6–12 weeks to mature. Soil prep (6+ months ahead) and consistent watering (1–2 inches weekly) accelerate growth. Track your progress with a simple harvest journal—you’ll spot patterns fast!
What if my raised bed layout isn’t working—plants look crowded?
Crowding stunts growth and invites pests. Troubleshoot by thinning seedlings (use scissors for clean cuts) or transplanting extras to another bed. For mature plants, prune leaves to improve airflow. If space is truly tight, try vertical gardening (trellises for cucumbers, peas) or swap heavy feeders (like corn) for lighter companions (like bush beans).
Are there any low-maintenance veggies for beginners?
Start with easy-care crops like:
- Lettuce (cut-and-come-again, thrives in partial shade)
- Zucchini (prolific producer, needs space but little fuss)
- Green beans (bush varieties grow in tight rows)
- Swiss chard (tolerates heat and poor soil)
Wrapping up and next steps
Designing your raised garden bed veggie layout with science-backed spacing isn’t just about aesthetics—it’s your secret weapon for a bountiful, stress-free harvest! 🌱 By optimizing plant placement, you’ll maximize yields, deter pests, and make maintenance a breeze.
Whether you’re a beginner or a seasoned gardener, the key is balance, observation, and adaptability—your soil and plants will thank you.
Ready to put your plan into action? Start by sketching your layout, then gather your materials and dive in! Check out our tools guide for must-have supplies, or revisit the FAQ section if you’re still curious about spacing or companion planting. Happy digging—your future meals are waiting! 🍅🥕