
Tools
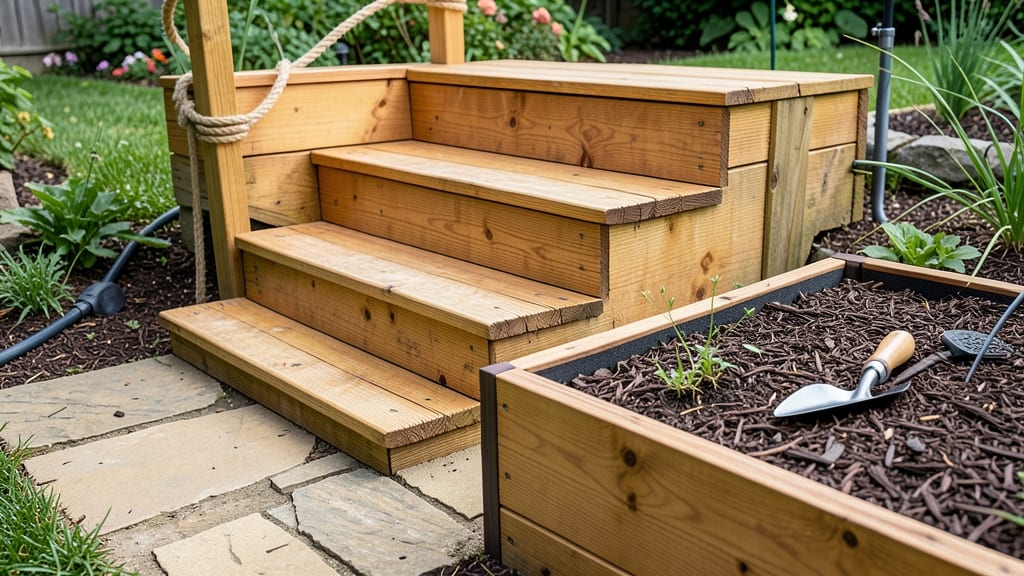
Building a raised garden bed that fits your space and needs is simpler than you think—no advanced skills required. 🌱 I’ve assembled these modular beds in under 2 hours each time, and the first step is choosing a design that matches your yard’s layout and your gardening goals.
The right height makes planting easier on your back, while customizable widths let you grow everything from salad greens to full-size tomatoes.
You’ll need basic tools—a tape measure, drill, and level—and materials like 2x6 lumber (or cedar for rot resistance) or metal/composite panels for durability. My favorite trick? Starting with corner posts to keep everything square before attaching the sides.
This method ensures your bed stays sturdy even after years of planting. For drainage, I add landscape fabric at the bottom before filling with soil.
The payoff comes when you’re kneeling less and harvesting more. A 12-inch-tall bed is ideal for most gardeners, while 24-inch heights work great for wheelchair accessibility. Once assembled, you’ll control the soil quality perfectly—no more battling compacted ground or weeds choking your plants.
The modular design means you can expand or reconfigure as your garden grows.
Pro tip: Pre-drill holes to avoid splitting wood, and use galvanized screws for extra strength. If you’re working with uneven ground, adjust the bed height with gravel or pavers underneath. This project transforms your gardening experience—let’s get those beds built!
📚 In This Guide
- What you need
- Instructions
- Tips and common mistakes
- Wrapping up and next steps
What you need
- ● Lumber: 2x6 or 2x8 pressure-treated boards (for framing) – 10-12 feet total
- ● 1x6 or 1x8 boards (for step treads) – 2-4 boards, depending on step width
- ● Hardware: 3-inch outdoor deck screws (galvanized or stainless steel) – 50-100 screws
- ● 2.5-inch exterior wood screws – 20-30 screws
- ○ Corner braces (optional but recommended) – 4-6 braces
- ○ Fasteners: Galvanized nails (optional for extra reinforcement) – 1 lb box
- ● Circular saw or miter saw (for precise cuts)
- ● Drill/driver (with screw attachment)
- ● Tape measure
- ● Speed square (for marking angles)
- ● Level (to ensure steps are even)
- ● Safety gear (gloves, goggles, ear protection)
- ● Wood stain or sealant (for weather resistance)
- ● Landscape fabric (to prevent weeds between steps)
- ● Post caps or decorative trim (for a polished look)
- ● Pre-cut step templates (to save time)
Step-by-step guide to building a modular raised garden bed
Here’s how I assemble sturdy, custom-height raised beds that last seasons and adapt to any space.
🪴 Step 1: Choose and Prepare Your Base Materials
Start with pressure-treated lumber (at least 2x6 or 2x8 boards) to resist rot—cedar or redwood are even better for longevity. Cut your boards to the desired dimensions (I like 4x8 feet for standard beds) using a circular saw or miter box. For modularity, I build 2-foot-wide sections that can be arranged in any configuration later.
Sand all edges and ends to prevent splinters—this is especially important if kids or pets will be near the bed. Pre-drill holes for screws at each corner joint to prevent wood from cracking when you assemble. I use 3-inch deck screws for stability, spacing them 6 inches apart along each board edge.
📏 Step 2: Assemble the Frame in Sections
Lay two boards side by side for the bottom frame. Align them perfectly and secure with screws at each corner, then add screws every 12 inches along the length for reinforcement. For 12-inch-tall beds, add a second layer of boards on top to create the sides—this doubles the height capacity while keeping the structure lightweight.
Double-check your corners with a speed square to ensure 90-degree angles. If you’re building multiple sections, use the same measurements for all to ensure uniformity. I like to assemble one full section at a time before moving to the next—this keeps the process organized and prevents misaligned joints.
✂️ Step 3: Reinforce and Add Optional Supports
For beds taller than 12 inches, add corner braces or internal support beams every 2 feet along the length. These prevent wobbling, especially when filled with soil. I use 2x4 stakes cut to 18-inch lengths and screw them diagonally from the bottom frame to the top rail at each corner.
If your bed will sit directly on grass or uneven ground, lay down landscape fabric first to suppress weeds. For extra stability, bury the bottom 2-3 inches of the frame into the ground or anchor it with stakes at each corner. This keeps the bed from shifting over time.
🌱 Step 4: Line and Fill for Planting Readiness
Line the inside of the bed with cardboard or landscape fabric to block weeds and grass from invading your soil. Cut it to fit snugly, overlapping edges by 2 inches and securing with staples. This step is non-negotiable—weeds will compete aggressively with your plants.
Fill the bed with a 3:1 ratio of topsoil to compost, mixing them thoroughly. Avoid garden soil alone—it compacts easily in raised beds. I top-dress with 2-3 inches of mulch (like straw or wood chips) to retain moisture and suppress weeds. Water lightly after filling to settle the soil before planting.
⏰ Step 5: Customize and Position for Optimal Growth
Arrange your modular sections in any configuration—L-shapes, curves, or straight rows. For sun-loving plants, position the bed where it gets 6+ hours of sunlight daily. If your space is shady, opt for shade-tolerant herbs or greens instead.
Add drip irrigation lines or soaker hoses along the bottom before filling to automate watering. I like to install them at the 2-inch depth to deliver moisture directly to roots. Test your setup by running water for 10 minutes—adjust flow rates to avoid overflow.
Tips & tricks for perfect modular raised garden beds
Building a sturdy, customizable raised bed takes the right prep work—here's how to avoid common pitfalls and create a structure that lasts.
Material Selection: While pressure-treated lumber is budget-friendly, cedar or redwood last significantly longer (15+ years) and resist rot without chemical treatments. For cost-effective alternatives, consider recycled composite lumber—it's splinter-free and won't warp like traditional wood. If using pressure-treated wood, opt for the newer "ground-contact" rated lumber that's safer for edible gardens.
Assembly Technique: In Step 2, when aligning your 2-foot-wide sections, use a clamp at each corner before screwing to prevent shifting during assembly. I've found that pre-drilling holes at 6-inch intervals (as instructed) works best with a 1/8-inch bitthird screw in the center of each board edge.
Reinforcement Strategy: The corner braces mentioned for beds over 12 inches tall can be made from scrap wood—cut 2x4 pieces at 45-degree angles and screw them diagonally between the top and bottom rails. This creates a simple but effective triangular support system. For beds on slopes, add horizontal support beams every 2 feet along the length to prevent bowing under soil weight.
Soil Mixing: When creating your 3:1 topsoil to compost ratio, sift the soil first to remove rocks and debris—this prevents uneven settling. For heavy clay soils, add 20% perlite or vermiculite to improve drainage. I've had great success with a 40% compost, 40% topsoil, 20% coconut coir blend for moisture retention in hot climates.
Pro Tips for Raised Garden Bed Steps
- Building a sturdy, customizable raised bed takes the right prep work—here's how to avoid common pitfalls and create a...
- Material Selection: While pressure-treated lumber is budget-friendly, cedar or redwood last significantly longer (15+...
- Assembly Technique: In Step 2, when aligning your 2-foot-wide sections, use a clamp at each corner before screwing to...
Frequently asked questions
Got questions about building or using raised garden bed steps?
You’re not alone! Here are answers to the most common concerns—from planning to troubleshooting—so you can create a safe, functional, and stylish solution for your modular garden.
What’s the best material for raised garden bed steps?
Opt for pressure-treated lumber (cedar or redwood) for durability and rot resistance, or use composite decking for a low-maintenance, splinter-free option. For a rustic look, untreated wood works but requires sealing. Avoid untreated pine—it warps quickly when exposed to moisture.
How long does it take to install steps for a raised bed?
For a basic 2–3 step setup, plan 1–2 hours if you’re experienced with basic carpentry. Beginners may need 3–4 hours, especially if cutting materials or troubleshooting fits. Pre-cutting lumber and using modular step kits (like those with pre-drilled holes) cuts time significantly.
Can I add steps to an existing raised bed without rebuilding it?
Yes! If your bed has a sturdy frame, you can attach steps externally using L-brackets or angled supports. For retrofits, ensure the steps align with the bed’s height (typically 12–18 inches per step) and secure them to the frame’s sides. Avoid overloading the structure—reinforce the frame if needed.
How wide should the steps be for safety and ease of access?
Steps should be at least 12–18 inches wide for comfortable footing. For mobility access, aim for 24+ inches. Tread depth (front-to-back) should match the riser height (e.g., 7-inch riser = 7-inch tread) to prevent tripping. Add non-slip treads if using smooth materials like concrete.Will steps work in winter or icy conditions?
To prevent slips, use steel or aluminum steps (they won’t rot) and add cleats or rubber grips to treads. For snow, clear steps regularly or install heated mats under treads. Avoid wood steps in freezing temps—opt for composite or metal if winter gardening is your goal.
Pro Tip:
Need extra grip? Sand the edges of wooden steps to smooth rough spots, or apply outdoor-rated grip tape to treads. For a seamless look, paint steps to match your bed’s frame—just use non-toxic, weatherproof paint!
Wrapping up and next steps
Building your own raised garden bed steps is a game-changer for accessibility and customization! Whether you’re accommodating mobility needs or simply adding style to your garden, modular assembly makes the project manageable and rewarding.
With the right materials and a little patience, you’ll create a functional, long-lasting solution that elevates your gardening experience—literally.
Ready to get started? Grab your tools, follow the steps, and soon you’ll be enjoying a garden that’s as easy to reach as it is beautiful! 🌱✨