
Plants
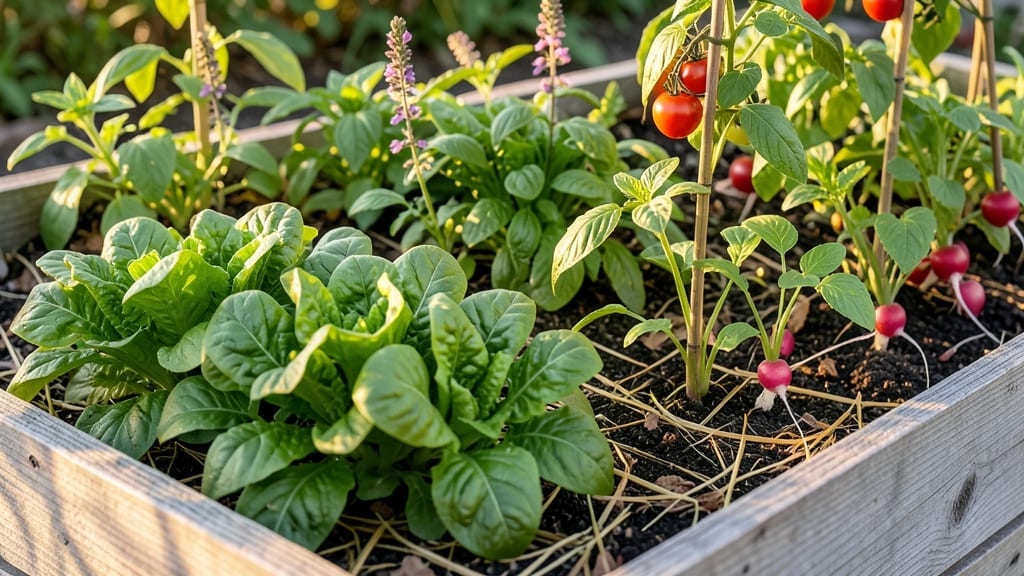
Raised garden bed plants transform even tiny spaces into productive havens. 🌱 I learned the hard way that not all vegetables thrive in confined beds—some sprawl, others bolt—but the right choices yield bountiful harvests in just a few square feet.
The secret lies in matching plant needs to bed dimensions, from shallow-rooted herbs to compact tomatoes that won't outgrow their containers.
Start with fast-maturing crops like lettuce, radishes, and bush beans that deliver results in 4-6 weeks. Herbs such as basil, parsley, and chives flourish in 6-inch-deep beds, while deeper-rooted veggies like carrots or beets need 12+ inches.
Drainage holes and quality soil mix (60% topsoil, 30% compost, 10% perlite) prevent soggy roots and stunted growth—trust me, I've seen both.
You'll notice healthier plants with fewer pests and diseases, thanks to the raised bed's natural elevation. The soil stays warmer in spring, giving you a 2-3 week head start on planting, and weeds struggle to take hold.
By midsummer, your bed will be a vibrant green machine, producing more than you expected from such a small footprint.
This method works for balconies, patios, or backyard corners—no garden required. The key is adapting plant choices to your bed's size and sunlight. Let's get those beds planted right!
📚 In This Guide
- What you need
- Instructions
- Tips and common mistakes
- Wrapping up and next steps
What you need
- ● Raised garden bed kit (pre-assembled or lumber for DIY): Untreated cedar, redwood, or composite wood (rot-resistant): 4–6 boards, 2x6x8 ft or 2x8x8 ft
- ● Corner brackets or galvanized screws: 4–8 pieces
- ● Landscape fabric: 1–2 sq. ft. per sq. ft. of bed base (to block weeds)
- ● Garden soil mix: Topsoil: 2–3 cubic feet per sq. ft. of bed
- ● Compost: 1–2 cubic feet per sq. ft.
- ○ Perlite or vermiculite (optional, for drainage): 1–2 bags
- ● Tools: Measuring tape
- ● Drill or screws
- ● Level
- ● Shovel or garden fork
- ● Wheelbarrow (for hauling soil)
- ● Seeds or seedlings: Herbs (e.g., basil, parsley, thyme): 1–2 plants per sq. ft.
- ● Veggies (e.g., lettuce, tomatoes, peppers): 1–3 plants per sq. ft. (check spacing needs!)
- ● Organic mulch (straw or shredded leaves): 1–2 inches (to retain moisture)
- ○ Plant markers (optional, for labeling)
- ● Drip irrigation kit or soaker hoses
- ● Garden kneeler or stool
- ● Timers for automated watering
- ● Decorative edging or rocks for a polished look
Step-by-Step guide for selecting and planting raised garden bed plants
Here's how I choose and arrange plants for maximum yield in a 4-foot by 8-foot raised bed—proven to work in any climate.
🌱 Step 1: Plan Your Planting Layout for Compatibility
Group plants by their sunlight needs and growth habits. I always start by placing sun-loving veggies like tomatoes, peppers, and basil along the south or west side of the bed, where they get 6+ hours of direct light. Shade-tolerant herbs like parsley, cilantro, and chives go on the north or east side, where they won’t compete for light.
Tall plants like pole beans or trellised cucumbers go in the northwest corner to avoid shading shorter crops. I sketch a rough map first—this prevents overcrowding and makes harvesting easier. For example, a tomato plant needs 18-24 inches of space, while bush beans can share 6 inches between them.
🌿 Step 2: Prepare the Soil and Plant in Successive Rows
Fill the bed with a mix of topsoil, compost, and perlite (I use equal parts for drainage and nutrients). Level the soil so water runs evenly—uneven beds lead to soggy spots where roots rot. Press down lightly with your hands to remove air pockets, but don’t compact it like lawn soil.
Plant in successive rows (not straight lines) to maximize space. For instance, I’ll place two rows of lettuce (4 inches apart) between two rows of radishes (2 inches apart). This way, I harvest radishes first, then replant lettuce in their space without disturbing the soil structure. Always plant larger plants first, then fill gaps with smaller crops.
☀️ Step 3: Water Deeply and Mulch to Retain Moisture
After planting, water deeply—until 2 inches of soil feels damp—to encourage roots to grow downward. I use a soaker hose to avoid disturbing seedlings. Watering from above can wash away soil and expose roots, so I always direct the stream at the base of plants.
Spread 2-3 inches of mulch (straw or shredded leaves work best) over the soil surface. This keeps moisture in, suppresses weeds, and regulates soil temperature. Check moisture every 2-3 days by sticking your finger 1 inch deep—if it’s dry, water again. Mulch also prevents soil from crusting, which can suffocate young seedlings.
✂️ Step 4: Monitor Growth and Adjust for Pests
Watch for early signs of stress like yellowing leaves (usually a sign of overwatering or nutrient deficiency) or wilting (underwatering or root-bound plants). I prune yellow or damaged leaves immediately to redirect energy to healthy growth. For herbs like basil, I pinch off the top sets of leaves to encourage bushier growth.
Use row covers if pests like cabbage moths or aphids appear. I’ve found that neem oil spray (applied in the evening) deters pests without harming beneficial insects. Rotate crops yearly to prevent soil-borne diseases—never plant the same family (like tomatoes and peppers) in the same spot two years in a row.
🪴 Step 5: Harvest Strategically for Continuous Yield
Harvest leafy greens like spinach and kale by cutting outer leaves first—this lets the plant keep growing. For root veggies like carrots or beets, wait until they reach half their mature size before pulling to avoid overcrowding. I always harvest in the morning when flavors are peak and plants are hydrated.
After harvesting, fill empty spaces with fast-growing crops like bush beans, radishes, or lettuce. This keeps the bed productive year-round. For example, after pulling early carrots, I’ll sow a new batch of green onions or microgreens in their place. This method ensures I’m always getting fresh produce without expanding the bed’s footprint.
Tips & tricks for perfect raised garden bed planting
These little details make all the difference between a thriving garden and one that struggles—trust me, I've learned this through years of trial and error.
Sunlight Strategy: Pay close attention to your garden's sunlight patterns throughout the day. While Step 1 suggests placing sun-lovers on the south or west side, I recommend observing your space for at least a week first. Morning sun behaves differently than afternoon sun—some plants (like basil) actually prefer the gentler morning light. Mark your bed's sunlight zones with stakes to visualize where each plant will thrive best.
Soil Mix Precision: The equal parts topsoil, compost, and perlite recommendation is perfect, but here's what nobody tells you—your compost quality matters more than you think. Use finished compost (no large chunks) and mix it thoroughly. I've found that adding a handful of worm castings to each planting hole gives seedlings an instant nutrient boost. For containers, consider adding a bit of sand to improve drainage if your perlite isn't doing enough.
Watering Wisdom: That 2-inch deep watering in Step 3 is critical, but timing matters just as much. Water in the early morning (before 8 AM) to prevent fungal growth from evening moisture. I've also discovered that watering at the same time daily helps plants develop consistent root patterns. For new transplants, water around the base rather than overhead to avoid disturbing the delicate root systems.
Pest Prevention: While neem oil is excellent, I've found that companion planting works even better for long-term pest control. Planting marigolds along the edges of your raised bed deters many common pests naturally. You can also interplant herbs like thyme or oregano—their strong scents repel insects while adding to your harvest. This creates a protective barrier without chemicals, and it works beautifully in the compact 4x8 space.
Pro Tips for Raised Garden Bed Plants
- These little details make all the difference between a thriving garden and one that struggles—trust me, I've learned ...
- Sunlight Strategy: Pay close attention to your garden's sunlight patterns throughout the day. While Step 1 suggests p...
- Soil Mix Precision: The equal parts topsoil, compost, and perlite recommendation is perfect, but here's what nobody t...
Frequently asked questions
Got questions about raised garden bed plants?
You’re not alone! Whether you’re a beginner or a seasoned green thumb, these answers will help you grow confidently in your compact space.
What are the easiest plants to grow in a raised garden bed?
Start with low-maintenance, fast-growing plants like lettuce, radishes, green beans, or bush tomatoes. Herbs such as basil, parsley, and chives thrive in shallow beds and tolerate partial shade. Choose varieties labeled "compact" or "bush" for small spaces!
When is the best time to plant in a raised garden bed?
Timing depends on your climate! In cooler regions, plant cool-season crops (like spinach or peas) in early spring or fall. Warm-season plants (tomatoes, peppers) need soil temps above 60°F—wait until after the last frost. Use a soil thermometer to check!
Can I reuse soil from my raised garden bed?
Yes, but refresh it! Mix old soil with compost (25-30%) and a balanced fertilizer to replenish nutrients. Avoid overloading with fresh manure—it can burn plants. Test soil pH (ideal: 6.0–7.0 for most veggies) and amend if needed.
How do I keep pests out of my raised garden bed?
Prevent pests with physical barriers (row covers, netting) and natural deterrents. Plant marigolds or basil nearby to repel bugs. Remove weeds and debris regularly, and handpick pests early. Avoid chemical sprays—they can harm beneficial insects!
Do raised garden beds need special drainage?
Ensure beds have drainage holes at the bottom and fill with a mix of soil, compost, and perlite (20%) to prevent waterlogging. Elevate beds 6–12 inches off the ground for airflow. Overwatering is a common killer—check soil moisture before watering!
Wrapping up and next steps
Raised garden beds are a game-changer for growing herbs and veggies in small spaces—offering better soil control, fewer weeds, and easier access for care. Whether you're a beginner or a seasoned gardener, these beds maximize your yield with minimal effort, making fresh produce feel effortlessly achievable. 🌱
Now that you’re armed with the best plants, tips, and troubleshooting tricks, it’s time to roll up your sleeves and start planting! Pick your favorite herbs or veggies, gather your supplies, and let your green thumb shine. Happy gardening!