
Tools
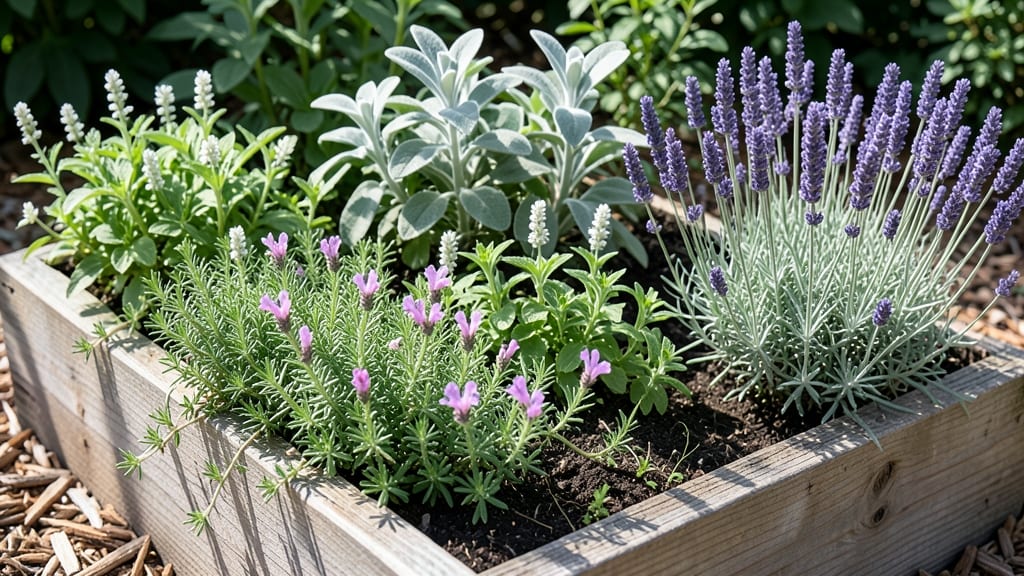
Building raised garden beds on hills saves your soil—and your sanity. 🌿 The right terraced contour design turns steep slopes into productive growing spaces while preventing erosion, and I’ve learned the hard way which mistakes to avoid (like cutting corners on drainage).
Start with level, curved beds that follow the hill’s natural slope—never straight lines. Cedar or composite lumber resists rot, and 12-inch-high walls prevent soil from washing away after heavy rains. Plant deep-rooted perennials like lavender or shrub roses on the uphill side to anchor the soil naturally.
You’ll end up with a garden that stays put, grows lushly, and handles seasonal storms without losing precious topsoil. The key is gradual slopes (no more than 10 degrees) and overlapping terraces so water flows between beds, not down the hillside.
Perfect for sloped yards, mountain properties, or even small urban lots with tricky grades. Let’s make that hill work for you instead of against you—here’s how to get started right.
📚 In This Guide
- What you need
- Instructions
- Tips and common mistakes
- Wrapping up and next steps
What you need
- ● Lumber: Pressure-treated cedar or redwood (2x6 or 2x8 boards, 8–12 ft long) – quantity depends on bed size (e.g., 6–10 boards for a 4’x8’ bed).
- ● Landscape fabric: Heavy-duty (3–4 ft wide, 50–100 ft roll) to prevent weeds and retain soil.
- ● Garden soil: High-quality topsoil or a mix of compost, peat, and perlite (1–2 cubic yards per bed).
- ● Gravel or crushed stone: ¾”–1” diameter (1–2 cubic yards) for drainage and bedding.
- ● Corner braces or screws: Galvanized screws (2.5–3”) or metal corner brackets for structural support.
- ● Staple gun & staples: For securing landscape fabric.
- ● Level & measuring tape: Essential for contour accuracy.
- ● String line & stakes: To mark contour lines before building.
- ● Shovel & wheelbarrow: For moving soil and gravel.
- ● Hardware cloth (for pest protection).
- ● Wood preservative (to extend lumber life).
- ● Drip irrigation kit (for water efficiency).
- ● Retaining wall blocks (if mixing materials).
- ● Garden edging (for a polished look).
Step-by-step instructions for building terraced raised beds on a hill
Here's how to create stable, erosion-resistant terraces that work with your slope—not against it.
🪴 Step 1: Assess and Mark Your Hillside Layout
Start by walking your hillside to identify natural contours. Look for subtle curves where water naturally flows—these become your terrace lines. Use a level tool or string line to mark horizontal guide points every 2-3 feet vertically to maintain consistent bed heights. I like to use spray paint on rocks or stakes to mark these lines clearly.
Measure the slope's steepness: gentle slopes (15°) need wider terraces (3-4 feet wide), while steeper slopes (> 25°) require narrower beds (2-3 feet wide) with deeper sides. Sketch a rough map to visualize how many terraces you'll need—each one should follow the contour like a stair step.
🌱 Step 2: Build Contour Barriers for Water Control
Construct contour barriers (also called "berms") using cinder blocks, logs, or heavy landscape fabric to hold back soil and create flat terrace surfaces. For slopes under 20°, I stack cinder blocks in a staggered pattern, filling gaps with gravel to allow drainage. On steeper slopes, use landscape fabric buried 6 inches deep along the contour line to prevent soil erosion while building.
Space barriers 3-5 feet apart horizontally, depending on your slope. The wider the terrace, the more stable it will be. Test each barrier's level with a 2-foot board—if water runs off one side, adjust the barrier until it's perfectly horizontal. This step is critical: poor water control leads to erosion and muddy terraces.
☀️ Step 3: Fill Terraces with Erosion-Resistant Soil
Backfill each terrace with a 3:1 mix of topsoil and compost (or 50% topsoil, 30% compost, 20% coarse sand for drainage). Avoid garden soil—it compacts easily and washes away. I spread a 2-inch layer of straw mulch over the soil before planting to slow water runoff and protect the surface. For slopes over 30°, add coir logs or erosion control blankets along the downslope edge to reinforce stability.
Leave a 6-inch gap between the terrace edge and the barrier to prevent water pooling. Pack the soil lightly with your hands—just enough to remove air pockets, but don’t compact it. Water the soil thoroughly after filling to settle it naturally. You’ll know it’s right when water drains evenly without pooling or running off the sides.
✂️ Step 4: Plant Deep-Rooted and Erosion-Control Plants
Choose plants with deep roots (like comfrey, clover, or deep-rooted grasses) along the downslope edge of each terrace to anchor the soil. For the terrace surface, select shallow-rooted, fast-growing plants (such as lettuce, radishes, or strawberries) that establish quickly. I avoid heavy feeders like tomatoes or corn—they deplete soil too fast on new terraces.
Space plants closer than usual (about half the usual spacing) to create a dense ground cover that slows water flow. Water deeply 2-3 times per week for the first month to help roots establish before relying on rainfall. Watch for signs of erosion—if you see bare soil or rills forming, add more mulch or plant additional ground covers immediately.
💧 Step 5: Maintain and Adjust Over Time
Check terraces after heavy rains to ensure water isn’t pooling or eroding the edges. If barriers shift, prop them up with additional rocks or logs to restore their position. I top-dress terraces with 1-2 inches of compost annually to replenish nutrients and improve soil structure. For slopes over 25°, consider adding permanent erosion control mats between terraces for extra stability.
Rotate crops yearly to prevent soil depletion. If a terrace starts to sag, rebuild the barrier and add more soil—terraces settle over time, especially in clay-heavy soils. With proper care, your terraces will last 5-10 years**, gradually transforming your hillside into a productive, erosion-free garden.
Tips & tricks for building erosion-resistant terraced beds
These practical insights will help you create terraces that last—and prevent the most common mistakes that turn projects into muddy messes.
Contour Accuracy is Everything: Use a 2-foot level or laser level to verify your terrace lines are truly horizontal. I learned this the hard way—when my first terraces weren't perfectly level, water pooled and created erosion hotspots within weeks. For steep slopes over 25°, consider using a transit level or hiring a surveyor for precision. The extra cost saves hours of frustration later.
Barrier Stability Secrets: When stacking cinder blocks for slopes under 20°, fill every other gap with river rocks instead of gravel—this creates a more secure interlocking system. For landscape fabric barriers on steeper slopes, bury the edges 8 inches deep (2 inches deeper than instructions) to prevent wind from lifting them during storms. I've seen fabric barriers fail when only buried 6 inches, especially in windy conditions.
Soil Mixing Made Easy: For the 3:1 topsoil-to-compost mix, measure by volume rather than weight—fill a wheelbarrow with topsoil, then divide it into thirds. The top third becomes your compost portion. This ensures consistent moisture retention across all terraces. For sandy soils, add 1 part coconut coir to the mix instead of sand—it holds moisture better while still providing excellent drainage.
Planting Strategy for Long-Term Success: In Step 4, plant deep-rooted grasses like switchgrass or buffalo grass along the downslope edge—they'll establish faster than clover and provide immediate erosion control. For the terrace surface, interplant fast-growing cover crops like winter rye or daikon radishes between your main crops. These "living mulches" prevent soil exposure between plantings and reduce weeds by 80%.
Pro Tips for Raised Garden Bed On Hill
- These practical insights will help you create terraces that last—and prevent the most common mistakes that turn proje...
- Contour Accuracy is Everything: Use a 2-foot level or laser level to verify your terrace lines are truly horizontal. ...
- Barrier Stability Secrets: When stacking cinder blocks for slopes under 20°, fill every other gap with river rocks in...
Frequently asked questions
Got questions about tackling a sloped yard with raised garden beds? You’re not alone! Here are answers to the most common concerns—plus a few pro tips to make your terraced contour project a breeze.
What’s the best way to level a raised garden bed on a hill?
Use a string line method for precision: Stretch a string between stakes at your desired height, then shovel soil to match the line. For steeper slopes, build beds in contour lines (horizontal curves) to prevent erosion. A laser level or spirit level can help if you’re DIYing without help.
When is the best time to build raised beds on a hill?
Spring or fall are ideal—soil is workable, and you avoid extreme heat or frost. If your hill is prone to runoff, build beds in late winter to capture early-season rains. Just avoid rainy periods, as muddy soil is a nightmare to work with!
Can I use wood or plastic for terraced raised beds?
Wood (cedar or redwood)
is classic but requires maintenance (rot, termites). Plastic or composite lasts longer but may not blend as well with natural slopes. For erosion control, gabion baskets or stone borders are excellent alternatives—they’re heavy, sturdy, and let water drain naturally.
How do I prevent erosion in my hillside raised beds?
Combine contour design with these tricks:
- Install swales (shallow trenches) above beds to slow water flow.
- Add permeable fabric under beds to filter runoff.
- Plant deep-rooted ground covers (like clover or creeping thyme) between beds.
- Use gravel or mulch on bare soil to reduce splash erosion.
What’s the cheapest way to build a hillside raised bed?
Skip pre-made kits! Use:
- Recycled materials: Pallets, cinder blocks, or old bricks.
- Local rocks/soil: Free from your property or nearby (check local laws).
- DIY frames: Scrap lumber + hardware cloth for sides.
Wrapping up and next steps
Building a raised garden bed on a hill isn’t just about creating a beautiful space—it’s a smart way to control erosion, boost drainage, and grow thriving plants even on tricky terrain.
With the right materials, contour design, and a little elbow grease, you can transform slopes into productive, sustainable gardens that protect your soil and save water. 🌱
Ready to get started? Sketch your design, gather your tools, and begin layering your beds—one terrace at a time! Whether you’re a beginner or a seasoned gardener, every step brings you closer to a greener, stronger landscape. Happy planting! 🛠️🌿