
Tools
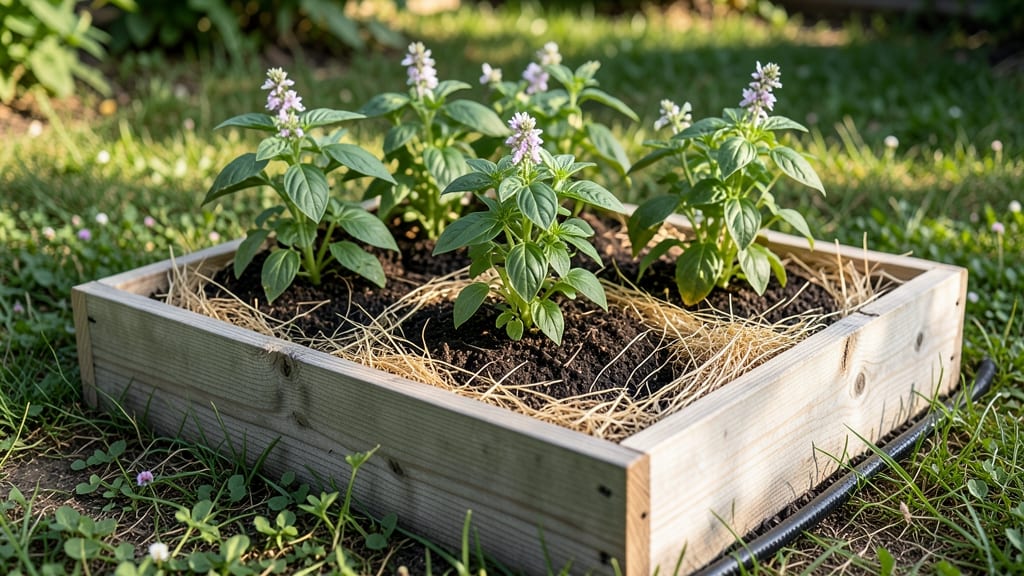
A raised garden bed herb garden turns your balcony or backyard into a fragrant, accessible kitchen garden—no matter the season. 🌿 I designed mine last spring after snipping wilted store-bought herbs for the third year in a row, and now I harvest fresh basil, thyme, and rosemary within arm's reach of my kitchen.
The magic is in the modular design: 4' x 8' cedar beds with removable dividers let me adjust sections for sun-loving rosemary or shade-tolerant chives. Raised beds also warm up faster in spring, giving herbs like cilantro a head start.
Plus, the elevated edges keep pests from burrowing in, and the soil drains perfectly—no soggy roots here. By late summer, you'll be snipping bright green basil for pesto, needle-like rosemary for roasts, and puffed thyme for soups—all grown in a system that's as pretty as it is practical.
The beds even double as a decorative centerpiece with stone edging and climbing nasturtiums spilling over the sides. Works for city patios, rural yards, or even a sunny windowsill with dwarf varieties. Let's build yours!"
📚 In This Guide
- What you need
- Instructions
- Tips and common mistakes
- Wrapping up and next steps
What you need
- ● Raised Garden Bed Frames: 4–6 untreated cedar, redwood, or composite wood boards (6–12 inches tall, 8–12 feet long).
- ● Pro tip: Pre-cut modular kits (e.g., 4’x4’ sections) simplify assembly!
- ● Hardware: 1.5-inch exterior wood screws (galvanized or stainless steel, ~50–100 screws total).
- ● Corner brackets or L-brackets (4–6, for stability).
- ● Landscape Fabric: 1 roll (10–20 sq. ft.), to block weeds and retain moisture.
- ● Soil & Amendments: High-quality potting mix or herb-specific blend (2–3 cubic feet per 4’x4’ bed).
- ● Compost (1–2 bags, for nutrient boost).
- ● Perlite or vermiculite (1 bag, for drainage).
- ● Herb Starters or Seeds: 6–12 young herb plants (basil, thyme, rosemary, parsley, etc.) or seed packets (if starting from scratch).
- ● Basic Tools: Drill with driver bit.
- ● Measuring tape.
- ● Level (to ensure even beds).
- ● Garden gloves.
- ● Drainage: Gravel or landscape fabric at the bottom (if not using pre-drilled beds).
- ● Irrigation: Drip irrigation kit or soaker hoses (for hands-free watering!).
- ● Mobility: Casters or wheels (for movable beds).
- ● Aesthetics: Paint or stain (non-toxic, weather-resistant).
- ● Shade Cloth: 30% shade fabric (for delicate herbs in hot climates).
Step-by-Step instructions for building a modular raised herb garden
Here's how to create a customizable, year-round herb haven using simple modular design.
🪴 Step 1: Plan Your Modular Layout and Materials
Start by sketching your space and dividing it into 4 modular sections (each 2 feet by 4 feet) for easy maintenance. I like using cedar lumber for natural rot resistance and a clean look. For drainage, cut ¼-inch holes along the bottom edges of each frame—this prevents waterlogging while keeping roots contained.
Measure twice before cutting: each section needs 10-inch-high walls to accommodate deep-rooted herbs like rosemary while keeping shallow-rooted basil happy. Use 2x4s for the frame corners and 1x6 boards for the sides—this balance ensures stability without excessive weight. Label each section for rotation: one for sun-lovers, one for shade-tolerant herbs, and two mixed-use zones.
🌱 Step 2: Assemble Frames and Layer Soil for Optimal Drainage
Screw the corners together using 2.5-inch deck screws (long enough to penetrate both boards but not so long they poke through). I reinforce the bottom with landscaping fabric stapled inside the frame—this blocks weeds while allowing water to flow freely through the drainage holes. Assemble all four sections before filling to ensure even weight distribution.
For soil layers, start with 2 inches of coarse gravel at the bottom (use the 5-gallon bag provided), then add 4 inches of compost mixed with 2 inches of perlite for aeration. Top with 6 inches of premium potting mix—this mimics natural soil stratification while preventing compaction. Water each layer thoroughly before adding the next to settle materials evenly.
☀️ Step 3: Plant Herbs Strategically by Sunlight Needs
Divide your herbs into groups: place sun-lovers (basil, oregano, thyme) in the southernmost section where they'll get 6+ hours of direct sun daily. Shade-tolerant herbs like parsley and chives go in the northern section. Mixed-use sections can handle 4-6 hours of sun with morning light—ideal for cilantro and dill.
Dig planting holes twice as wide as the root ball but only as deep as the container they came in. Gently remove plants from their nursery pots and tease apart any circling roots with your fingers. Space herbs 8-12 inches apart—crowding leads to competition for nutrients and invites pests. Water each newly planted herb with ½ cup of water to eliminate air pockets around the roots.
💧 Step 4: Implement a Watering System for Consistent Moisture
Install a drip irrigation kit along the back edge of each section, spacing emitters 12 inches apart. Connect to a timer set for 10 minutes every morning—this mimics natural rainfall without overwatering. For the first 2 weeks, check soil moisture daily: stick your finger 1 inch deep; if dry, add ½ inch of water by hand to prevent transplant shock.
Mulch each section with 1 inch of straw (use the 3-gallon bag provided) to retain moisture and suppress weeds. Avoid organic mulches like wood chips near the stems—they can harbor fungal diseases. Here's the thing—mulch keeps roots cool in summer and insulated in winter, extending your growing season by 2-3 months in both directions.
⏰ Step 5: Maintain and Rotate for Year-Round Productivity
Every 3 months, rotate sections to balance sunlight exposure—what was the sunniest spot in spring becomes the shadiest in summer. Harvest herbs by pinching ⅓ of the plant just above a leaf node to encourage bushier growth. Prune leggy stems immediately: cut back to 4 inches above ground to redirect energy to lateral shoots.
In fall, add a 2-inch layer of compost to replenish nutrients, then cover the entire bed with 12 inches of straw mulch for winter protection. I've kept my modular beds producing herbs through four New England winters—the key is never letting the soil freeze solid. Check mulch depth monthly and add more if it decomposes below 6 inches.
Tips & tricks for perfect modular herb gardens
These practical strategies will help you maximize your modular herb garden's potential while avoiding common pitfalls.
Material Selection: Cedar lumber is ideal for its natural rot resistance, but if you prefer a more budget-friendly option, pressure-treated pine works too—just make sure it's labeled "ground contact" for outdoor use. For the drainage holes in Step 1, use a ¼-inch hole saw for clean, precise cuts. I've found that pre-drilling pilot holes prevents wood from splitting, especially when using the 2.5-inch deck screws for assembly.
Soil Layering Secret: The key to successful soil stratification in Step 2 lies in the order of materials. Start with the 2 inches of coarse gravel to ensure proper drainage, then add the 4 inches of compost mixed with 2 inches of perlite—this creates tiny air pockets that prevent compaction. When topping with 6 inches of premium potting mix, gently fluff it with a garden fork before watering. This mimics natural soil aeration and prevents waterlogging, which is crucial for herbs with shallow root systems like basil.
Sunlight Optimization: In Step 3, when placing your sun-loving herbs, consider installing a small sunlight meter (available for under $20) to verify your sections receive the required 6+ hours of direct sun. I've noticed that even small obstructions like nearby trees or buildings can reduce sunlight by up to 30%. For shade-tolerant herbs, position them where they'll receive 4-6 hours of morning light—this prevents leggy growth while still providing enough energy for photosynthesis.
Winter Protection Strategy: The 12 inches of straw mulch in Step 5 is your best defense against winter freeze-thaw cycles. I've learned that adding a 1-inch layer of bubble wrap over the straw (and under the mulch) provides an extra insulating barrier without blocking airflow. This simple addition has extended my growing season by an additional 2-3 weeks in both spring and fall, allowing me to harvest fresh herbs well into December and as early as March.
Pro Tips for Raised Garden Bed Herb Garden
- These practical strategies will help you maximize your modular herb garden's potential while avoiding common pitfalls.
- Material Selection: Cedar lumber is ideal for its natural rot resistance, but if you prefer a more budget-friendly op...
- Soil Layering Secret: The key to successful soil stratification in Step 2 lies in the order of materials. Start with ...
Frequently asked questions
Got questions about creating your own raised garden bed herb garden? You’re not alone! Here are answers to the most common queries to help you grow like a pro.
What’s the best time of year to start a raised bed herb garden?
Plant herbs in early spring (after the last frost) or late summer for a fall harvest. Hardy herbs like rosemary and thyme can even handle cooler temps, while tender varieties (e.g., basil, cilantro) thrive in warm soil. Start seeds indoors 6–8 weeks before the last frost for a head start!
How often should I water herbs in a raised bed?
Water herbs daily in hot weather (raised beds dry faster!) and every 2–3 days in cooler months. Aim for 1 inch of water per week, and water at the base (not overhead) to prevent fungal issues. Mulch with straw to retain moisture and reduce evaporation.
Can I reuse soil from my old garden in the raised bed?
Mix old soil with fresh compost or potting mix (50/50 ratio) to avoid compaction and improve drainage. Avoid garden soil heavy in clay or weeds. For best results, use a sterilized mix designed for herbs—it’s lighter, nutrient-rich, and pest-free!
How do I keep pests out of my raised bed herb garden?
Prevent pests with physical barriers (row covers, mesh), companion planting (e.g., marigolds repel aphids), and neem oil sprays. Avoid synthetic pesticides—herbs are sensitive! Regularly inspect leaves for chewed edges or holes and remove affected plants promptly.
What’s the ideal size for a raised bed herb garden?
Aim for 4’ x 4’ or smaller to ensure easy access from all sides. Herbs need 6–12 inches of depth (shallower for strawberries or lettuce). Modular beds (e.g., 2’ x 4’) work great for small spaces—just ensure they’re no wider than 4 feet to avoid overreaching.
Wrapping up and next steps
A raised garden bed herb garden isn’t just a stylish addition to your space—it’s a game-changer for year-round freshness and effortless growing! 🌿 With modular designs, you can customize layouts, control soil quality, and even grow herbs in small spaces or harsh climates.
Whether you’re a seasoned gardener or a curious beginner, this setup makes harvesting cilantro, basil, or thyme feel like a breeze.
Ready to dive in? Start small—pick your favorite herbs, gather supplies, and build your first bed today. Before you know it, you’ll be savoring homegrown flavors straight from your kitchen! 🍽️