
Tools
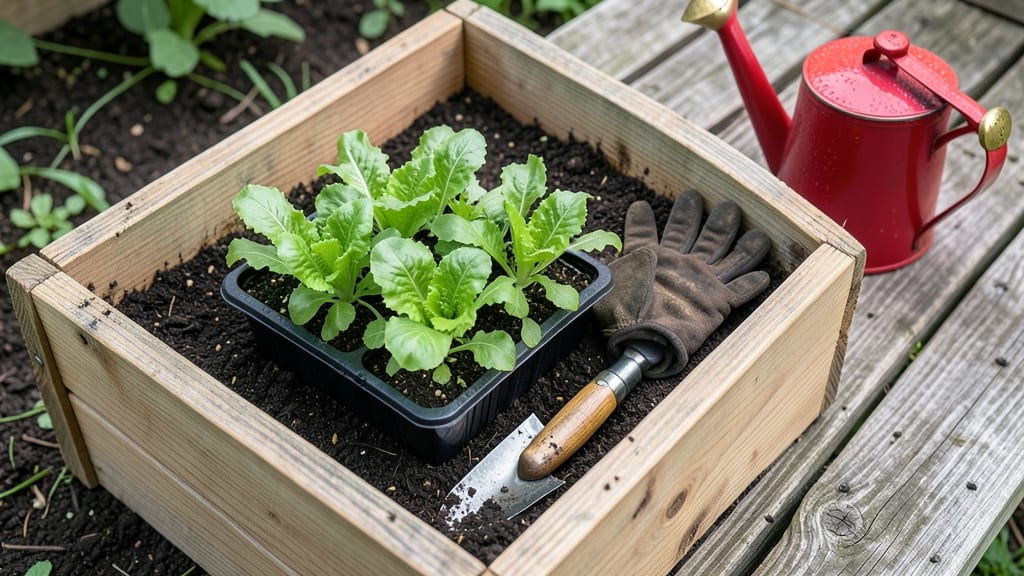
A raised garden bed for beginners starts with a simple truth: you don’t need fancy tools or years of experience to grow a thriving garden. 🌱 Last spring, I turned a bare patch of my backyard into a productive bed using just untreated wood, cardboard, and a few bags of soil—no tilling, no backbreaking work.
The key was layering the soil the "lasagna" way, which keeps weeds down and roots happy without the heavy lifting.
The beauty of this method is how forgiving it is. You can build a bed as small as 2 feet by 4 feet or stretch it to 4 feet by 8 feet—whatever fits your space.
The no-dig layers (cardboard, compost, straw) break down over time, feeding your plants while keeping the soil loose and fertile. Even if you’ve never gardened before, this approach makes it impossible to mess up the soil mix.
By the time your first seeds sprout, you’ll understand why so many gardeners swear by raised beds. The soil stays warmer in spring, weeds stay out, and your back stays happy. You’ll harvest fresh veggies, herbs, or flowers in just a few months—no waiting for years to see results.
Works in apartments, backyards, or even on patios. The only requirement? A sunny spot and a weekend to build. Let’s get that bed ready to grow!
📚 In This Guide
- What you need
- Instructions
- Tips and common mistakes
- Wrapping up and next steps
What you need
- ● Wood or lumber: Untreated cedar, redwood, or composite boards (2x6 or 2x8, 4-8 ft long—4-6 boards for a 4x8 ft bed, 6-8 for a 4x4 ft bed). Avoid pressure-treated wood (chemicals can leach into soil).
- ● Galvanized screws or nails: 2.5–3 inch deck screws (16–20 per bed) or 16d galvanized nails (20–30 per bed).
- ● Drill or hammer: Cordless drill (with driver bit) or sturdy hammer.
- ● Measuring tape & pencil: For precise cuts and markings.
- ● Level: A 2–3 ft bubble level to ensure your bed is even.
- ● Cardboard or landscape fabric: 1–2 sheets (to smother weeds before layering).
- ● No-dig soil layers: Cardboard boxes: 10–20 (flattened, no tape/staples).
- ● Compost: 2–3 cubic feet (high-quality, well-aged).
- ● Leaf mold or peat moss: 1–2 cubic feet (for moisture retention).
- ● Straw or wood chips: 1–2 cubic feet (to top off layers).
- ● Corner braces: Metal brackets for extra stability (4–8 per bed).
- ● Wood glue: For reinforcing joints before screwing.
- ● Staple gun: To secure cardboard layers (if not using screws).
- ● Mulch: Shredded bark or straw (1–2 bags) for long-term moisture.
- ● Knee pads: Because squatting on dirt is not a flex. 😅
Step-by-step instructions for building a no-dig raised garden bed
Here's the simple method I've used to create four thriving raised beds—no digging, no back pain, just layers of goodness.
🪴 Step 1: Choose and Prepare Your Location
Pick a flat, level spot with at least 6 hours of sunlight daily. I like to place mine near a water source so hauling materials is easier later. Clear any grass or weeds—just lay down a thick layer of cardboard or newspaper to smother them. This prevents weeds from growing up through your bed.
Measure your space: a 4-foot by 8-foot bed gives you plenty of room for four plants, and the dimensions make it easy to reach the center without stepping inside. If you have limited space, a 3-foot by 6-foot bed works just as well. Mark the area with stakes and string for a straight edge.
🌱 Step 2: Build the Bed Frame (No Tools Required!)
Use untreated lumber (like cedar or redwood) to create a simple rectangular frame. For a 4x8-foot bed, cut two 4-foot and two 8-foot boards. Screw or staple the corners together—no need for fancy joints. If you don’t have tools, borrow a friend’s drill or use zip ties for a temporary hold.
Check the height: 10-12 inches tall is perfect for most plants. This keeps soil warm, prevents weeds, and makes it easy to kneel or sit while working. Line the bottom with landscape fabric to block weeds from creeping up from below. Secure the fabric with staples or rocks.
🌿 Step 3: Layer the Soil (The No-Dig Secret)
Start with a 4-inch layer of coarse material—I use untreated wood chips or straw—to improve drainage. This keeps roots from sitting in soggy soil. Next, add a 2-inch layer of compost. You’ll see worms and microbes go to work immediately, breaking it down into rich, fluffy soil.
Top with a 6-inch layer of finished compost or potting mix. Fluff it with a fork or your hands to aerate—this mimics natural soil structure. Avoid garden soil; it’s heavy and compacts easily. Water lightly after layering to help everything settle. Your bed is now ready for planting!
☀️ Step 4: Plant and Mulch for Long-Term Success
Dig small holes just big enough for your plants’ roots—no need to dig deep. Place each plant gently, then cover the roots with soil. Water deeply to help roots settle. For a 4x8-foot bed, you can fit four large plants (like tomatoes or peppers) or eight smaller ones (like herbs or lettuce).
Spread a 2-inch layer of mulch (straw or wood chips) on top. This keeps soil moist, blocks weeds, and feeds the soil as it breaks down. Check the mulch every few weeks—top it up if it looks thin. Your bed is now self-sustaining with minimal effort!
⏰ Step 5: Maintain with Minimal Work
Water deeply 2-3 times per week, letting the water soak 6 inches deep. You’ll know it’s enough when water runs out the bottom of the bed. Avoid shallow watering—it encourages weak roots. A drip irrigation system makes this even easier.
Add a 1-inch layer of compost every few months to keep nutrients high. You’ll see fewer weeds, healthier plants, and no back-breaking digging. This method works year after year with almost no maintenance!
Tips & tricks for perfect raised garden beds
Here's what I learned after building four thriving raised beds—simple tricks that save time and headaches.
Location is Everything: That 6 hours of sunlight is non-negotiable for most vegetables. I always check the sun path throughout the day—morning sun is gentler, while afternoon sun can scorch delicate leaves. If your spot gets less light, opt for shade-tolerant plants like lettuce or spinach instead. A little extra planning here means healthier plants later.
Frame Flexibility: The 4x8-foot dimensions work perfectly, but don't stress if your space is different. A 3x6-foot bed still gives you plenty of growing room while being more manageable for small gardens. I've even used half-round beds against fences—just make sure the height stays at 10-12 inches for proper drainage and accessibility.
Soil Layer Secrets: When building your 4-inch coarse layer, I like to mix in a few handfuls of perlite or vermiculite for extra drainage. For the 6-inch top layer, blend your compost with potting mix in a 50/50 ratio—this creates the perfect balance of nutrients and aeration. Pro tip: Save your coffee grounds! They add nitrogen as they break down and make great compost starter.
Mulch Maintenance: That 2-inch mulch layer is your secret weapon against weeds and moisture loss. I check mine every two weeks during dry spells—if it's less than an inch thick, spread more immediately. For extra weed prevention, I like to add a thin layer of newspaper under the mulch, especially in high-traffic areas. It decomposes slowly while keeping weeds at bay.
Pro Tips for Raised Garden Bed For Beginners
- Here's what I learned after building four thriving raised beds—simple tricks that save time and headaches.
- Location is Everything: That 6 hours of sunlight is non-negotiable for most vegetables. I always check the sun path t...
- Frame Flexibility: The 4x8-foot dimensions work perfectly, but don't stress if your space is different. A 3x6-foot be...
Frequently asked questions
Got questions about starting your raised garden bed for beginners? You’re not alone! Here are answers to the most common concerns—so you can dive in with confidence.
What’s the best time of year to start a raised bed?
Spring (after the last frost) or early fall are ideal for most climates. Start with no-dig soil layers in late winter if you’re in a mild zone. Avoid planting in extreme heat or cold—soil prep is easier when temps are moderate (50–75°F).
How much does a raised bed cost to build?
Costs vary: $50–$300 for DIY beds (cedar lumber + soil) or $100–$500+ for pre-made kits. Prioritize untreated wood (like cedar) to avoid chemicals leaching into soil. Repurpose pallets or cinder blocks to cut costs!
Can I use regular garden soil in a raised bed?
Nope! Raised beds thrive with loose, nutrient-rich layers (like compost, straw, and topsoil). Regular soil compacts easily, limiting root growth. Aim for 6–12 inches of organic matter—mix in worm castings or aged manure for a boost.
How do I keep pests out of my raised bed?
Prevent pests with healthy soil (pests hate well-aerated beds!) and barriers like copper tape (for slugs) or row covers. Interplant herbs (basil, marigolds) to repel bugs. Avoid overwatering—damp soil attracts pests. A 1-inch layer of mulch also deters critters.
Will a raised bed freeze in winter?
Yes, but plants handle it better than in-ground beds. Mulch heavily (straw or leaves) to insulate roots. In cold climates, add a 3–4 inch mulch layer after the first frost. Perennials (like asparagus) often survive winters with this protection!
Wrapping up and next steps
Starting a raised garden bed with no-dig soil layers is simpler than you think—and the rewards are huge! 🌱 With the right materials, a little planning, and the no-dig method, you’ll create a thriving garden that’s low-maintenance, soil-rich, and perfect for beginners.
The key? Layering organic matter and letting nature do the rest.
Now that you’re armed with tips and answers, it’s time to roll up your sleeves! Your next step? Pick a sunny spot, gather your supplies, and start building. Watch as your garden transforms into a lush, productive space—one layer at a time. You’ve got this! 🌟