
Tools
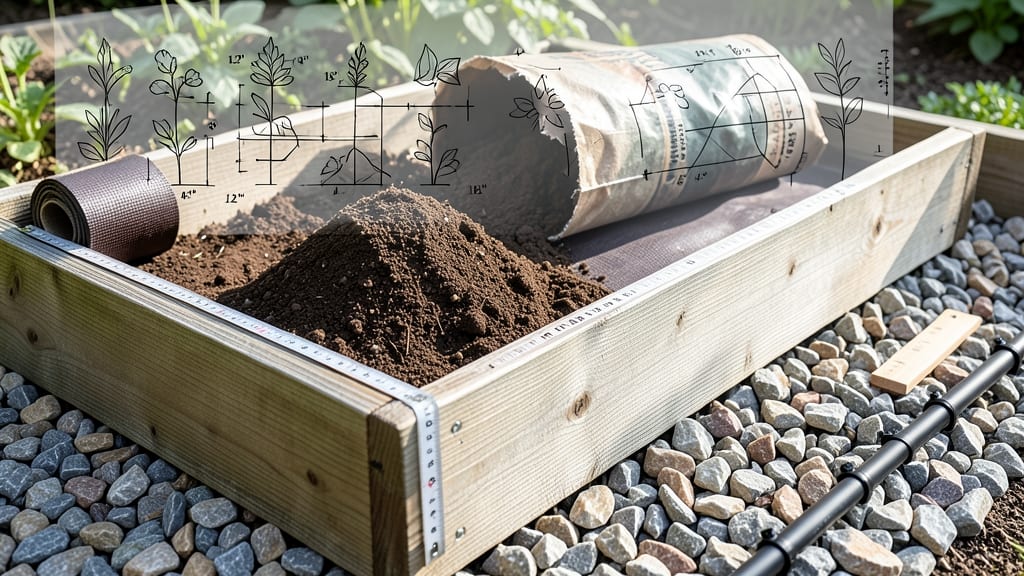
My raised garden bed design plans let you stack, shift, and shape your garden like LEGO blocks—no digging, no limits. 🌱 I built mine after realizing my flat ground was too soggy for tomatoes and too rocky for herbs, and now I can adjust heights for every plant's needs without breaking a sweat.
The key is interlocking frames that let you create custom tiers, slopes, or even built-in seating—all while keeping drainage perfect.
Start with cedar or composite lumber (it won’t rot) and cut pieces to standard widths like 2x4s or 2x6s, depending on how deep you want your beds. My 12-inch-tall frames give me enough room for root crops while keeping my back happy—no more bending over all season.
The modular pieces snap together with corner brackets, so you can expand or rearrange as your garden grows (or your mood changes).
What you end up with is a garden that works with your space, not against it: wider beds for veggies, shallower sections for herbs, and even a cozy nook for morning coffee.
The drainage? Built right in—just add landscape fabric at the bottom and fill with your favorite soil mix. No more wasted water or struggling plants.
This system scales from a tiny balcony to a backyard retreat, and the same principles work whether you're in a rainy climate or a dry one. The only limit is your imagination—and maybe your lumber budget. Let’s sketch out your dream setup!
📚 In This Guide
- What you need
- Instructions
- Tips and common mistakes
- Wrapping up and next steps
What you need
- ● Lumber: Pressure-treated or cedar (resistant to rot) – 4x4 posts (8 ft long, 4-6 pieces) and 2x6 boards (8 ft long, 6-8 pieces).
- ● Galvanized screws: 2.5-inch deck screws (100+ pieces) for assembly.
- ● Landscape fabric: 1 roll (6 ft wide) to block weeds and retain moisture.
- ● Gravel or sand: 1-2 bags (20 lbs each) for drainage layer.
- ● Soil mix: High-quality garden soil or compost blend (1-2 cubic yards, depending on bed size).
- ● Circular saw or miter saw
- ● Drill/driver
- ● Measuring tape
- ● Speed square
- ● Level
- ● Work gloves
- ● Wheelbarrow (for soil)
- ● Shovel
- ● Corner braces for extra stability
- ● Wood stain or sealant (to protect lumber)
- ● Drip irrigation kit (for efficient watering)
- ● Edging stones (for a polished look)
- ● Pre-cut lumber (if you prefer convenience)
Step-by-step instructions for building modular raised garden beds
Here's how to create adjustable-height frames that improve drainage and let you customize plant zones.
🪴 Step 1: Plan Your Layout and Dimensions
Start by sketching your bed's footprint. Standard widths should be 3-4 feet for easy reach from both sides. Lengths can vary, but 4 feet is ideal for most gardens. I like to use 2x4 lumber for frames because it's sturdy yet lightweight enough to adjust heights later.
Measure your space carefully—leave 12-18 inches between beds for walking paths. If you're building multiple beds, align them in straight lines for a clean look. Note where you'll place taller plants (like tomatoes) versus shorter ones (like lettuce) to plan height variations now.
☀️ Step 2: Build the Base Frame
Cut your lumber to create a rectangle with 12-inch-high sides for the base frame. Use 2.5-inch deck screws to assemble corners at 45-degree angles for extra stability. I reinforce each corner with two screws—this prevents wobbling when you later add height extensions.
Check for square corners by measuring diagonally from one corner to the opposite. Both measurements should be equal. Once your base is square, flip it over and add 1-inch landscape fabric to the bottom. This blocks weeds while allowing water to drain freely—critical for root health in raised beds.
🌱 Step 3: Add Adjustable Height Panels
Cut additional 2x4 lumber strips to create removable height extensions. For a 2-foot-tall bed, I add two 6-inch-high panels> on each side. Secure them with 2-inch screws> so they can be removed or stacked as needed. This modular approach lets you lower sections for shallow-rooted plants while keeping taller varieties elevated.
Leave ½-inch gaps> between panels and the base frame. These gaps improve airflow and drainage—you'll see water flow more evenly through the soil when it rains. I like to paint the wood with a non-toxic sealant before assembly to extend its life by 3-5 years>.
💧 Step 4: Fill and Level the Bed
Fill the base with 6 inches of coarse gravel> for drainage, then add 12 inches of high-quality compost and topsoil mix>. I blend my own using 50% compost, 30% topsoil, and 20% perlite> to create a fluffy, well-draining medium. Level the soil with a rake, then water it thoroughly until moisture reaches 6 inches deep>.
Wait 24 hours> before planting. This lets the soil settle and prevents roots from drying out during the initial watering. If your bed sinks after watering, add more soil to maintain the 12-inch depth>—this ensures roots have room to grow without hitting the gravel layer.
✂️ Step 5: Install Drainage and Final Touches
Drill ¼-inch holes> in the bottom corners of your base frame to create overflow drains. These prevent water from pooling during heavy rains. I also add ¼-inch mesh hardware cloth> over the holes to keep critters out while allowing water to escape.
For extra durability, I line the inside of the frame with landscape fabric> before adding soil. This keeps weeds from growing up through the gravel layer. Finally, add 2-3 inches of mulch> on top to retain moisture and suppress weeds—just avoid piling it directly against plant stems.
Tips & tricks for perfect raised garden bed frames
Building modular raised beds takes planning—but these tricks will help you avoid common mistakes and create a system that lasts for years.
Stability First: When assembling the base frame with 2.5-inch deck screws at 45-degree angles, I pre-drill pilot holes to prevent wood splitting—especially with pressure-treated lumber. This is particularly important for the 12-inch-high sides where weight will accumulate. Also, use a level to check for square corners before securing the final screw in each corner. A perfectly square base prevents wobbling when you later add height extensions.
Height Panel Hack: For the 6-inch-high panels that create your 2-foot-tall bed, I mark all cuts with a pencil before cutting to ensure consistency. Pro tip: Use a speed square to create perfectly straight angles on your lumber—this makes assembly much smoother. The ½-inch gaps between panels and base aren't just for drainage; they also allow you to easily slide panels in and out for maintenance or seasonal adjustments.
Soil Mix Pro Tip: When blending your 50% compost, 30% topsoil, and 20% perlite mix, I recommend testing the moisture level before planting. Press a handful of the mix—it should hold together but not be soggy. The 6 inches of coarse gravel at the bottom isn't just for drainage; it also helps regulate soil temperature, which is especially beneficial for cool-season crops. After filling, I always give the soil a final level with a board rather than a rake to create a perfectly flat planting surface.
Long-Term Protection: The non-toxic sealant I mentioned will extend your frame's life by 3-5 years, but I also recommend adding a layer of landscape fabric between the wood and soil. This prevents the wood from absorbing moisture, which can lead to rot over time. For the ¼-inch holes in the bottom corners, I use a drill bit slightly smaller than specified to create clean, precise openings that won't splinter the wood.
Pro Tips for Raised Garden Bed Design Plans
- Building modular raised beds takes planning—but these tricks will help you avoid common mistakes and create a system ...
- Stability First: When assembling the base frame with 2.5-inch deck screws at 45-degree angles, I pre-drill pilot hole...
- Height Panel Hack: For the 6-inch-high panels that create your 2-foot-tall bed, I mark all cuts with a pencil before ...
Frequently asked questions
Got questions about raised garden bed design plans? You’re not alone! Here are some of the most common concerns—and their practical solutions—to help you build with confidence.
What’s the best height for a raised garden bed to prevent drainage issues?
Aim for 6–12 inches deep for most vegetables and herbs, or 12–18 inches for deeper-rooted plants like tomatoes or potatoes. The key is ensuring the bed has a slight slope (1–2°) toward the back or sides to encourage water runoff. For modular designs, stack frames with corner brackets or interlocking joints to maintain stability while allowing drainage.
When is the best time to build a raised garden bed?
Build your bed 6–8 weeks before planting to let soil settle and decompose (if using organic matter). Spring or early fall are ideal—avoid winter in freezing climates or summer in scorching heat. Pro tip: Pre-assemble frames indoors in cold months, then fill and plant once temperatures stabilize!
Are there budget-friendly alternatives to cedar or redwood for frames?
Try:
- Recycled plastic lumber (durable, pest-resistant, and often cheaper long-term).
- Untreated pine or fir (seal with non-toxic wood preservative).
- Cinder blocks or bricks (DIY walls; add hardware cloth to deter burrowing pests).
- Salvaged materials (check local reuse centers for old windows, pallets, or fencing).
Just avoid pressure-treated wood with arsenic or chromium—opt for ACQ-treated lumber if using pressure-treated options.
How do I keep pests out of a raised bed without chemicals?
Start with hardware cloth (1/4-inch mesh) at the bottom to block rodents, then use these tricks:
- Plant pest-repelling companions like marigolds, basil, or nasturtiums.
- Install fine mesh row covers for young plants.
- Encourage beneficial insects (ladybugs, lacewings) with dill or fennel.
- Try diatomaceous earth (food-grade) around the bed’s edge for slugs/snails.
Regularly inspect soil for grubs or eggs—early action saves your harvest!
Can I reuse soil from my old garden in the raised bed?
Mix old soil 50/50 with fresh compost or bagged garden mix to avoid compacting or nutrient depletion. Test your soil first—if it’s heavy clay or sandy, amend with:
- Peat moss or coconut coir (for water retention).
- Perlite or vermiculite (for drainage).
- Composted manure (for nitrogen).
Top tip: Add a 1-inch layer of mulch (straw or wood chips) to retain moisture and suppress weeds.
Wrapping up and next steps
Designing your own raised garden bed with modular frames unlocks endless creativity while ensuring optimal plant health through customizable heights and drainage. Whether you’re a beginner or a seasoned gardener, these plans make it easy to tailor your space to your needs—no guesswork, just growth! 🌱
Ready to get started? Sketch your layout, gather your materials, and build with confidence! Your dream garden is just a few cuts and screws away—let’s dig in! 🛠️