
How To
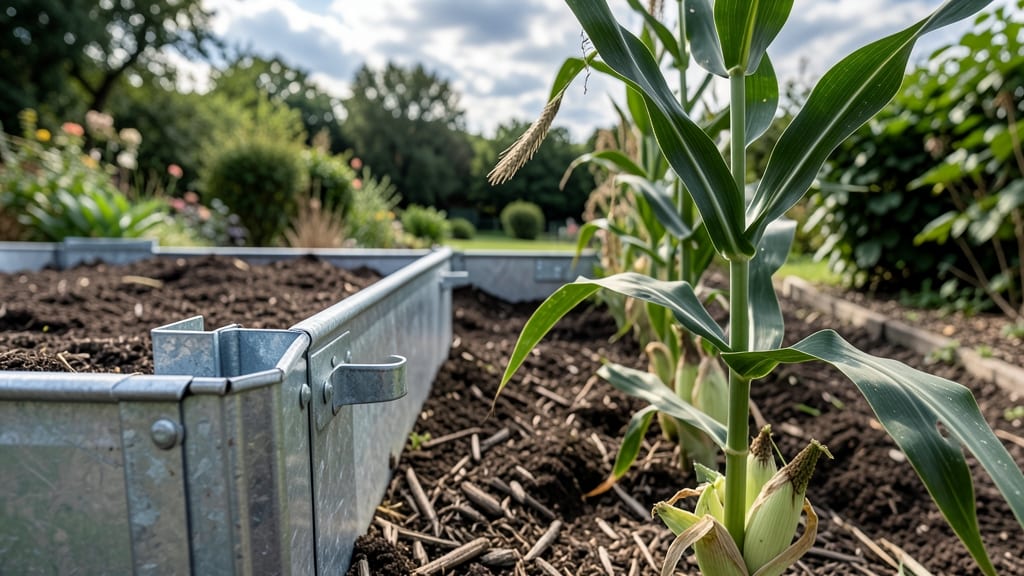
Galvanized raised bed corner brackets are the secret to beds that stay square and sturdy for decades. 🌱 I learned this the hard way when my first cedar bed warped after just two years—until I switched to galvanized steel brackets that held firm through heavy rain and winter freeze-thaw cycles.
These little connectors transform flimsy wood frames into rock-solid structures that won't sag or twist.
The real game-changer is the galvanization process itself. Zinc coating prevents rust even in wet climates, so your brackets won't corrode like plain steel or degrade like untreated wood screws.
Most hardware stores carry them in 12-inch lengths, and they're compatible with all standard lumber sizes from 2x4s to 6x6 posts. The best part? You can assemble a 4-foot by 8-foot bed in under an hour with just a drill and screws.
What you end up with is a raised bed that stays perfectly plumb season after season, resisting the weight of soil and plants without flexing. No more crooked corners, no more uneven heights—just clean lines and professional results that make your garden look like it belongs in a catalog.
The galvanized finish also means you won't have to repaint or retreat your brackets every few years.
Works equally well for vegetable gardens, flower beds, or even container setups that need extra reinforcement. Here's how to choose the right size and install them without common mistakes—so your bed lasts as long as your garden dreams.
📚 In This Guide
- What you need
- Instructions
- Tips and common mistakes
- Wrapping up and next steps
What you need
- ● Galvanized raised bed corner brackets – 4-8 brackets (depending on bed size; typically 1 per corner + extras for reinforcement). Choose heavy-duty galvanized steel (16-18 gauge) for maximum durability.
- ● Pressure-treated lumber or cedar wood – 2x6, 2x8, or 2x10 boards (cut to your bed’s dimensions). Avoid treated wood if growing edibles directly against it.
- ● Exterior-grade screws or decking nails – 3-inch galvanized or stainless steel (resists rust and corrosion). Aim for 100-200 screws depending on bed size.
- ○ Landscape fabric or hardware cloth – Optional but recommended for weed suppression and pest deterrence.
- ● Drill/driver with phosphor bronze or cobalt drill bits (for metal and wood).
- ● Circular saw or miter saw for precise board cuts.
- ● Measuring tape, speed square, and pencil for accurate markings.
- ● Level (2-4 ft) to ensure your bed stays perfectly even.
- ○ Clamps (optional but helpful for holding boards steady during assembly).
- ● Safety gear – gloves, safety glasses, and ear protection.
- ● Flat, stable ground – Clear debris, rocks, or uneven terrain before assembly.
- ● Weather-friendly conditions – Avoid working in extreme heat, rain, or high humidity.
- ○ Helper (optional) – A second pair of hands makes lifting and aligning heavy boards easier!
Step-by-Step guide to installing galvanized raised bed corner brackets
Here’s how to assemble sturdy, rust-resistant raised beds that last for years.
🪴 Step 1: Measure and Mark Your Raised Bed Layout
Start by measuring the length and width of your desired raised bed—typically 4 feet by 8 feet for most projects. Use a tape measure to mark the corners on the ground where the brackets will go. I like to use 4-inch stakes and twine to outline the shape first, so I can visualize the bed before digging.
Double-check your measurements by measuring diagonally from corner to corner. If both diagonals are equal, your rectangle is square. Adjust the stakes until the corners form a perfect shape. This ensures your bed stays level and the brackets fit snugly without gaps.
☀️ Step 2: Assemble the Brackets and Attach to Bed Frames
Lay out your galvanized corner brackets—they should come with pre-drilled holes for screws. If your brackets require assembly, use the included hardware to secure the two pieces together. I always pre-assemble a few brackets on the ground to confirm they fit before attaching them to the bed frames.
Place the brackets at each corner of your raised bed frame, aligning them so the screws will go through the frame and into the ground stakes. For extra stability, I use 3-inch deck screws to attach the brackets to the wood. Make sure the brackets are flush with the frame—no gaps or wobbling allowed.
💧 Step 3: Secure the Bed to the Ground with Stakes
Dig small holes—about 6 inches deep—at each corner where the brackets will meet the ground. Insert 4-foot ground stakes (or longer if needed) into the holes, leaving about 18 inches above ground for adjustment. This gives you room to level the bed perfectly before finalizing.
Attach the brackets to the stakes using 4-inch galvanized screws, ensuring the bed frame sits level. Tap the stakes gently into the ground until the bed is stable but not buried. Check for level with a carpenter’s level or even a bubble level—this prevents water pooling or uneven weight distribution.
✂️ Step 4: Reinforce and Test for Stability
Once all brackets are secured, give the bed a firm shake to test stability. If it wobbles, tighten the screws or adjust the ground stakes deeper. For extra reinforcement, I add horizontal bracing between opposite corners using additional brackets or wood strips. This prevents the bed from bowing over time.
Fill the bed with soil or landscaping fabric, then distribute the weight evenly. Watch how the bed settles—if any corner sinks, dig deeper and re-stake. A properly installed galvanized bracket system should hold 500+ pounds without shifting, so take your time here.
🪴 Step 5: Finish and Maintain for Long-Term Durability
Once the bed is secure, add your soil mix and plants. Galvanized brackets won’t rust, but I still recommend checking the screws annually for tightness. If you notice any loosening, simply re-tighten the screws—no need to dig up the bed.
For longevity, avoid placing the bed directly on concrete or pavement, as this can trap moisture and cause wood rot. Instead, use landscape fabric under the soil to prevent weeds and extend the life of your galvanized hardware. Your raised bed is now built to last!
Tips & tricks for perfect galvanized raised bed corner bracket installation
Here's what nobody tells you about building a raised bed that won't wobble or rust out in a season.
Precision Matters in Step 1: When marking your 4-foot by 8-foot layout, use a string line between stakes for perfectly straight edges. I've learned this the hard way—skipping this step leads to crooked beds that look unprofessional. Also, measure diagonally twice to confirm your rectangle is square before proceeding. This ensures your galvanized corner brackets will fit perfectly without gaps.
Pre-Assembly Check in Step 2: Before attaching any brackets to your bed frame, test-fit them on the ground first. This simple step reveals if your brackets are compatible with your frame's thickness. If they don't align properly, you'll catch it before wasting screws. I always pre-assemble at least one bracket to confirm the screw holes match up with your frame's dimensions.
Leveling Secret in Step 3: For that 18 inches of stake above ground, use a 2x4 as a makeshift leveling tool. Place it across the bed frame and adjust stakes until the board sits perfectly flat. This prevents water pooling and ensures even weight distribution. Pro tip: Check level after each stake is secured—don't assume all four will be perfect after just one adjustment.
Reinforcement Strategy in Step 4: That 500+ pounds capacity isn't just marketing—it's achievable with proper bracing. For larger beds (over 4'x8'), add diagonal bracing between opposite corners using 2x4 lumber and additional brackets. This creates a triangle structure that distributes weight more effectively. I've seen beds collapse under heavy loads when this step was skipped.
Pro Tips for Galvanized Raised Bed Corner Brackets
- Here's what nobody tells you about building a raised bed that won't wobble or rust out in a season.
- Precision Matters in Step 1: When marking your 4-foot by 8-foot layout, use a string line between stakes for perfectl...
- Pre-Assembly Check in Step 2: Before attaching any brackets to your bed frame, test-fit them on the ground first. Thi...
Frequently asked questions
Got questions about galvanized raised bed corner brackets?
Here are some of the most common ones—and their answers—to help you build with confidence!
What’s the difference between galvanized and regular steel brackets?
Galvanized steel brackets are coated with a protective zinc layer, making them rust-proof and far more durable than untreated steel. Regular steel will corrode over time, especially in wet or humid conditions, while galvanized brackets last for years without maintenance.
How long do galvanized corner brackets last in a raised bed?
With proper installation, galvanized brackets can last 10+ years without rusting. Their zinc coating resists corrosion from soil, moisture, and weather, but longevity depends on bed material (e.g., cedar vs. pressure-treated wood) and exposure to harsh elements.
Are galvanized brackets worth the extra cost?
While they cost slightly more upfront, galvanized brackets save you money long-term by eliminating rust repairs, warping, or bed collapse. Think of them as an investment in durability—especially for heavy-duty beds or climates with high humidity.
Can I use alternatives like screws or stakes instead of brackets?
Screws alone won’t provide the same structural stability as corner brackets, especially for tall or wide beds. Stakes can help, but they don’t reinforce the corner joints where beds are most likely to sag. Brackets distribute weight evenly and prevent wobbling—making them the smart choice for long-term strength.
What should I do if my galvanized brackets start rusting?
If you spot rust, act fast! Scrub the area with steel wool, sand it smooth, and apply a zinc-rich primer or fresh galvanized coating. For severe corrosion, replace the bracket—rust weakens metal, compromising your bed’s stability. Prevention tip: Avoid placing beds directly on concrete or in standing water to extend their life.
Wrapping up and next steps
Investing in galvanized raised bed corner brackets is a game-changer for gardeners and DIYers alike—offering unmatched rust resistance, structural strength, and long-term durability.
Whether you're building a new raised bed or reinforcing an existing one, these brackets ensure your project stands the test of time, weather, and heavy loads. Now’s the perfect moment to take action!
Ready to elevate your gardening game? Gather your tools, follow the steps, and start building with confidence. Your future plants (and your back!) will thank you. 🌱✨