
Flowers
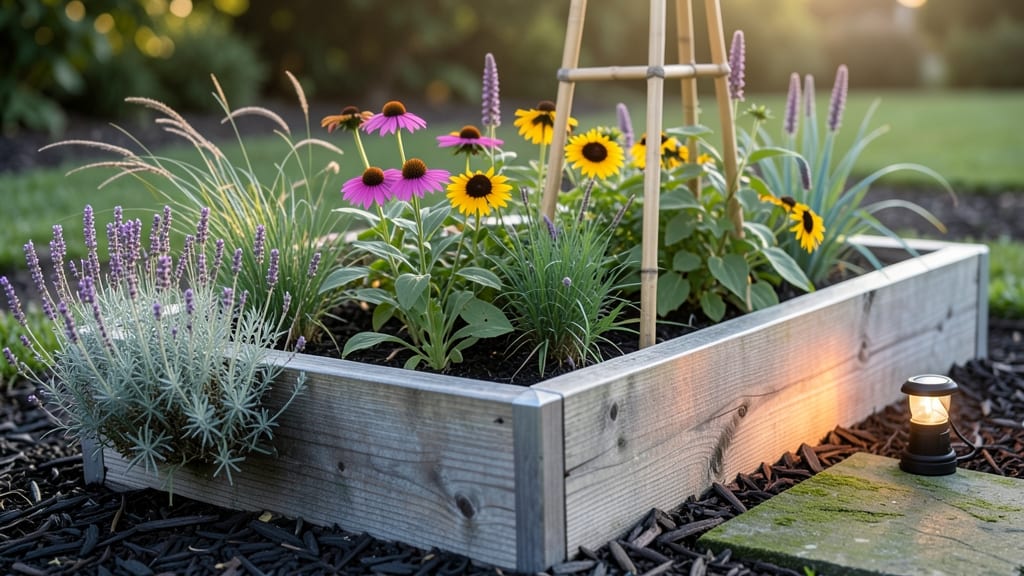
Creating a pollinator-packed raised flower bed starts with a layout that works for your space—whether that’s a city balcony or a sprawling backyard. 🌸 I designed mine to attract bees, butterflies, and hummingbirds all season long, and the secret lies in the shape, materials, and plant layers.
The right design lifts your plants above pests, improves drainage, and makes maintenance a breeze (no more backaches from bending over). My first bed used cedar planks for natural rot resistance, but stone or metal edges work just as well.
A 3-foot by 6-foot rectangle fits most small gardens perfectly, while larger spaces can handle tiered or spiral designs for visual drama. The key is keeping the height between 6 to 12 inches—high enough to prevent weeds but low enough to reach easily.
Drainage holes in the bottom and a layer of landscape fabric keep roots happy without soggy soil. By the time summer rolls around, you’ll have a nonstop parade of pollinators visiting your garden, and your flowers will bloom longer than ever.
The layered planting—tall perennials at the back, mid-height shrubs, and trailing annuals in front—creates depth and keeps color going from spring to frost. Plus, the elevated design keeps your knees dry and your soil fluffy. This works for urban balconies, cottage-style gardens, or modern minimalist spaces.
The only rule? Let your plants guide the design—if you love wildflowers, go for a loose, natural look; if you prefer structure, try geometric shapes with clean edges. Ready to sketch your first bed?
📚 In This Guide
- What you need
- Instructions
- Tips and common mistakes
- Wrapping up and next steps
What you need
- ● Lumber or pre-made raised bed kit: Cedar, redwood, or composite wood (4x4 or 6x6 posts, 2x6 or 2x8 boards). Dimensions: Adjust based on bed size (e.g., 4’x8’ or 3’x6’). Quantity: 4–8 boards + 4 corner posts.
- ● Galvanized screws or decking nails: 2.5–3” long, stainless steel or coated for durability. Quantity: 20–30 screws/nails per bed.
- ● Landscape fabric: 3–4 ft wider than bed dimensions to block weeds.
- ● High-quality soil: Mix of topsoil (50%), compost (30%), and perlite/sand (20%) for drainage. Quantity: ~1 cubic foot per square foot of bed.
- ● Native pollinator-friendly plants: Seeds or seedlings (e.g., coneflowers, milkweed, bee balm, lavender). Quantity: 9–12 plants per 4’x8’ bed.
- ● Measuring tape and speed square for precision cuts.
- ● Drill/driver + bits for screws or hammer for nails.
- ● Circular saw or miter saw for cutting lumber.
- ● Level to ensure your bed is perfectly even.
- ● Gloves and safety glasses (because DIY safety first!).
- ● Edging stones or timber screws for a polished look.
- ● Drip irrigation kit to keep plants hydrated with minimal effort.
- ● Mulch (pine straw or shredded bark) to retain moisture and suppress weeds.
- ● Decorative stakes or plant markers for a garden journal vibe.
Step-by-Step instructions for building pollinator-friendly raised flower beds
Here's how to create a thriving raised bed that keeps bees, butterflies, and hummingbirds visiting from spring through fall.
🪴 Step 1: Plan Your Bed Layout and Dimensions
Start with a design that fits your space and pollinators' needs. A 4-foot by 8-foot bed gives you room for variety while keeping maintenance manageable. I like to divide mine into three zones: tall back plants (like coneflowers), mid-height bloomers (black-eyed Susans), and low-growing pollinator magnets (lavender and thyme). This creates layers that attract different insects at different heights.
Sketch your design on paper first. Mark where you'll place the 2x6 or 2x8 boards (typically 4-6 inches tall) to create the frame. Most pollinators prefer beds with at least 4 feet of width—narrower beds dry out faster and limit plant diversity. If your bed is long, add a 2-foot wide path along one side for easy access without disturbing the plants.
☀️ Step 2: Build the Frame and Prepare the Base
Construct your frame using untreated wood (cedar lasts longest) or galvanized metal to prevent rot. For a 4-foot by 8-foot bed, you'll need four 8-foot-long boards for the sides and four 4-foot-long boards for the corners. Assemble them into a rectangle, ensuring the corners are square by measuring diagonally—both sides should be equal. Secure corners with 2.5-inch deck screws or galvanized nails driven at a 45-degree angle into the boards.
Before adding soil, place the frame in its final location and check for level. Fill the bottom with cardboard or landscape fabric to block weeds, then add a 2-inch layer of gravel for drainage. This prevents waterlogging, which can drown roots and attract pests. I always tap the frame gently after adding gravel to ensure it's stable—you don't want it shifting once planted.
🌱 Step 3: Layer Soil for Pollinator-Friendly Growth
Fill your bed with a 3:1 ratio of topsoil to compost—this gives plants the nutrients they need while improving drainage. For a 4-foot by 8-foot bed, you'll need about 1 cubic yard of soil mix. Start with a 2-inch layer of coarse sand or perlite at the bottom to further improve drainage, especially if your area gets heavy rain. Spread the soil mix evenly, breaking up clumps as you go.
Add a light layer of mulch (like straw or shredded leaves) on top after planting. This keeps moisture in and weeds out, but avoid piling it against plant stems—leave a 1-inch gap to prevent rot. I like to mix in a slow-release organic fertilizer at this stage to give pollinator plants a strong start. Water the soil thoroughly before planting to settle it and remove air pockets.
🌿 Step 4: Plant for Continuous Bloom and Pollinator Needs
Arrange plants in odd-numbered groups (3, 5, or 7) for a natural, full look. Start with tall plants (like bee balm or Russian sage) at the back, then mid-height bloomers (such as purple coneflower or black-eyed Susan) in the middle, and low-growing pollinator favorites (like lavender or creeping thyme) at the front. Space perennials 18-24 inches apart and annuals 12-18 inches apart—this gives them room to grow without competing for sunlight.
Include a mix of early, mid, and late-season bloomers to ensure pollinators have food from spring through fall. For example, plant crocus or lungwort for early bees, coneflowers or milkweed for midsummer, and asters or goldenrod for late-season visitors. Avoid double-flowered varieties—they often lack the pollen and nectar that pollinators rely on. Water deeply after planting to help roots establish, then mulch again to retain moisture.
⏰ Step 5: Maintain for Long-Term Pollinator Success
Check your bed weekly for weeds, pulling them before they compete with your pollinator plants. Water in the early morning to reduce evaporation and fungal diseases. Most pollinator plants need 1-1.5 inches of water per week, but adjust based on rainfall—let the top 2 inches of soil dry out between waterings to prevent overwatering.
Deadhead spent blooms monthly to encourage more flowers and extend the season. Cut back perennials in late fall or early spring to keep the bed tidy and promote new growth. I also add a small birdbath or shallow dish nearby for pollinators to drink—just keep it filled with fresh water. With this care, your raised bed will become a buzzing hub of activity that pollinators can't resist!
Tips & tricks for pollinator-packed raised beds
Creating a thriving pollinator garden isn't rocket science—just a few smart strategies that make all the difference.
Design for Height Layers: In Step 1, when planning your zones, remember that pollinators like bees and butterflies use different heights for different purposes. Tall plants at the back (like bee balm) provide perches for resting, while mid-height bloomers (like coneflowers) are perfect for foraging. Low-growing plants (like thyme) create safe landing spots for smaller insects. I always sketch my design with these layers in mind—it's like building a pollinator hotel with built-in amenities!
Wood Selection Wisdom: For Step 2, cedar might be pricier, but it lasts 5-7 years without rotting, while untreated pine will need replacing in 2-3 years. If you're on a budget, pressure-treated lumber works too—just make sure it's labeled "ground contact" and free of arsenic. Pro tip: Pre-drill screw holes to prevent wood splitting when you secure those corners with 2.5-inch deck screws.
Soil Science: The 3:1 soil-to-compost ratio in Step 3 is perfect, but don't skimp on the coarse sand layer at the bottom. In areas with heavy clay soil, I add an extra inch of sand to prevent waterlogging—this makes a huge difference for delicate pollinator plants. Also, consider adding a handful of worm castings to your compost mix for extra microbial activity that helps roots absorb nutrients.
Planting Patterns: When arranging your plants in Step 4, think about color contrast too. Purple coneflowers against yellow black-eyed Susans create visual cues that help pollinators find nectar more efficiently. And remember—odd numbers (3, 5, or 7 plants per group) look more natural than even numbers, which can appear too geometric for pollinators.
Pro Tips for Raised Flower Bed Designs
- Creating a thriving pollinator garden isn't rocket science—just a few smart strategies that make all the difference.
- Design for Height Layers: In Step 1, when planning your zones, remember that pollinators like bees and butterflies us...
- Wood Selection Wisdom: For Step 2, cedar might be pricier, but it lasts 5-7 years without rotting, while untreated pi...
Frequently asked questions
Got questions about creating your own raised flower bed paradise? You’re not alone—here are some of the most common queries we hear from gardeners just like you!
What’s the best soil mix for a pollinator-friendly raised bed?
Use a well-draining, nutrient-rich blend of 60% native topsoil, 30% compost, and 10% perlite or sand. Pollinators love loose, fertile soil that retains moisture but avoids sogginess. Avoid heavy clay or pure sand—both can stress plants and deter beneficial insects.
When is the ideal time to plant in a raised flower bed?
For most climates, spring (after the last frost) and early fall are perfect. Cool-season plants (like lavender or alyssum) can go in late summer, while heat-lovers (e.g., coneflowers) thrive when planted in spring. Pro tip: Mulch after planting to lock in moisture!
Are there budget-friendly alternatives to cedar or redwood raised beds?
Try:
- Cinder blocks or bricks (stacked with landscape fabric to block weeds).
- Repurposed wood pallets (sand and seal first for safety).
- Galvanized steel troughs (durable and lightweight).
- Fabric grow bags (great for small spaces or renters).
How do I attract more pollinators to my raised bed?
Plant a diverse mix of native flowers with varying bloom times (e.g., early spring crocus, summer black-eyed Susans, and fall asters). Add host plants for butterflies (like milkweed) and water sources (a shallow dish with pebbles). Avoid pesticides—even "organic" ones can harm pollinators!
My raised bed is sagging—how do I fix it?
Sagging usually means the bed needs structural support. Try:
- Adding corner braces or metal screws to reinforce wooden frames.
- Replacing rotted wood or re-laying soil evenly (overloading can cause collapse).
- For fabric or lightweight beds, anchor them to stakes or use landscape screws.
Wrapping up and next steps
Transforming your garden into a buzzing, blooming paradise with raised flower bed designs is simpler—and more rewarding—than you think! 🌸 From sun-loving perennials to shade-friendly pollinator magnets, these layouts ensure your garden stays vibrant all year round.
Whether you’re a seasoned gardener or a curious beginner, the key is to start small, plan with purpose, and watch your space thrive.
Ready to roll up your sleeves? Sketch your design today, gather your materials, and let nature do the rest. Your future pollinator pals will thank you—one bee, butterfly, and burst of color at a time! 🐝✨