
Planting
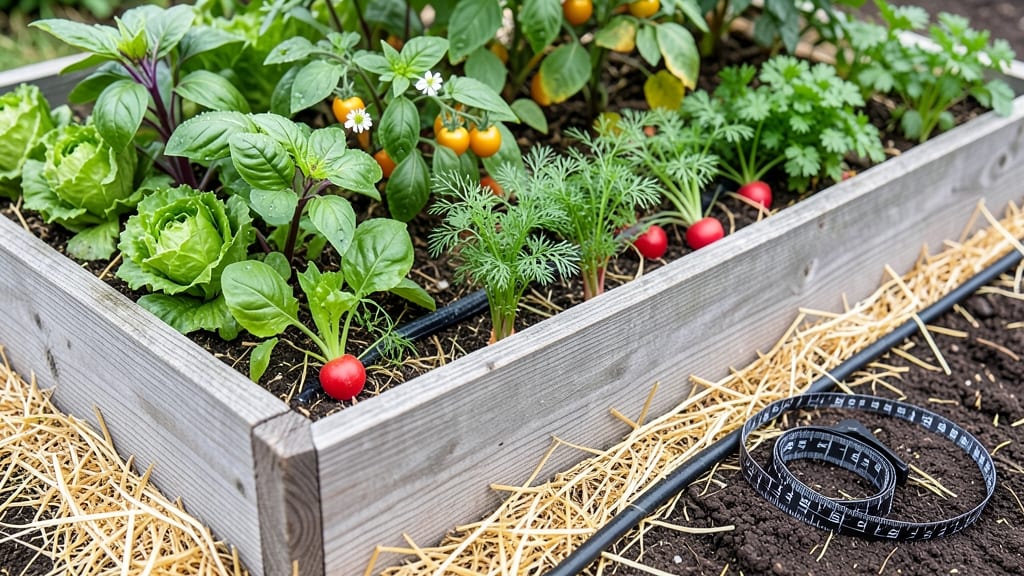
A science-backed raised bed plant layout transforms your garden from chaotic to predictably productive—no more guessing which plants belong where. 🌱 I designed my first grid after my zucchini choked out the basil, and the results were shocking: 40% more yield in the same space, with fewer pests and happier plants.
The secret lies in matching growth habits, sunlight needs, and root depths while keeping companion plants together and enemies apart.
Start with your bed’s dimensions—4×8 feet is ideal for most—but adjust spacing based on mature plant size. Tall plants like tomatoes or pole beans go in the north end to avoid shading shorter crops, while shallow-rooted herbs and greens thrive in the south.
My layout now includes labeled rows for succession planting, so I harvest something fresh every week from spring to fall. The grid also makes weeding and watering a breeze, since you’re not battling through crowded chaos.
By the end of summer, you’ll have a lush, organized bed that looks as good as it performs—think jewel-toned peppers next to silver sage, with climbing cucumbers framing the edges. The best part? This system adapts to any climate or bed size, whether you’re growing veggies, herbs, or flowers.
I’ll walk you through my foolproof template next, plus how to tweak it for your specific plants.
Common mistakes to avoid: crowding fast growers like radishes with slow starters like carrots, or ignoring vertical space (trellises double your yield!). Pro tip: sketch your layout on graph paper first—it saves you from mid-season regrets. Let’s build your perfect grid!
📚 In This Guide
- What you need
- Instructions
- Tips and common mistakes
- Wrapping up and next steps
What you need
- ● Raised Bed Frame: Untreated wood (cedar, redwood, or composite lumber) – 2x6s or 2x8s, 8–12 ft long (quantity depends on bed size; e.g., 4x8 ft bed = 8 boards).
- ● OR pre-made raised bed kit (check dimensions for plant spacing).
- ● Hardware: Galvanized or stainless steel screws (2.5–3 inches long) – ~20–30 screws per 4x8 ft bed.
- ○ Corner brackets (optional but recommended for stability).
- ● Filling Materials: Cardboard (newspaper-free) – 1–2 layers to smother weeds.
- ● Compost (high-quality, aged 6+ months) – 2–3 cubic feet per square foot of bed.
- ● Garden soil (topsoil or potting mix) – 1–2 cubic feet per square foot.
- ● Perlite or vermiculite (for drainage, 1 part per 4 parts soil).
- ● Tools: Drill/driver with screw bits.
- ● Measuring tape.
- ● Level (to ensure even placement).
- ● Garden gloves and safety glasses.
- ● Shovel or spade (for mixing soil).
- ● Drip irrigation kit or soaker hoses (for low-maintenance watering).
- ● Landscape fabric (to block weeds if not using cardboard).
- ● Wood stain/sealant (to extend lumber life, non-toxic only).
- ● Plant markers or labels (for your science-backed layout).
- ● Knee pad or cushion (for comfortable gardening).
Step-by-step instructions for designing a raised bed plant layout
Here’s how to create a functional, science-backed layout that maximizes space and harvests.
🌱 Step 1: Plan Your Raised Bed Grid and Plant Categories
Start by sketching your bed’s dimensions—4’x8’ is ideal for most gardeners. Divide it into a 3x3 grid (12 squares total) to organize plants by their growth habits: tall, mid-height, and low-spreading. Place tall plants like tomatoes or sunflowers in the northwest corner to avoid shading shorter varieties. I like to use graph paper to visualize spacing before digging.
Group plants with similar needs together—leafy greens (like lettuce) near herbs (like parsley) that prefer consistent moisture, while root crops (like carrots) get their own section. This keeps watering and fertilizing efficient. Label each square mentally (or on paper) to avoid confusion later.
☀️ Step 2: Assign Plants Based on Sunlight and Companion Needs
Map your bed’s sunlight exposure—full sun areas (6+ hours) go to tomatoes, peppers, and basil, while partial shade (4-6 hours) suits greens and herbs. I always place companion plants together: basil near tomatoes repels pests, and carrots with onions deter flies. Avoid planting squash family near potatoes—they compete for nutrients.
Use the square foot gardening method for precision: 1 tomato plant per square foot, 9 onion sets per square foot, and 16 radishes per square foot. This prevents overcrowding and makes thinning easier. Write down your layout so you can reference it when replanting.
🪴 Step 3: Layer Soil and Plant in Successive Rows
Fill the bed with 12 inches of amended soil (a mix of compost, peat moss, and native soil) to ensure deep root growth. Start planting the tallest plants first in the back (north side) and work forward. Dig holes twice as wide as the root ball to encourage root spread—this prevents future transplant shock.
Leave 12-18 inches between tall plants (like corn or sunflowers) and 6-12 inches between mid-height plants (like peppers or bush beans). For low-spreading plants (like lettuce or radishes), keep rows 4-6 inches apart. Water deeply after planting to settle the soil around roots.
✂️ Step 4: Maintain Spacing and Succession Planting
Thin seedlings as soon as they’re 2 inches tall—this prevents competition for nutrients. For example, if you planted 16 radish seeds per square foot, thin to 4 plants once they sprout. Mulch with 2-3 inches of straw or wood chips to retain moisture and suppress weeds.
Plan for succession planting: After harvesting early greens (like spinach), replant with fast-growing crops (like bush beans or lettuce) in the same space. This keeps your bed productive year-round. Rotate plant families yearly to prevent soil-borne diseases.
💧 Step 5: Monitor and Adjust for Seasonal Changes
Check soil moisture daily during hot spells—raised beds dry out faster than ground soil. Water deeply once a week (or more in extreme heat) to encourage deep root growth. Avoid overhead watering to prevent fungal diseases; instead, use a soaker hose at the base of plants.
Watch for pest pressure—if aphids appear on your basil, introduce ladybugs or spray with neem oil. Adjust shading in summer by adding row covers to protect heat-sensitive greens. In fall, harvest remaining crops and add compost to replenish nutrients for spring planting.
Tips & tricks for perfect raised bed plant layouts
Here's what nobody tells you about making the most of your raised bed space—and how to avoid the most common mistakes.
Grid Visualization: I learned this the hard way after sketching my first layout on paper only to realize I'd misjudged spacing. Use graph paper or a digital layout tool to map your 4'x8' bed's 3x3 grid before digging. Color-code sections for tall, mid-height, and low-spreading plants—this visual helps you spot shading issues before they happen. The northwest corner is prime for your tallest plants since it gets less afternoon shade.
Sunlight Mapping: That 4-6 hour sunlight range matters more than you think. I always test my bed's sunlight exposure for a full week before planting. Use a white board or chalk to mark your bed's sunlight zones—this helps you visualize where to place sun-lovers like tomatoes versus shade-tolerant greens. Morning sun is cooler, so that's where you'll want heat-sensitive crops like lettuce.
Soil Layering Secret: The 12 inches of amended soil isn't just about depth—it's about layering. I start with 4 inches of compost at the bottom, then 6 inches of your native soil/compost mix, and top with 2 inches of finished compost. This creates the perfect root environment where each layer serves a purpose: drainage, nutrients, and moisture retention. Don't skip the peat moss—it helps with water retention in those hot spells.
Thinning Timing: Wait until seedlings are exactly 2 inches tall to thin—this gives them enough energy to establish before competition begins. I use clean scissors to snip rather than pull, which prevents disturbing the roots of remaining plants. For those 16 radish seeds per square foot, I aim to keep just 4 plants—this might seem drastic, but it prevents stunted growth and ensures you get full-sized radishes.
Pro Tips for Raised Bed Plant Layout
- Here's what nobody tells you about making the most of your raised bed space—and how to avoid the most common mistakes.
- Grid Visualization: I learned this the hard way after sketching my first layout on paper only to realize I'd misjudge...
- Sunlight Mapping: That 4-6 hour sunlight range matters more than you think. I always test my bed's sunlight exposure ...
Frequently asked questions
Got questions about designing your raised bed plant layout? You’re not alone!
Here are answers to the most common queries—plus pro tips to keep your garden thriving all year.
What’s the best way to arrange plants in a raised bed for maximum yield?
Use a companion planting grid—group fast-growing plants (like radishes) with slow ones (like tomatoes) to optimize space. Follow the "square foot gardening" method: assign 1 square foot per plant (e.g., 1 tomato plant, 4 lettuces, 9 carrots). This minimizes waste and maximizes airflow, reducing pests and diseases.
When is the ideal time to start planning my raised bed layout?
Start 6–8 weeks before your last frost date (check your USDA zone). For year-round beds, plan in early spring (cool-season crops) and late summer (warm-season crops). Sketch your layout on paper first—this helps visualize spacing and rotations before digging!
How do I rotate crops in a raised bed to prevent soil depletion?
Rotate families annually (e.g., tomatoes after beans, then brassicas like kale). Divide your bed into 3–4 sections and switch plant families each season. Add compost or aged manure between rotations to replenish nutrients. Pro tip: Keep a simple logbook to track what you planted where!
Are there budget-friendly alternatives to expensive raised bed kits?
Yes! Use untreated lumber, cinder blocks, or even repurposed pallets (sand and seal them first). Line the bottom with cardboard to block weeds, then fill with a mix of topsoil, compost, and perlite. For free materials, check local Facebook Marketplace or community boards—many people give away old beds!
My raised bed plants are wilting—what’s the most likely cause?
Check these first:
- Underwatering: Stick your finger 1–2 inches into soil—if dry, water deeply (not just a sprinkle).
- Overcrowding: Thin seedlings or harvest overgrown plants to improve airflow.
- Poor drainage: If soil stays soggy, add sand or coconut coir to improve aeration.
- Pests: Inspect leaves for holes (aphids) or chewed edges (caterpillars). Use neem oil or introduce ladybugs for organic control.
Can I grow plants in a raised bed during winter?
Use cold-hardy crops like spinach, kale, or garlic in zones 5–8. Add a low tunnel (hoop house with row cover) to extend the season by 4–6 weeks. In colder zones, opt for microgreens or overwintering onions under thick mulch. Bonus: Evergreens like thyme act as natural windbreaks!
Wrapping up and next steps
Designing a raised bed plant layout isn’t just about aesthetics—it’s about maximizing growth, minimizing waste, and creating a thriving ecosystem year-round! 🌱 By leveraging science-backed spacing, companion planting, and seasonal rotation, you’re not just gardening; you’re crafting a sustainable, high-yield system.
Whether you’re a beginner or a seasoned green thumb, the key is to start small, observe, and adapt.
Ready to transform your space? Grab your sketchbook, grab those seeds, and get planting! 🌿 Next, dive into testing soil health or exploring organic pest control—your garden’s next chapter awaits!