
Planting
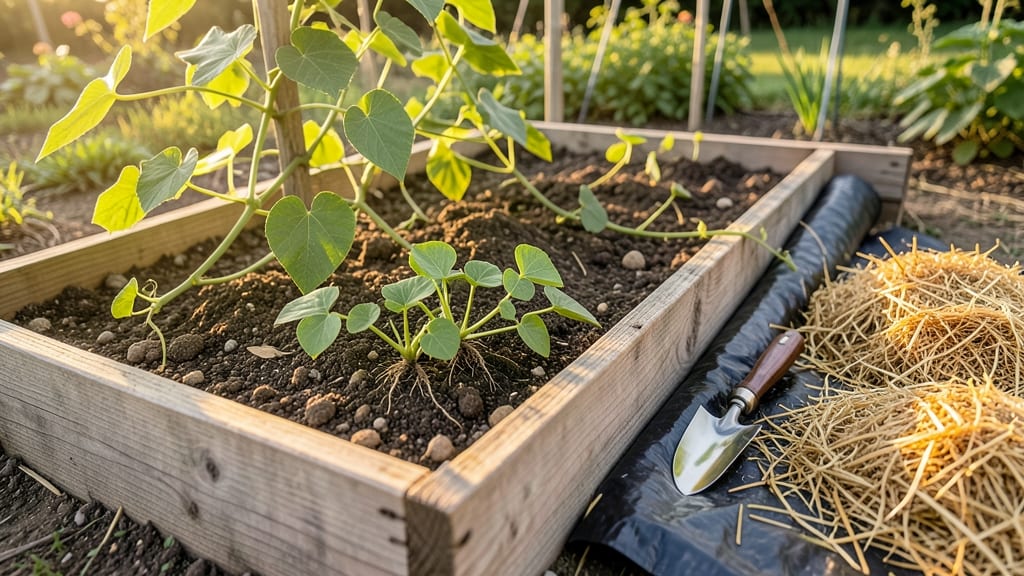
Sweet potatoes thrive in raised beds where roots spread freely without soil compaction. 🌱 My first attempt with store-bought mix failed—until I learned the secret: a 12-inch-deep blend of compost, sand, and aged manure. This recipe transforms your raised bed into a sweet potato powerhouse.
The key is drainage and warmth—raised beds heat up faster than ground soil, giving vines a head start. Space plants 12-18 inches apart in rows 3 feet apart, and plant slips (not seeds) 2 inches deep. Water deeply twice weekly once established, keeping soil moist but never soggy.
By midsummer, you’ll see lush vines and tuber formation below the soil line. The raised bed’s elevated edges prevent rot from ground moisture, and the loose soil makes harvesting easier. Sweet potatoes grown this way stay clean, disease-free, and sweet—no digging through mud.
This method works in zones 7-10 with 6+ hours of sun daily. For cooler climates, extend the bed with black plastic mulch. The payoff? Bigger yields with less effort—no more struggling to dig in heavy ground.
📚 In This Guide
- What you need
- Instructions
- Tips and common mistakes
- Wrapping up and next steps
What you need
- ● Raised Bed Frame: Wooden frame (cedar or untreated lumber, minimum 12" deep—sweet potatoes need room to stretch!)
- ● OR pre-made raised bed kit (check dimensions—18" deep is ideal for vining roots).
- ● Soil Mix (Custom Blend): 50% well-draining garden soil (or potting mix)
- ● 30% compost or aged manure (for nutrients)
- ● 20% perlite or coarse sand (to prevent compaction)
- ● Sweet Potato Slips: 10–15 healthy slips (green, leafy stems from store-bought sweet potatoes—blank">grow your own slips for free!)
- ● Tools: Garden trowel or spade
- ● Gloves (to protect from soil and thorns)
- ● Watering can or hose with gentle spray nozzle
- ● Mulch (straw or shredded leaves, 2–3 inches)
- ● Drip Irrigation Kit: Keeps roots consistently moist without overwatering.
- ● Row Cover or Netting: Protects slips from pests like birds or squash bugs.
- ● Slow-Release Fertilizer: (e.g., 10-10-10) for a nutrient boost mid-season.
- ● Wood Chips or Landscape Fabric: Lines the bed to prevent soil erosion (if using lightweight mix).
- ● Support Stakes or Trellis: For varieties that vine aggressively (though sweet potatoes are low-maintenance!).
Step-by-Step guide for planting sweet potatoes in raised beds
Here’s how to create the perfect deep, loose soil environment sweet potatoes crave—no digging required.
🪴 Step 1: Build or Use a Raised Bed at Least 12 Inches Deep
Sweet potatoes need 12-18 inches of loose, well-draining soil to develop their edible tubers. If building a new bed, construct it from rot-resistant wood (cedar or composite lumber) or repurpose an existing one. The depth is critical—shallow beds restrict root growth and yield small, stunted tubers. I like to add cardboard or landscape fabric at the bottom to suppress weeds without blocking drainage.
Position the bed in full sun (at least 8 hours daily) and protect it from strong winds. If your site has poor drainage, elevate it further or add coarse sand to the bottom layer. The goal is soil that stays warm and loose year-round—sweet potatoes thrive in 70-85°F soil temperatures and hate cold, compacted earth.
🌱 Step 2: Layer Soil for Perfect Drainage and Nutrients
Fill the bed with a custom mix of 50% compost, 30% coconut coir or peat moss, and 20% perlite or coarse sand. This combination prevents soil from packing down while retaining moisture. I start with a 4-inch layer of compost at the bottom (sweet potatoes are heavy feeders), then alternate 2-inch layers of coir and perlite up to the rim. This mimics the loose, aerated soil they grow in naturally.
Moisten the mix thoroughly but avoid sogginess—sweet potatoes rot in waterlogged soil. A good test is to squeeze a handful: it should hold together but not drip. If your climate is dry, add mulch (straw or shredded leaves) on top to lock in moisture and suppress weeds. This layer also keeps the soil temperature stable, which is key for consistent growth.
☀️ Step 3: Plant Slips (Young Plants) at the Right Depth and Spacing
Sweet potatoes grow from slips (young plants), not seeds. Plant them 4-6 weeks after your last frost when soil is at least 65°F. Space slips 12-18 inches apart in rows 24 inches apart—this gives tubers room to swell without crowding. Bury the stem 2-3 inches deep, leaving the top leaves above soil level. I like to plant in a slight trench (1-2 inches deep) to encourage roots to grow downward.
Water deeply after planting to settle the soil around the slips. Avoid overhead watering—it spreads disease. Instead, use a soaker hose or water at the base. Within 2-3 weeks, you’ll see new leaves emerge—that’s your signal the roots are establishing. If leaves yellow, it’s often a sign of overwatering or poor drainage, so adjust your watering schedule.
💧 Step 4: Mulch and Water for Maximum Yield
Apply a 4-inch layer of mulch (straw or pine needles) around plants to retain moisture and regulate soil temperature. Sweet potatoes are drought-tolerant once established, but they need consistent moisture during the first 6-8 weeks of growth. Water 1-2 inches per week, letting the soil dry slightly between waterings. Overwatering leads to rot, while underwatering causes small, tough tubers.
As vines grow, gently hill soil around the base of plants (add 2-3 inches of soil every few weeks). This encourages more tuber development below ground. By mid-summer, vines will sprawl—let them grow freely, but keep them contained in the bed to prevent disease spread. The key is balance: enough water to feed the plant, but not so much that the soil stays soggy.
⏰ Step 5: Harvest When Vines Die Back
Sweet potatoes are ready to harvest 90-120 days after planting, when the vines turn yellow and die back naturally. Gently dig around the base of plants with a fork or hands—avoid piercing the tubers. Lift carefully to avoid bruising. Cure harvested sweet potatoes in a warm (80-85°F), humid (80-90%) space for 10 days to develop sweetness and thicken skins. Store in a cool, dark place for long-term use.
If frost threatens before harvest, cover plants with row fabric to extend the season. Unharvested tubers left in the ground will shrink and develop woody centers, so time your planting for a long, warm growing season. With the right soil and care, you’ll pull out pound after pound of sweet, flavorful tubers—worth every layer of the bed!
Tips & tricks for perfect raised bed sweet potatoes
Sweet potatoes reward patience and precision—here's how to maximize your harvest without the guesswork.
The Depth Difference: That 12-18 inch depth in Step 1 isn't arbitrary—it's based on how deep sweet potato tubers grow naturally. I've found that adding a 1-inch layer of coarse sand at the very bottom (before the cardboard) creates an instant drainage layer that prevents rot. This is especially important if your climate gets heavy rains—water should flow through, not pool. The tubers will follow this loose layer downward, giving you larger, more uniform harvests.
Soil Layering Secrets: When building your soil mix in Step 2, don't just eyeball those 2-inch layers of coir and perlite. Use a straight-edged board to create clean, even layers—this prevents pockets where soil might compact. I also recommend adding a handful of biochar (optional) to each 4-inch compost layer. Biochar improves soil structure and holds nutrients longer, which translates to sweeter tubers. The key is maintaining that airy, loose texture throughout.
Planting Precision: The 2-3 inch planting depth in Step 3 is crucial, but here's what I've learned about spacing: if you're growing in a small bed, reduce the 12-18 inch spacing to 10-12 inches between slips. This works because sweet potatoes don't compete for sunlight like many other crops—they spread horizontally. Just be prepared for slightly smaller tubers. For the trench method, I use a trowel to create a shallow furrow rather than digging holes, which preserves the soil structure we worked so hard to create.
Watering Wisdom: That 1-2 inch weekly watering guideline in Step 4 needs adjustment based on your soil mix. The coir-perlite combination holds moisture differently than regular garden soil. I check moisture by pushing my finger 2 inches into the soil—if it feels dry, that's when to water. The mulch layer should stay damp, not soggy. One trick I've found helpful is to water in the early morning when temperatures are cooler—this reduces evaporation and gives roots time to absorb moisture before the heat of the day.
Pro Tips for Raised Bed For Sweet Potatoes
- Sweet potatoes reward patience and precision—here's how to maximize your harvest without the guesswork.
- The Depth Difference: That 12-18 inch depth in Step 1 isn't arbitrary—it's based on how deep sweet potato tubers grow...
- Soil Layering Secrets: When building your soil mix in Step 2, don't just eyeball those 2-inch layers of coir and perl...
Frequently asked questions
Got questions about growing sweet potatoes in raised beds? You’re not alone! Here are answers to the most common concerns—so you can dig in with confidence.
How deep should a raised bed be for sweet potatoes?
Sweet potatoes need at least 12–18 inches of soil depth—deeper is better! Since they have long, sprawling roots, a shallow bed (under 12") will stunt growth. Use cedar or untreated wood for durability, and fill with a mix of 60% topsoil, 30% compost, and 10% sand for drainage.
When is the best time to plant sweet potatoes in a raised bed?
Plant slips (young plants) 2–4 weeks after your last frost date when soil temps hit 65°F+. In warm climates, aim for spring (March–April) or fall (September–October) to avoid summer heat stress. Avoid planting too early—cold soil slows root development.
Can I grow sweet potatoes in a raised bed without slips (just seeds)?
Yes, but it’s slower and less reliable. If using seeds (like store-bought sweet potatoes), soak them in water for 24 hours, then plant 1–2 inches deep in warm soil. Slips (root cuttings) grow 3–4x faster—ask local nurseries or sprout your own from store-bought sweet potatoes (just let them sprout in water first!).
How do I keep pests (like squirrels or bugs) away from my raised bed sweet potatoes?
Use these natural deterrents:
- Row covers (lightweight fabric) to block flying pests.
- Copper tape around the bed edges to repel squirrels.
- Neem oil spray (weekly) for aphids/beetles.
- Interplant with marigolds or basil—their scent confuses pests.
Why aren’t my sweet potatoes growing in the raised bed?
Check these troubleshooting tips:
- Not enough sun? Sweet potatoes need 6–8+ hours of sunlight daily.
- Overwatering? Let soil dry between waterings—roots rot in soggy soil.
- Nutrient deficiency? Add compost or balanced fertilizer (like 10-10-10) when vines appear.
- Poor soil mix? Amend with more compost or perlite for aeration.
Wrapping up and next steps
Growing sweet potatoes in a raised bed isn’t just rewarding—it’s transformative! 🌱 With the right soil depth, organic matter, and a little patience, you’ll unlock a harvest of vibrant, nutrient-packed tubers that rival store-bought (but taste so much better).
Whether you’re a beginner or a seasoned gardener, this method makes sweet potato success achievable—no fancy equipment required.
Ready to dig in? Start by sketching your raised bed layout this weekend, then gather your supplies. Before you know it, you’ll be feasting on homegrown sweet potatoes—and maybe even sharing the bounty with neighbors! Happy planting! 🍠✨