
How To
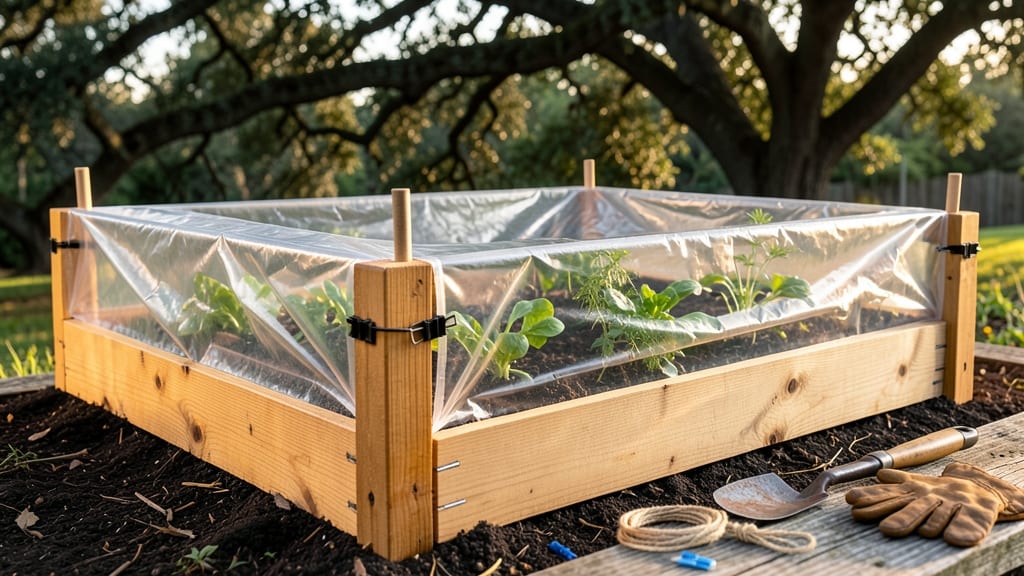
My raised bed covers DIY starts with a few basic supplies and an afternoon of work that pays off all season long. 🌱 These homemade covers transform my garden into a controlled environment where plants thrive through heatwaves, pests stay out, and frost never touches tender leaves.
The best part? You'll never need to buy expensive commercial covers again.
All you need is some sturdy fabric or plastic sheeting, zip ties or rope, and a few wooden dowels or PVC pipes for support. I used old bedsheets and heavy-duty plastic from the hardware store—both work perfectly.
The whole project costs less than $30 and takes about 2 hours to complete for a standard 4x8-foot bed.
Once installed, you'll see immediate benefits: soil stays moist longer, nighttime temps stay warmer, and pests like cabbage moths can't lay eggs on your plants. My lettuce now grows through summer when it used to bolt in days, and my tomatoes set fruit even in July heat.
Customize for your climate—add ventilation holes for hot summers or double-layer for extra insulation in cold snaps. These covers last for years with simple care, making them the most cost-effective garden upgrade I've ever made. Ready to extend your growing season?
📚 In This Guide
- What you need
- Instructions
- Tips and common mistakes
- Wrapping up and next steps
What you need
- ● Covering Material (choose one): Frost cloth (30–50% shade cloth) – 1–2 yards per bed (adjust based on bed size)
- ● Burlap or heavy-duty landscape fabric – 1–2 yards per bed
- ● Hardware cloth (for pest protection) – 1/4" or 1/2" mesh, cut to bed dimensions
- ○ Support Frame (optional but recommended): PVC pipes (1/2" or 3/4" diameter) – 4–8 pieces, 3–4 ft long
- ● Wooden dowels or stakes – 4–6 pieces, 1–2 ft long
- ● Bamboo stakes or rebar – 4–8 pieces, 2–3 ft long
- ● Fasteners & Hardware: Zippers or Velcro strips – 1–2 per bed (for secure closure)
- ● Staple gun + staples – for attaching fabric to frame
- ● Screws or brackets – if using a wooden frame
- ● T-nuts or washers – for securing PVC hoops
- ● Measuring tape
- ● Scissors or utility knife (for cutting fabric/mesh)
- ● Drill or screwdriver (if assembling a frame)
- ● Pliers (for bending PVC or hardware cloth)
- ● Ruler or straightedge (for precise cuts)
- ● Hole punch (if attaching fabric to stakes)
- ● Reflective tape – to deter pests like deer
- ● Waterproof sealant – for wooden frames
- ● Heavy-duty grommets – for hanging covers on hooks
- ● Thermometer – to monitor bed temperature
- ● Paint or stain – for aesthetic or weatherproofing frames
Step-by-Step instructions for building raised bed covers
Here's the straightforward way to create durable, weatherproof covers that extend your growing season without breaking the bank.
🪴 Step 1: Measure and Cut Your Base Frame
Start by measuring your raised bed's dimensions—length, width, and height—then add 2 inches to each side for overhang. This extra space keeps rain from pooling on the soil when covers are in place. I use 2x4 lumber for the frame because it's sturdy yet lightweight enough to lift easily. Cut four pieces to match your bed's adjusted dimensions.
Assemble the frame with deck screws (not nails—they pull out over time). Pre-drill holes to prevent wood splitting, especially if you're using pressure-treated lumber. The frame should be slightly taller than your bed's sides to create a secure fit. Test the fit by placing it over your bed before attaching any covering material.
🌱 Step 2: Choose and Attach Your Covering Material
For lightweight, breathable protection, frost cloth or agricultural fabric works best—it lets sunlight through while blocking frost. If you need heavier coverage for wind or snow, opt for corrugated plastic or clear polycarbonate panels. Secure the material to the frame using zip ties or staples (if using fabric). Leave a 4-inch overhang on all sides to ensure full coverage.
For a more permanent solution, I like to use clear vinyl tarp stretched tightly over the frame and secured with bungee cords along the edges. This creates a mini greenhouse effect. Whatever you choose, avoid heavy materials like plywood—they can smother plants and trap too much heat. Test your cover by placing it over the bed and checking for gaps where cold air might sneak in.
☀️ Step 3: Add Adjustable Supports for Stability
To keep covers from sagging under snow or heavy rain, install adjustable supports at each corner of the frame. Use PVC pipes cut to 18-24 inches tall and secured with zip ties or u-bolts. These supports let you raise or lower the cover depending on weather conditions. For extra stability, add a center support if your bed is wider than 4 feet. This prevents the cover from bowing in the middle.
I like to paint the supports with weatherproof paint to extend their lifespan. Position them so the cover sits 6-12 inches above the bed when fully raised. This height allows for airflow while still protecting plants from frost. If you're using plastic, leave a small gap at the bottom to prevent condensation buildup, which can rot plant leaves.
⏰ Step 4: Test and Adjust for Seasonal Use
Before the first frost, place the cover over your bed and secure it tightly. Check for drafts by running your hand along the edges—you should feel a gentle breeze, not a cold draft. If gaps exist, add weatherstripping or adjust the overhang. For early spring or late fall, leave the cover partially open during the day to let in sunlight while still protecting plants overnight.
Monitor your plants closely the first few weeks. If leaves look wilted or yellow, the cover might be trapping too much heat—lift it slightly during the day. Conversely, if frost still forms, lower the cover or add an extra layer of frost cloth. With practice, you'll find the perfect balance for your climate. Store the cover when not in use to prevent UV damage and extend its life.
Tips & tricks for perfect raised bed covers
Here's what nobody tells you about building covers that actually work—no more wasted materials or ineffective protection.
Frame Fit is Everything: In Step 1, when you're cutting your 2x4 lumber, take an extra 5 minutes to test-fit the frame before final assembly. I've seen gardeners skip this and end up with frames that wobble or don't sit flush against the bed. The frame should sit snugly on top of your raised bed's sides—no gaps where cold air could sneak in. If it feels loose, add small wood shims inside the corners to create a tighter fit. This simple check prevents all sorts of draft problems later.
Material Matters More Than You Think: For Step 2, if you're using frost cloth or agricultural fabric, look for materials labeled with a "light transmission percentage" of at least 60%. This ensures your plants still get enough sunlight to photosynthesize while being protected from frost. I've had the best luck with 30-gauge frost cloth—it's lightweight enough to handle easily but durable enough to last multiple seasons. When securing with zip ties, space them every 12-18 inches along the edges to prevent sagging over time.
Support System Secrets: In Step 3, when installing your 18-24 inch PVC supports, consider adding a small piece of foam pipe insulation around each pipe where it touches the frame. This creates a tiny air gap that prevents condensation from forming where the metal meets wood. I learned this the hard way after noticing wood rot developing at the base of my supports after just one winter. Also, if you're in an area with heavy snowfall, add diagonal cross-bracing between opposite supports to prevent the frame from bowing under weight.
Seasonal Adjustment Strategy: For Step 4, here's my pro move: mark your cover with a permanent marker at the 6-inch and 12-inch height points on each support. This lets you quickly adjust the height based on weather conditions without measuring each time. During mild fall nights, I keep it at 12 inches for maximum airflow. When temperatures drop below freezing, I lower it to 6 inches for better frost protection. This simple marking system saves me time and ensures consistent protection throughout the season.
Pro Tips for Raised Bed Covers Diy
- Here's what nobody tells you about building covers that actually work—no more wasted materials or ineffective protect...
- Frame Fit is Everything: In Step 1, when you're cutting your 2x4 lumber, take an extra 5 minutes to test-fit the fram...
- Material Matters More Than You Think: For Step 2, if you're using frost cloth or agricultural fabric, look for materi...
Frequently asked questions
Got questions about DIY raised bed covers? We’ve got answers!
Whether you’re wondering about materials, timing, or troubleshooting, here’s what you need to know to keep your garden thriving year-round.
When is the best time to install a raised bed cover?
Install your cover before the first frost hits (typically late fall) to protect plants from cold snaps. For spring, add it as soon as temperatures dip below 40°F at night. A cover traps heat during the day and insulates plants overnight—ideal for extending your growing season without early harvests.
What’s the easiest DIY raised bed cover material to use?
Start with clear corrugated plastic (cheap and lightweight) or bubble wrap (budget-friendly but less durable). For long-term use, opt for polycarbonate panels (UV-resistant) or fabric row covers (breathable for seedlings). Avoid thick materials—ventilation is key to preventing mold or overheating!
How do I keep pests out without suffocating my plants?
Use fine mesh fabric (like Agribon) for ventilation while blocking insects. Secure it tightly with zip ties or clips to prevent gaps. For heavy pests (like rabbits), add a hardware cloth frame around the edges. Pro tip: Loosen covers slightly during warm days to reduce humidity bups.
Will a DIY cover protect plants during heavy snow or ice?
Lightweight covers (plastic or fabric) won’t support snow—shed it manually to prevent collapse. For extreme winters, use sturdy polycarbonate or a wooden frame with a sloped roof to let snow slide off. Add weights or stakes to secure covers during storms, but avoid crushing plants underneath.
Can I reuse last year’s raised bed cover?
Yes! Clean and inspect for tears, mold, or UV damage before reuse. Disinfect fabric covers with a 10% bleach solution (rinse well). Plastic covers may yellow over time—replace if brittle. Store covers flat and dry in a cool, dark space to extend their lifespan for years.
Still stumped?
Drop your question in the comments—we’re happy to help you customize your cover for peak performance!
Wrapping up and next steps
Creating your own raised bed covers is a game-changer for any gardener! With just a few materials and a little creativity, you can extend your growing season, protect your plants from harsh weather, and even boost your harvest.
Whether you’re using old windows, fabric, or repurposed materials, these DIY covers are budget-friendly and easy to customize to fit your needs.
Now that you’re armed with ideas and answers, it’s time to roll up your sleeves and get building! Start small—try one bed first—and soon you’ll be enjoying longer, healthier growing seasons with minimal effort. Happy gardening! 🌱✨