
Landscaping
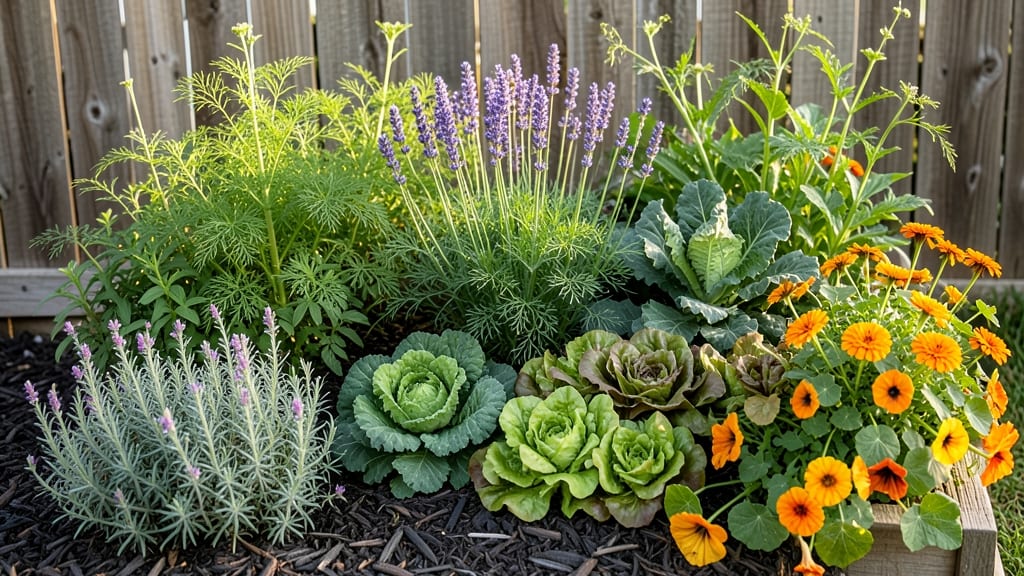
A raised bed along your fence line turns wasted space into a lush, private garden oasis. 🌿 I've used this trick to double my growing area without adding square footage—just by working with what's already there.
The key is choosing the right fence type, optimizing sunlight, and picking plants that thrive in tight quarters while still creating that coveted "hidden garden" feel.
Most people assume you need a wooden fence, but I've successfully used chain-link, vinyl, and even a sturdy privacy screen as the backdrop. The bed itself should sit 6-12 inches away from the fence to prevent rot and allow for proper drainage.
For privacy, tall plants like sunflowers, hollyhocks, or even a trellised cucumber vine work wonders—while still leaving room for your veggies and herbs below.
What you'll end up with is a garden that feels secluded yet sunlit, productive yet pretty, and usable year-round if you layer in cold-hardy crops like kale, spinach, and garlic.
The fence becomes your garden's natural trellis and windbreak, while the raised bed gives you perfect soil conditions regardless of what's under your lawn or patio.
This setup works especially well for urban backyards, small spaces, or anywhere you want to maximize privacy without sacrificing growing room. The only real challenge is drainage—so we'll tackle that first. Here's how to make it work for your space.
📚 In This Guide
- What you need
- Instructions
- Tips and common mistakes
- Wrapping up and next steps
What you need
- ● Pro tip: 💡 If your fence line gets full sun, opt for cedar lumber—it’s naturally rot-resistant and aromatic! For shadier spots, pressure-treated pine works just fine.
Step-by-step instructions for building a raised bed along a fence line
Here's how to create a functional, space-saving privacy garden that maximizes your yard's potential.
🪴 Step 1: Measure and Mark Your Space
Start by measuring the length of your fence line where you want the raised bed. A standard width of 4 feet provides easy access from both sides while maximizing planting space. Mark the area with stakes and string—this keeps your layout straight and prevents overbuilding.
Check for any underground utilities with a call before you dig service. You don't want to hit pipes or wires when digging post holes. I always mark the fence line with spray paint first to visualize the bed's footprint before committing to measurements.
🪴 Step 2: Build the Raised Bed Frame
Use untreated cedar or redwood lumber (both resist rot) for the frame. Cut 2x6 boards to your desired length—typically 8 feet or less for easy handling. Assemble the frame with galvanized screws or corner brackets, creating a rectangular shape with 4-foot width and 1-foot height (adjustable based on your needs).
Position the frame directly against the fence, leaving a 2-inch gap between the wood and fence for airflow and drainage. Secure the frame to the ground with T-posts or landscape screws every 2 feet to prevent shifting. This ensures stability, especially in windy conditions.
🌱 Step 3: Add Layers for Drainage and Soil
Line the bottom of the frame with landscape fabric to prevent weeds from invading. Add a 2-inch layer of gravel or crushed stone for drainage—this keeps water from pooling and roots from suffocating. I like to use 1/2-inch gravel because it drains quickly but doesn’t wash away easily.
Fill the remaining space with a mix of 1/3 compost, 1/3 topsoil, and 1/3 perlite or coarse sand. This lightweight blend drains well but retains moisture for plants. Avoid garden soil—it compacts and smothers roots in raised beds. Fluff the soil with a rake to create a loose, aerated base for planting.
☀️ Step 4: Plant for Privacy and Year-Round Interest
Start with fast-growing shrubs like bamboo or arborvitae along the fence line for instant privacy. Space them 3-4 feet apart to allow room for growth. For a mix of height and texture, add ornamental grasses or hydrangeas in the back row and perennials like lavender or salvia in front.
Plant annuals like sunflowers or cosmos in the center for seasonal color. These fill gaps quickly and attract pollinators. Water deeply after planting to settle the soil and encourage root establishment. Mulch with 2-3 inches of shredded bark to retain moisture and suppress weeds—this is especially important in the first growing season.
💧 Step 5: Maintain for Long-Term Success
Water the bed 1-2 inches per week, focusing on the base rather than overhead spraying. A drip irrigation system works best—it delivers moisture directly to roots without wetting foliage, which reduces disease risk. Check soil moisture with your finger; if the top 1 inch feels dry, it’s time to water.
Fertilize in early spring with a balanced organic fertilizer (like 10-10-10) to support new growth. Prune shrubs in late winter to shape them and remove dead branches. This keeps your privacy screen dense and tidy. Watch for pests like aphids or spider mites—neem oil spray resolves most issues without harming plants or pollinators.
Tips & tricks for space-saving privacy gardens
Between us, these small adjustments make all the difference between a flimsy fence hugger and a sturdy, long-lasting privacy solution.
Material Selection: While cedar and redwood are ideal for their natural rot resistance, I've found that pressure-treated lumber can work too—just seal it with a non-toxic wood preservative after assembly. The 4-foot width is perfect because it gives you enough planting space while still allowing access from both sides without crowding.
Drainage Hack: That 2-inch gravel layer might seem small, but trust me on this—it prevents waterlogging that can rot your frame from the inside. For extra insurance, especially in heavy clay soil, add a layer of landscape fabric under the gravel too. This creates a proper drainage sandwich that keeps roots happy.
Planting Strategy: When spacing those 3-4 foot apart shrubs, consider their mature height. Tall arborvitae belong at the back while shorter perennials like lavender go in front. This creates natural layers that block views more effectively. I like to stagger plants in a staggered pattern rather than straight lines for a more organic look.
Maintenance Shortcut: The 2-3 inches of mulch isn't just for looks—it's your weed barrier and moisture retainer. I recommend using shredded hardwood mulch because it breaks down slowly and adds organic matter to your soil as it decomposes. Refresh it every spring to maintain that thick protective layer.
Pro Tips for Raised Bed Along Fence Line
- Between us, these small adjustments make all the difference between a flimsy fence hugger and a sturdy, long-lasting ...
- Material Selection: While cedar and redwood are ideal for their natural rot resistance, I've found that pressure-trea...
- Drainage Hack: That 2-inch gravel layer might seem small, but trust me on this—it prevents waterlogging that can rot ...
Frequently asked questions
Got questions about creating a raised bed along your fence line? You’re not alone! Here are some common concerns—and straightforward answers—to help you plan like a pro.
What’s the best way to keep my fence from rotting or getting damaged?
Use cedar or pressure-treated lumber for the bed frame to prevent moisture damage. If your fence is wooden, add a waterproof barrier (like landscape fabric) between the bed and fence. For metal or vinyl fences, a simple 1-inch gap with mulch or gravel will keep things dry and airy.
Can I build a raised bed along a fence year-round, or is there a best time?
Spring or early fall is ideal—soil is workable, and plants thrive without extreme heat or cold. If you’re in a mild climate, winter builds are fine, but avoid freezing ground. Pro tip: Prep the fence line first (clear debris, check for nails) to save time later!
How deep should the bed be, and what if my fence blocks sunlight?
Aim for 6–12 inches deep for most veggies and herbs; deeper (18+ inches) for root crops like potatoes. If your fence casts shade, opt for shade-tolerant plants (e.g., lettuce, spinach, ferns) or add a reflective surface (like a white fence panel) to bounce light onto the bed.
Do I need a permit to build a raised bed along my fence?
Usually not—but check local HOA or city codes if your fence is near property lines. Most raised beds under 4 feet tall and 3 feet wide fly under the radar. When in doubt, snap a quick photo and ask your local extension office for peace of mind!
What’s the easiest alternative if my fence isn’t sturdy enough?
Try a freestanding raised bed (no fence attachment) or a vertical planter (like trellises or wall-mounted boxes) to save space. For extra privacy, add fast-growing climbers (e.g., morning glories, ivy) to soften the look while keeping roots contained.
Still stumped? Drop your question in the comments—we’ve got answers!
Wrapping up and next steps
A raised bed along your fence line isn’t just a smart use of space—it’s a game-changer for privacy, productivity, and curb appeal! 🌿 Whether you’re a seasoned gardener or just starting, this design maximizes your outdoor potential while keeping maintenance simple.
Now that you’ve got the know-how, it’s time to grab those tools and make your vision bloom.
Ready to transform your yard? Start by sketching your design, gathering supplies, and breaking ground—your future garden is waiting! 🌱