
Tools
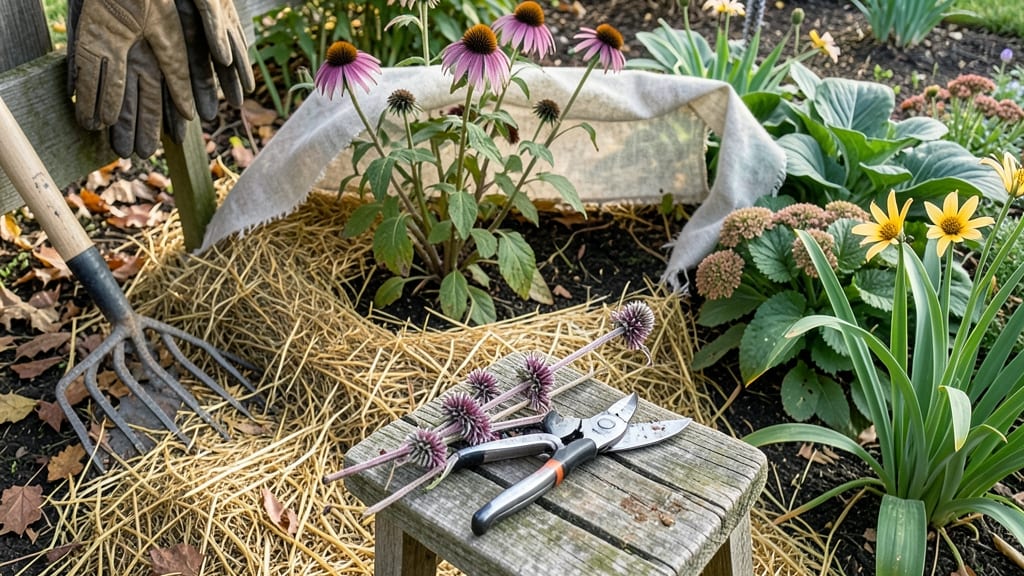
Your garden’s winter survival starts with putting your garden to bed for the winter—these 10 critical tasks before the first frost. 🍂 I’ve learned the hard way—skipping even one step can mean frozen roots, broken branches, or lost soil structure by spring.
This isn’t just cleanup; it’s a survival strategy for your plants and soil.
The real secret? Timing and layers. Start by pruning perennials after they’ve died back but before hard frosts hit—usually 2-4 weeks before your first freeze. Then add mulch (3-4 inches of straw or shredded leaves) to insulate roots, and wrap tender plants in burlap or frost cloth.
Even your tools need care: clean blades, sharpen pruners, and store them dry to prevent rust.
By spring, you’ll have healthier plants, better soil structure, and fewer surprises. The mulch breaks down into free fertilizer, and protected roots bounce back faster. Think of it as tucking your garden into a cozy blanket—so when warmer days return, everything’s ready to burst back to life.
Regional tweaks matter: In Zone 5, aim for mid-October prep; in Zone 8, wait until November. And if you’re in a microclimate (like a sheltered south-facing wall), extend protection for a few extra weeks. The goal? No wasted effort, just smarter prep.
📚 In This Guide
- What you need
- Instructions
- Tips and common mistakes
- Wrapping up and next steps
What you need
- ● Mulch: 2–4 inches of organic mulch (straw, shredded leaves, or wood chips). Pro tip: Avoid thick layers that can suffocate soil.
- ● Garden gloves: 1–2 pairs (heavy-duty for thorny plants or rough debris).
- ● Pruners: Bypass pruners (for clean cuts) or loppers (for thicker stems).
- ● Rake: A sturdy leaf rake (for clearing debris) and a bow rake (for leveling soil).
- ● Shovel: A flat-edged shovel for moving soil and mulch.
- ● Garden twine or stakes: For securing heavy mulch or supporting winter-proof structures.
- ○ Compost or fertilizer: Optional but helpful for replenishing nutrients (use a balanced 10-10-10 or organic option).
- ● Frost cloth or row covers: Lightweight fabric to protect tender perennials from late frosts.
- ● Soil thermometer: To monitor ground temps if you’re in a very cold climate.
- ● Plant labels: Waterproof markers to keep track of perennials or new additions.
- ● Wheelbarrow or bucket: For hauling heavy mulch or debris efficiently.
- ● Knee pads or a small stool: Because winter prep is not a young person’s game!
Step-by-Step guide to winterizing your garden
Here's how to protect your plants and soil through the cold months—my foolproof method that's saved my garden from frost damage for years.
🌿 Step 1: Clean Up and Remove Debris
Start by removing all annual plants, weeds, and diseased foliage from the garden beds. I pull everything down to the soil level—this prevents pests and diseases from overwintering. For perennials, cut back dead stems to about 2-3 inches above ground level, but leave seed heads for winter interest and bird habitat.
Rake up all fallen leaves and debris from the garden beds, but leave them in a pile nearby for composting. Wet leaves can smother plants, so I spread them thinly over lawn areas instead. This prevents thatch buildup while still returning nutrients to the soil.
✂️ Step 2: Protect Sensitive Plants and Mulch Heavily
Wrap tender perennials and young plants in burlap or frost cloth, securing with twine or plant ties. I focus on plants like salvia, lavender, and newly planted shrubs that can't handle freezing temperatures. For container plants, move them to a sheltered location or wrap the pots in bubble wrap and bury them in straw.
Spread a 4-6 inch layer of organic mulch over garden beds after the first frost. I use shredded leaves, straw, or wood chips—whatever's available. This insulates the soil and protects roots from extreme temperature fluctuations. Avoid using fresh wood chips near plants, as they can tie up nitrogen as they decompose.
💧 Step 3: Water Before the Ground Freezes
Give your garden a deep watering a few days before the first hard frost. The goal is to moisten the soil to a depth of 6-8 inches—this ensures plants have enough water to survive winter dormancy. I water in the late afternoon so the soil has time to absorb moisture before evening.
Check the soil moisture by digging down a few inches—it should feel damp but not soggy. Overwatering now can lead to root rot before the ground freezes. If your area gets heavy snow, the meltwater will provide additional moisture during winter.
☀️ Step 4: Prepare Tools and Equipment
Clean and sharpen all garden tools before storing them for winter. I scrub metal tools with a wire brush to remove rust, then oil them to prevent corrosion. Store them in a dry place—hanging them on a wall or in a tool shed works best. Plastic tools can be rinsed and left to dry completely before storage.
Drain and winterize hoses, sprinklers, and irrigation systems to prevent freezing and bursting. I disconnect hoses and store them in a garage or shed, then drain any remaining water from sprinkler heads. For in-ground irrigation systems, blow out all lines and cover outdoor valves with insulation.
🪴 Step 5: Plan for Spring with Soil Care
Spread a 2-3 inch layer of compost over garden beds after the first frost. This feeds the soil over winter and gives you a head start on spring planting. I avoid working the compost into the soil now—letting it sit on top prevents compaction and allows earthworms to incorporate it naturally.
Mark garden beds with stakes or labels if you're unsure where things are planted. I jot down notes about what performed well and what needs replacing. This makes spring planning easier and helps me remember which areas need extra attention.
Tips & tricks for perfect winter garden prep
Real talk: Winterizing your garden isn't just about throwing mulch on everything. These are the details that separate a garden that survives winter from one that thrives when spring comes.
Timing is Everything: Don't wait until the first frost to start—act when you see the forecast predicting a hard freeze. I aim to complete Steps 1-3 (cleanup, protection, and watering) at least 3-5 days before that first hard frost hits. This gives your plants time to adjust and the soil time to absorb moisture properly. Pro tip: Check your local frost date calendar—it's your garden's roadmap for winter prep.
Mulch Like a Pro: When spreading that 4-6 inch layer of organic mulch in Step 2, focus on the base of plants rather than piling it against stems. I create a donut shape around each plant, leaving the center clear. This prevents rot while still insulating roots. For extra protection, top your mulch with a thin layer of straw—it adds insulation without compacting like heavier mulches can.
Tool Care Matters: In Step 4, when you're cleaning tools, don't just wipe them off—give them a proper inspection. Look for any hidden rust spots or dull edges that need attention. I keep a small jar of mineral oil in my tool shed for quick touch-ups. For plastic tools, a vinegar soak (1 part vinegar to 3 parts water) removes grime better than soap alone. Store them with handles pointing downward to prevent water pooling.
Spring Planning Now: That 2-3 inch layer of compost you spread in Step 5? Use it strategically. I mark beds where I'll plant heavy feeders like tomatoes or peppers with a small flag, then add a slightly thicker layer (about 3 inches) of compost there. This gives those nutrient-hungry plants a head start. For lighter feeders, stick with the standard 2-inch layer—you don't want to overdo nitrogen in winter.
Pro Tips for Putting Your Garden To Bed For The Winter
- Real talk: Winterizing your garden isn't just about throwing mulch on everything. These are the details that separate...
- Timing is Everything: Don't wait until the first frost to start—act when you see the forecast predicting a hard freez...
- Mulch Like a Pro: When spreading that 4-6 inch layer of organic mulch in Step 2, focus on the base of plants rather t...
Frequently asked questions
Got questions about winterizing your garden? You’re not alone! Here are some common concerns—and straightforward answers—to help you prep like a pro.
When is the exact best time to put my garden to bed?
The ideal window is after your first hard frost (when temps drop to 25–30°F) but before the ground freezes solid. This usually falls between late fall and early winter—check your USDA Hardiness Zone for precise timing. Pro tip: If frost is forecast, act fast to protect tender plants!
What if I missed the deadline? Can I still winterize my garden?
Don’t panic! Even if the ground is partially frozen, you can still mulch heavily, cover vulnerable plants with frost cloth, and add extra insulation (like straw or leaves). Focus on soil protection—amend with compost in spring to revive it.
Should I remove all dead plants, or leave some for winter interest?
Remove diseased or pest-ridden plants immediately to prevent overwintering pathogens. For healthy perennials or ornamental grasses, leave them be—they provide winter texture and shelter for beneficial insects. Cut back in early spring instead.
Is it worth investing in expensive winter covers, or will cheap alternatives work?
Budget-friendly options like cardboard, burlap sacks, or even old blankets can work in a pinch! For long-term use, frost cloth or row covers are worth the splurge—they’re reusable, breathable, and protect against windburn. DIY tip: Secure covers with bricks or stakes to avoid damage.
What’s the best way to deal with slugs/snails in winter?
These pests are still active when temps hover above freezing. Set out beer traps or copper tape around vulnerable plants, and remove leaf litter where they hide. In heavy-infestation areas, apply diatomaceous earth (food-grade) as a natural barrier.
Wrapping up and next steps
Putting your garden to bed for winter doesn’t have to be a chore—it’s an investment in next year’s blooms!
By clearing debris, protecting soil, and prepping plants, you’re setting the stage for a healthier, more vibrant garden in spring. 🌱 Take pride in your efforts; every step you take now ensures your garden wakes up strong and ready to thrive.
Ready to tackle the next phase? Plan your spring planting schedule while your garden rests—sketch out layouts, research new varieties, or even start seeds indoors. The off-season is the perfect time to dream big and get organized for warmer days ahead! ✨