
Tools
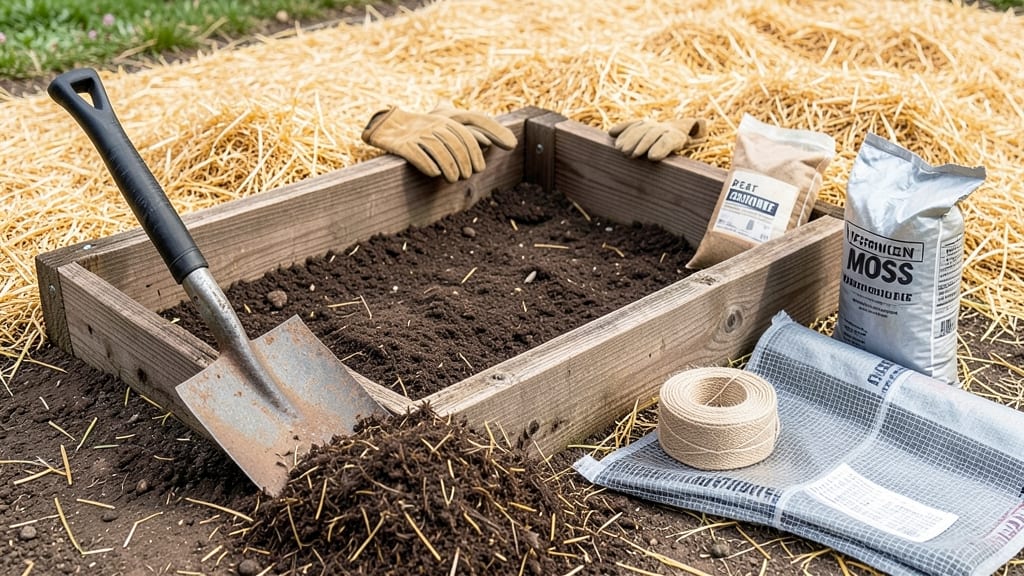
Winterizing your raised bed isn't just about survival—it's about preparing a raised bed garden for winter to thrive before the first frost. 🌱 I've learned the hard way that skipping this step leads to compacted soil, lost nutrients, and a sluggish start in spring.
The key is protecting that precious soil while giving it a chance to rest and recharge.
Start by clearing out dead plants and weeds—this prevents pests from overwintering and stops diseases from spreading. Then, add a 3-4 inch layer of straw or leaves as mulch; this insulates the soil, keeps moisture locked in, and breaks down into rich compost over time.
For colder climates, consider a cold frame or row cover to trap heat and extend the growing season slightly into winter.
You'll wake up to a garden that's ready to burst into action in spring—soil stays loose, nutrients stay intact, and you avoid the dreaded "spring cleanup" that leaves you exhausted before planting even begins.
The best part? This method works whether you're in a Zone 5 or Zone 8 garden, with just a few climate-specific tweaks.
Pro tip: If you're growing winter-hardy crops like kale or spinach, leave them in place—they'll reward you with fresh harvests while protecting the soil. For empty beds, a thick layer of cardboard followed by mulch keeps weeds at bay and prevents erosion.
Think of winter as a chance to prep, not just endure.
📚 In This Guide
- What you need
- Instructions
- Tips and common mistakes
- Wrapping up and next steps
What you need
- ● Mulch (required): Straw (1–2 inches thick, at least 10–15 lbs per 4’x8’ bed)
- ● Shredded leaves (dry, leaf-free of disease, 5–10 lbs per bed)
- ● Pine needles or wood chips (3–4 inches thick)
- ○ Compost (optional, 1–2 inches for nutrient boost)
- ● Protective coverings (required): Frost cloth (1.5–3 oz per sq. ft., cut to bed size + 6" overhang)
- ● Burlap or landscape fabric (1–2 layers for heavy snow)
- ● Hardware & fasteners (required): Staple gun + staples (or heavy-duty clips)
- ● Brass or galvanized screws/nails (for securing edges)
- ● Row covers (for delicate perennials)
- ● Garden twine (to secure covers)
- ● Thermometer (soil probe type, 0–50°F range)
- ● Pruners (for cleanup)
- ● Garden hose (for light irrigation if needed)
Step-by-Step instructions for preparing a raised bed for winter
Here's how I protect my raised beds from freeze-thaw cycles—keeping soil structure and nutrients intact for spring.
🪴 Step 1: Clear and Assess the Bed
Remove all plant debris, weeds, and dead foliage from the bed. I use a small rake to pull up stubborn roots and a garden fork to loosen compacted soil at the edges. This prevents pests from overwintering and reduces disease pressure next season.
Look for signs of poor drainage—waterlogged spots or erosion channels. If you spot these, mark them so you can address them in spring. Healthy soil structure starts with a clean slate, and winter prep is the perfect time to evaluate what needs attention.
🌿 Step 2: Add Organic Mulch Layer
Spread a 4-6 inch thick layer of straw or shredded leaves evenly across the bed. I avoid wood chips here because they can compact and create a barrier that prevents water penetration. The mulch will insulate the soil, protecting roots from extreme temperature swings.
Fluff the mulch gently with your hands to create air pockets—this helps with moisture regulation and prevents the layer from becoming waterlogged. If you're using leaves, mix in a few handfuls of compost to prevent them from matting down too tightly.
💧 Step 3: Water Deeply Before Freezing Temperatures
Give the bed a deep watering 2-3 days before the first hard frost. The goal is to saturate the soil down to 12 inches deep—this ensures plants have moisture reserves and prevents soil from heaving when it freezes. I use a soaker hose for even distribution and avoid puddling at the surface.
Check moisture by digging a small hole—if the soil feels damp but not soggy at 6 inches down, you've hit the right level. Overwatering now can lead to poor drainage issues when the ground freezes, so aim for just enough to keep the soil hydrated through winter.
✂️ Step 4: Protect Perennial Roots and Delicate Plants
For perennials or tender plants still in the bed, mound an extra 2-3 inches of mulch around their bases. I also wrap burlap or frost cloth loosely around the crowns of plants like asparagus or artichokes to shield them from direct cold. This extra insulation can make the difference between a plant surviving or dying back.
If you have any bare-root perennials or tender shrubs, now's the time to add a thick layer of compost around their roots before covering with mulch. The compost acts as a slow-release fertilizer while the mulch protects against freeze-thaw damage.
☀️ Step 5: Monitor and Adjust Through Winter
Check the bed once a month during winter to ensure the mulch hasn't shifted or compacted. If it looks thin in spots, add more to maintain that 4-6 inch layer. I also keep an eye out for ice buildup—if you see a thick crust forming, gently break it up with a rake to prevent waterlogging.
If your winter is particularly mild, you might notice new growth from perennials. In this case, add a light layer of straw to protect any emerging shoots from late frosts. Winter prep isn't just about freezing—it's about setting your bed up for a strong spring start.
Tips & tricks for perfect winter raised bed prep
Winterizing your raised beds properly sets the stage for a thriving spring garden—here's how to avoid common pitfalls and get it right the first time.
Timing is Everything: Those 2-3 days before the first hard frost are critical for Step 3's deep watering. I check my local frost forecast and schedule my watering accordingly—this prevents soil from drying out completely before winter sets in. Pro tip: If you're unsure about frost dates, err on the earlier side and water when nighttime temps dip below 40°F consistently. This gives your soil that extra moisture buffer.
Mulch Layer Secrets: When adding your 4-6 inch mulch layer in Step 2, I like to create a "mulch sandwich" for extra insulation. Start with a 1-inch layer of compost directly on the soil, then add your straw or leaves, and top with another 1-inch layer of compost. This sandwich structure prevents the mulch from compacting and creates more air pockets for better moisture regulation. The compost also feeds beneficial microbes that'll wake up hungry in spring!
Visual Cues for Perfect Moisture: In Step 3, when checking soil moisture at 6 inches down, I look for three things: the soil should hold together when squeezed but crumble easily (not stick to your fingers), it should smell earthy (not musty), and if you poke it, water should bead up on the sides of the hole. This tells me the soil is perfectly hydrated—not too wet, not too dry. Overwatering here can actually cause more problems than underwatering when the ground freezes.
Winter Monitoring Shortcuts: For Step 5's monthly checks, I set a reminder on my phone for the first of each month. I also keep a small garden journal where I sketch my bed layout and note where I added extra mulch or broke up ice. This visual record helps me spot patterns—like which areas always get ice buildup or where mulch tends to shift. It's like having a winter garden diary that saves me time and effort next season!
Pro Tips for Preparing A Raised Bed Garden For Winter
- Winterizing your raised beds properly sets the stage for a thriving spring garden—here's how to avoid common pitfalls...
- Timing is Everything: Those 2-3 days before the first hard frost are critical for Step 3's deep watering. I check my ...
- Mulch Layer Secrets: When adding your 4-6 inch mulch layer in Step 2, I like to create a "mulch sandwich" for extra i...
Frequently asked questions
Got questions about winterizing your raised bed? Here are some of the most common ones—and their answers—to help you prep like a pro!
When is the best time to start preparing my raised bed for winter?
Start before the first hard frost—typically 4–6 weeks ahead in most climates. This gives you time to clear debris, amend soil, and add mulch or covers. If you’re in a mild-winter zone, you might delay until late fall, but act before temperatures consistently drop below freezing.
Do I need to remove all plants before winter?
Not necessarily! Leave healthy perennials (like herbs, asparagus, or strawberries) in place—they benefit from winter protection. However, remove diseased plants, annuals, and weeds to prevent pests and pathogens from overwintering. Cut back dead foliage after mulching to avoid spreading spores.
What’s the best mulch for raised beds in winter?
Use organic, breathable mulches like straw, shredded leaves, or wood chips (3–4 inches deep). Avoid thick layers of fresh wood chips, which can mat down and trap moisture. For extra insulation in cold climates, layer straw over leaves or use straw bales around tender plants.
How do I keep pests out of my raised bed over winter?
Pests love hiding in leaf litter and debris. Clear all plant residue, turn the soil lightly (if not frozen), and apply diatomaceous earth or row covers for heavy infestations. Quiescent pests (like slugs) can be deterred with copper tape or a gravel barrier at the bed’s edge.
Can I reuse last year’s soil in my raised bed after winter?
Yes, but refresh it! Winter leaches nutrients, so mix in compost (1–2 inches) and a balanced fertilizer (like 10-10-10) in early spring. Test your soil if you suspect depletion—raised beds dry out faster, so they may need extra organic matter to retain moisture and fertility.
Wrapping up and next steps
Preparing your raised bed garden for winter is the ultimate act of love for your plants—and your future harvests! 🌱 By following these steps, you’ve ensured your soil stays healthy, protected, and ready to thrive when spring rolls around.
Now that your beds are cozy and secure, take a moment to celebrate your hard work—you’re already setting yourself up for a bountiful next growing season.
Your next logical step? Plan ahead! Sketch out your spring planting schedule, research cold-hardy crops, or even start seedling indoors for an early jumpstart. Winter is the perfect time to dream big—so grab a notebook, sip some hot cocoa, and let your garden goals take root. 🌟