
Tools
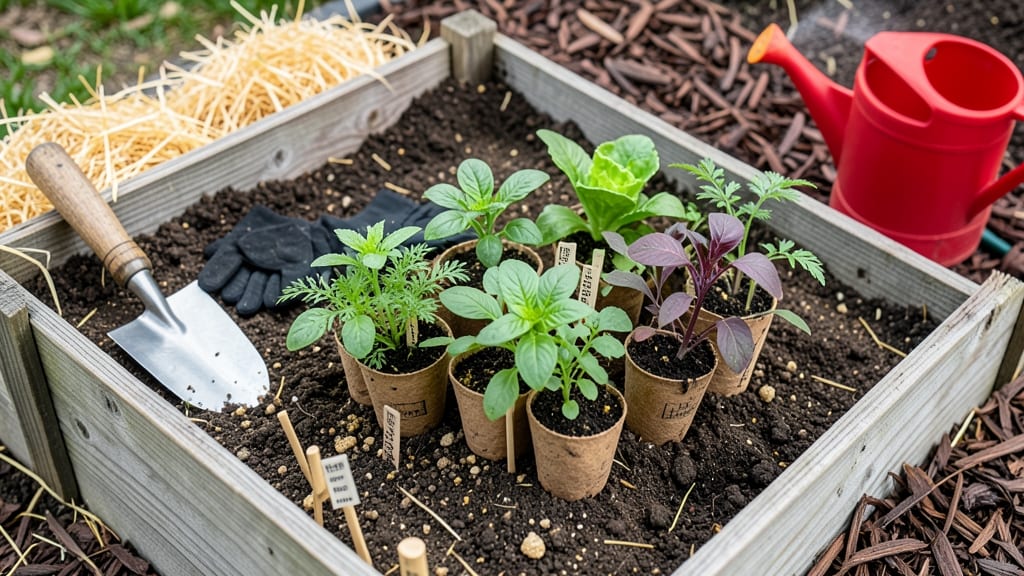
Starting a raised bed vegetable garden turns your backyard into a harvest hotspot—even if you’ve never planted a seed before. 🌱 The key is simple: build a container, fill it with the right soil, and let plants spread out without competing for space.
My first raised bed produced 20 pounds of tomatoes in the first season, and I used basic materials you can find at any hardware store.
You’ll need untreated lumber, screws, landscape fabric, quality soil mix, and a sunny spot with at least 6 hours of sunlight daily. The construction takes a weekend afternoon, and the soil prep is where most beginners trip up—don’t skimp on compost or you’ll fight weeds all summer.
I built mine in a 4x8-foot footprint, which fits most yards without taking over.
Once planted, your bed will look like a patchy green carpet at first. But by mid-summer, you’ll be picking fresh lettuce, bush beans, and maybe even a few tomatoes—all without bending over.
The real magic happens when you add companion plants like basil near tomatoes to deter pests naturally. Maintenance is minimal: water twice a week, pull weeds early, and watch your garden grow.
This method works for any climate, from hot southern summers to cool northern springs. The only rule? Start small—one bed is plenty for a family of four.
By next year, you’ll be dreaming up new crops to try, and your neighbors will be asking for your secret. Let’s get those beds built!
📚 In This Guide
- What you need
- Instructions
- Tips and common mistakes
- Wrapping up and next steps
What you need
- ● Raised bed frame: Untreated wood (cedar or redwood recommended), plastic, or composite lumber. Dimensions: At least 4’ x 8’ x 12” deep (standard size for easy access).
- ● Cardboard or landscape fabric: 1–2 sheets (to suppress weeds and block invasive roots).
- ● High-quality soil: 6–8 cubic feet per 4’ x 8’ bed. Mix of topsoil, compost, and organic matter (e.g., coconut coir or peat moss).
- ● Organic compost: 2–3 bags (for nutrient-rich soil).
- ● Mulch: Straw or wood chips (1–2 bags to retain moisture).
- ● Measuring tape (for precise cuts).
- ● Saw (hand saw or circular saw for wood).
- ● Drill & screws (deck screws, 2–3 inches long).
- ● Shovel & garden fork (for soil prep).
- ● Wheelbarrow (to haul soil and compost).
- ● Gloves & knee pads (because gardening is hands-on!).
- ● Drip irrigation kit (for easy watering).
- ● Garden hose with spray nozzle (for targeted watering).
- ● Row covers or netting (to protect plants from pests).
- ● Soil pH tester (to check if your soil needs amendments).
- ● Seed starting kit (if you’re growing from seeds).
Step-by-step instructions for building your first raised bed vegetable garden
Here's how I get beginners growing their first harvest—no prior experience needed.
🪴 Step 1: Choose and Prepare Your Location
Pick a spot that gets at least 6 hours of sunlight daily. Morning sun with afternoon shade works best in hot climates—it keeps roots cooler. I always check sunlight patterns for a full week first by marking with a stick where shadows fall at noon. Avoid low spots where water pools after rain.
Clear the area of grass, weeds, and debris within a 2-foot border around your planned bed. Use a shovel to dig out any stubborn roots—this prevents future competition. Lay down cardboard or landscape fabric to smother remaining weeds and block new growth. The cardboard will decompose over time, adding nutrients to the soil.
🪴 Step 2: Build or Assemble Your Raised Bed Frame
For a 4' x 8' bed, use untreated wood (cedar or redwood lasts longest) or heavy-duty composite lumber. Cut four corners at 45-degree angles for a clean look, then assemble with 2.5-inch deck screws. I like to pre-drill holes to prevent wood splitting. Leave a 1-inch gap between the bottom of the frame and the ground—this improves drainage and prevents rot.
For pre-made kits, follow the manufacturer's instructions for assembly. If using cedar, apply a non-toxic wood sealant to extend its life. Place the frame in your prepared location and check for level using a 4-foot level. Adjust the corners by tapping them up or down with a rubber mallet until the bed sits perfectly flat.
🌱 Step 3: Fill the Bed With the Right Soil Mix
Fill the bed with a mix of 60% topsoil, 30% compost, and 10% perlite or vermiculite for drainage. I start by adding a 2-inch layer of coarse wood chips or straw at the bottom to improve drainage further. Then, layer the soil mix in 4-inch increments, tamping it down lightly after each layer to eliminate air pockets.
Don't use garden soil alone—it compacts easily and lacks the nutrients vegetables need. Mix in a handful of balanced organic fertilizer (10-10-10) or bone meal for extra phosphorus to encourage strong root growth. Water the soil lightly after filling to help it settle and remove any dust.
☀️ Step 4: Plan Your Planting Layout for Success
Divide your bed into a grid using string and stakes to mark rows. Plant tall crops like tomatoes or corn at the north end to avoid shading shorter plants. I like to use the "square foot gardening" method—plant seeds or transplants in a 1-foot square grid for easy maintenance. This also prevents overcrowding, which leads to disease.
Group plants with similar water and nutrient needs together. For example, place leafy greens like lettuce and spinach near each other, but keep them away from heavy feeders like corn. Leave 12-18 inches between rows for easy access. Water the bed thoroughly before planting to help roots establish faster.
💧 Step 5: Water and Maintain for a Thriving Garden
Water the bed deeply 2-3 times per week, aiming for 1 inch of water per week. Use a soaker hose or drip irrigation to deliver water at the base of plants—this prevents fungal diseases that spread from wet foliage. I set a timer for 20 minutes every morning to keep moisture consistent without overwatering.
Mulch the surface with 2-3 inches of straw or shredded leaves to retain moisture and suppress weeds. Add a fresh layer of compost every 4-6 weeks to replenish nutrients. Watch for pests like aphids or slugs—address them early with soapy water or organic slug bait to avoid larger infestations later.
Tips & tricks for perfect raised bed vegetable gardens
Turn your first raised bed into a thriving garden with these pro tips that save time and prevent common mistakes.
Sunlight Secret: That 6-hour sunlight minimum is non-negotiable, but here's what nobody tells you—morning sun (before 10 AM) is more important than afternoon for most vegetables. I've seen beds in full afternoon sun still produce well, but plants struggle more in hot climates. Test your spot for a full week before committing, especially if you're in a transitional climate zone. A simple stick shadow test at noon reveals everything you need to know.
Soil Layering Strategy: When building your 60-30-10 soil mix, don't just dump everything in at once. Start with that 2-inch drainage layer, then add your soil in 4-inch increments while tamping lightly between layers. This prevents compaction and creates ideal root zones. I like to think of it like building a lasagna—each layer has a specific purpose that supports what comes next. The tamping step is often skipped, but it makes all the difference for root development.
Frame Assembly Hack: That 1-inch gap between your frame and the ground might seem small, but it's crucial for drainage and preventing rot. Here's my trick: Use small bricks or pavers under the corners to create that gap consistently. This also elevates the bed slightly, making it easier to access from all sides. For pre-made kits, check the manufacturer's specs—some require even more clearance for proper airflow at the base.
Planting Layout Pro Tip: The square foot gardening method isn't just about spacing—it's about creating microclimates within your bed. I've found that planting taller crops like tomatoes at the north end creates natural shade for shorter plants during peak afternoon sun. This simple adjustment can double your yield from heat-sensitive varieties. Plus, the grid system makes it easy to rotate crops next season without losing track of what went where.
Pro Tips for Start A Raised Bed Vegetable Garden
- Turn your first raised bed into a thriving garden with these pro tips that save time and prevent common mistakes.
- Sunlight Secret: That 6-hour sunlight minimum is non-negotiable, but here's what nobody tells you—morning sun (before...
- Soil Layering Strategy: When building your 60-30-10 soil mix, don't just dump everything in at once. Start with that ...
Frequently asked questions
Got questions?
Here are answers to the most common ones about starting a raised bed vegetable garden—whether you're a total beginner or just need a quick refresher.
What’s the best time of year to start a raised bed garden?
The ideal time depends on your climate! In most regions, spring (after the last frost) is perfect for planting cool-season crops like lettuce, peas, and spinach. For warm-season veggies (tomatoes, peppers, cucumbers), wait until soil temps reach 60°F+ (use a soil thermometer if unsure). In warmer climates, you can even start in fall or winter for a second harvest.
How much does it cost to start a raised bed garden?
Costs vary widely! A basic setup (untreated wood, soil, seeds) can run $50–$150, while premium kits (cedar, compost, organic soil) may hit $200–$500+. Save money by sourcing wood locally, using free compost (check community gardens), or starting with seeds instead of transplants. Pro tip: Repurpose old pallets or cinder blocks for a budget-friendly frame!
Do I need to till the soil in a raised bed?
Nope! Raised beds are designed to avoid tilling—it disrupts soil structure and can introduce weeds. Instead, amend the soil before filling the bed with a mix of topsoil, compost, and aged manure. Once planted, focus on mulching and adding compost annually to keep it fertile. Bonus: No weeds = less work for you!
How do I keep pests out of my raised bed garden?
Prevention is key! Use row covers for early pests, plant companion crops (like basil with tomatoes), and introduce beneficial insects (ladybugs, lacewings). For stubborn critters, try neem oil or diatomaceous earth. Avoid chemical pesticides—they harm beneficial bugs and soil health. Quick fix: Copper tape around the bed deters slugs!
What’s the best size for a raised bed?
Keep it 4 feet wide max (so you can reach the center without stepping in) and 8–12 feet long. Height should be 6–12 inches deep for most veggies (deeper for root crops like carrots). Avoid tiny beds—they dry out faster. Ideal size: 4’x8’ (perfect for beginners!). Design tip: Add a trellis to save space for climbing plants like cucumbers or beans.
Wrapping up and next steps
Starting a raised bed vegetable garden is an exciting and rewarding journey—even for beginners! With the right materials, a little planning, and patience, you’ll soon be enjoying fresh, homegrown veggies. Remember: healthy soil, proper spacing, and consistent care are your keys to success.
Now that you’re ready to dig in, take the next step—mark your calendar, prep your first batch of soil, and plant those seeds! Watch your garden grow, and don’t forget to celebrate every little victory along the way. 🌱✨