
Tools
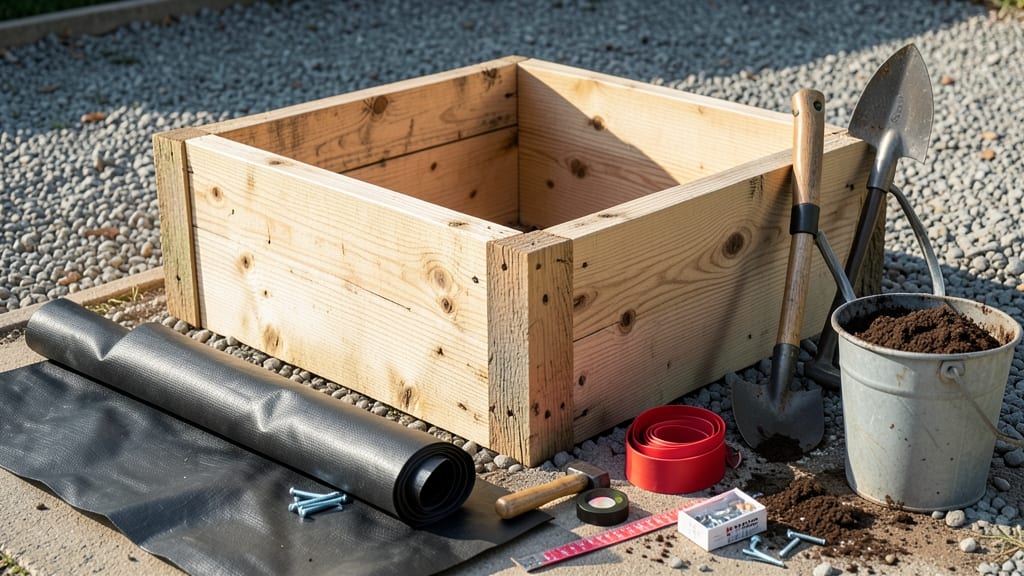
Building a cheap raised garden bed doesn’t mean sacrificing quality—it just means getting creative with materials. 🌱 I’ve turned pallet wood, cinder blocks, and scrap lumber into sturdy, long-lasting beds that cost a fraction of store-bought options. The key? Repurposing what you already have or finding cheap sources locally.
A 4x8-foot bed costs me about $30-$40 using pallets from a hardware store or free wood from construction sites. You’ll need basic tools (a drill, saw, and screws), but no fancy equipment.
The design keeps soil contained, improves drainage, and raises planting height for easier access—perfect for backs, knees, or small spaces. Once built, fill it with a mix of topsoil and compost for lush, productive plants.
The first year, I grew tomatoes, peppers, and herbs that outpaced anything in my in-ground garden. No fancy materials, just smart planning and a little elbow grease. Works for any yard size, from tiny balconies to sprawling backyards. Here’s how to build yours without breaking the bank!
📚 In This Guide
- What you need
- Instructions
- Tips and common mistakes
- Wrapping up and next steps
What you need
- ● Wooden pallets: 4–6 sturdy, untreated pallets (check local stores, Craigslist, or Facebook Marketplace for free/cheap options). Avoid chemically treated wood (look for the HT stamp—avoid MB or DB).
- ● Screws or decking nails: 2–3 lbs of 2.5–3" exterior-grade screws/nails (galvanized or stainless steel to resist rust).
- ● Landscape fabric or cardboard: 1 roll (10–20 ft) to line the bed and block weeds.
- ● Garden soil or compost: 1–2 cubic yards of high-quality topsoil or a mix of garden soil + compost (check local prices—sometimes cheaper in bulk!).
- ○ Wood glue (optional but helpful): 1 small bottle for extra reinforcement at joints.
- ● Drill/driver: With a screwdriver bit (borrow one if you don’t own it!).
- ● Hacksaw or reciprocating saw: To trim pallet slats to size (if needed).
- ● Measuring tape & pencil: For marking cuts and dimensions.
- ● Level: To ensure your bed is straight and even.
- ● Work gloves & safety goggles: Because DIY safety first! 🛡️
- ● Wheelbarrow or shovel: For hauling soil.
- ● Corner braces: Metal L-brackets to reinforce pallet corners (if your pallets are wobbly).
- ● Wood stain or paint: Non-toxic, outdoor-safe sealant to extend wood life (skip if using untreated cedar/pine).
- ● Drip irrigation kit: Save time with a simple DIY watering system.
- ● Rocks or bricks: For edge weighting (if your bed is windy or on a slope).
Step-by-step instructions for building DIY pallet raised beds
Here's how I build sturdy, budget-friendly pallet beds that last multiple seasons.
🪴 Step 1: Gather and Prepare Your Pallets
Start with 4 heat-treated lumber pallets (check local hardware stores or Craigslist for free/cheap options). Avoid chemically treated pallets—look for the "HT" stamp for heat-treated wood. I like to use pallets with slats removed for better drainage, but if yours are intact, that's fine too.
Lay the pallets flat and inspect for nails or screws sticking up. Use a hammer to sink any protruding fasteners below the surface—this prevents splitting when you stack them. If a pallet is warped or broken, set it aside for other projects. You'll need two pallets for the bottom layer and two for the top layer, arranged perpendicularly for stability.
🌿 Step 2: Assemble the Frame and Add Support
Arrange two pallets side by side to form the base. Place the third pallet on top, butted up against the first two to create a 4-foot by 4-foot square. The fourth pallet goes on top, completing the box. Use 3-inch deck screws to secure the corners—pre-drill holes to prevent splitting. I like to space screws every 12 inches for maximum strength.
For extra stability, add 2x4 stakes as corner supports. Cut four 12-inch lengths and screw them into the bottom corners of the frame. This keeps the bed from wobbling when you fill it with soil. If you're building a taller bed (12 inches or more), add a middle layer of pallets for support—this prevents sagging over time.
💧 Step 3: Line the Bed and Fill With Soil
Line the bottom of the bed with cardboard or landscape fabric to block weeds. I use old moving boxes cut to size—just make sure they fit snugly against the sides. This layer also prevents soil from leaking out between the pallet slats. If using fabric, leave 6-inch overhangs on the sides to tuck under the edges.
Fill the bed with a mix of topsoil and compost. I use 2 cubic feet of topsoil and 1 cubic foot of compost> for every 4-foot section. Break up any large clumps with your hands—you want a loose, crumbly texture. Water the soil lightly before planting to help settle it. Avoid compacting it with your feet, as this reduces drainage.
✂️ Step 4: Reinforce and Protect the Wood
Once your bed is filled, give the wood a protective coat of linseed oil or outdoor wood sealant. This keeps the pallets from rotting or warping over time. Apply with a brush, following the wood grain, and let it dry completely before planting. I like to do this in the evening so the oil has time to cure overnight.
For extra durability, add landscape fabric strips along the top edges of the pallets. Tuck them under the soil to create a clean border and prevent erosion. If you're building multiple beds, space them at least 18 inches apart for easy access. This also helps with airflow between plants, reducing disease risk.
☀️ Step 5: Plant and Maintain Your New Bed
Start with plants that thrive in raised beds, like lettuce, herbs, or strawberries. I like to plant in rows, spacing seeds or seedlings according to the package directions. Water gently after planting to help roots establish. Avoid overwatering—the raised bed design drains quickly, so you won’t need to water as often as in-ground gardens.
Check the soil moisture daily during the first week. Stick your finger 1 inch into the soil>—if it feels dry, it's time to water. Once established, most plants in raised beds need watering every 2-3 days in warm weather. Mulch with straw or shredded leaves> to retain moisture and suppress weeds. This keeps the soil cool and reduces watering needs by up to 30%>.
Tips & tricks for building budget-friendly pallet raised beds
Took me a while to figure these out, so here's how I make sure my pallet beds last for years without breaking the bank.
Pallet Selection Tip: Always look for the "HT" stamp on pallets—this means they're heat-treated and safe for gardening. I've learned the hard way that chemically treated pallets can leach harmful substances into your soil. If you can't find heat-treated ones, give pallets a thorough wash with soapy water and rinse well before using. For drainage, I prefer pallets with slats removed, but if yours are intact, you can still use them by adding extra cardboard at the bottom to prevent soil loss.
Stability Secret: When assembling your 4-foot square frame, make sure the pallets are perfectly perpendicular to each other. I use a carpenter's square to check the corners before securing them with screws. For taller beds (12 inches or more), adding a middle layer of pallets makes all the difference—it prevents sagging over time. I've seen beds collapse when people skip this step, especially with heavy soil.
Soil Mixing Strategy: The 2 cubic feet of topsoil to 1 cubic foot of compost ratio is perfect for most vegetables, but if you're growing heavy feeders like tomatoes, add an extra ½ cubic foot of compost. I always break up soil clumps with my hands to create that loose, crumbly texture—it makes a huge difference in root development. Pro tip: If your soil feels too dense after adding water, mix in some perlite or coarse sand to improve drainage.
Wood Protection Hack: Applying linseed oil or outdoor wood sealant in the evening gives it plenty of time to cure overnight before planting. I like to use a natural brush for this step—it helps distribute the oil evenly along the wood grain. For extra protection, especially in rainy climates, consider adding a second coat after the first one dries completely. This simple step can extend the life of your pallet beds by years.
Pro Tips for Make A Raised Garden Bed Cheap
- Took me a while to figure these out, so here's how I make sure my pallet beds last for years without breaking the bank.
- Pallet Selection Tip: Always look for the "HT" stamp on pallets—this means they're heat-treated and safe for gardenin...
- Stability Secret: When assembling your 4-foot square frame, make sure the pallets are perfectly perpendicular to each...
Frequently asked questions
Got questions about building a budget-friendly raised garden bed?
You’re not alone! Here are answers to the most common concerns—plus a few pro tips to keep your project smooth and stress-free.
Can I use any old wood for a raised garden bed?
Not all wood is safe for edible gardens! Avoid pressure-treated lumber (contains harmful chemicals) and opt for untreated cedar, redwood, or even reclaimed wood like pallets (sand and seal them first). If using pallets, check for _HT_ stamps—those are heat-treated and safer. Pro tip: Line the bed with landscape fabric to extend its life and block weeds!
How long does it take to build a raised bed?
Most DIYers finish a basic 4’x8’ bed in 1–3 hours, depending on your skill level and tools. Break it into steps: measuring (15 mins), cutting wood (30–60 mins), assembling (1 hour), and filling with soil (30 mins). Weekend warriors can tackle it in a morning! Pro tip: Pre-drill screws to avoid splitting wood—save time and frustration.
What’s the cheapest way to fill a raised bed?
Skip pricey bagged soil! Mix 50% topsoil (buy in bulk or borrow from a friend’s yard), 30% compost (homemade or cheap from garden centers), and 20% perlite or sand for drainage. Avoid free yard waste—it may contain weeds or contaminants. Pro tip: Cardboard boxes (flattened) under the soil layer suppress weeds naturally!
Do raised beds need drainage holes?
Not always! If your bed is 6–12 inches deep and sits on flat ground, drainage holes aren’t critical—but they help in heavy rain. For extra safety, add a 1-inch layer of gravel at the bottom. Warning: Avoid holes if using pallets; their slats already create natural airflow. Pro tip: Elevate beds slightly (4–6 inches off the ground) to prevent rot and pests.
What if my bed starts sinking or collapsing?
Sinking often means insufficient support or soil settling. Fix it: Add more wood or cinder blocks under weak spots, and top off with fresh soil/compost. Collapsing? Check for rotten wood (replace it!) or uneven assembly. Prevent it: Use 2x6 or 2x8 boards (not flimsy 1x materials) and screw corners inside and out for stability. Pro tip: Water your bed gently after filling to help soil compact evenly.
Wrapping up and next steps
Creating a budget-friendly raised garden bed from pallet wood is easier—and more rewarding—than you think! 🌱 With just a few dollars and a little elbow grease, you’ve got a functional, eco-friendly planter that’s perfect for herbs, veggies, or flowers.
The best part? You’re not just saving money; you’re also reducing waste and giving your plants the perfect growing environment.
Now that you’re armed with step-by-step tips, material hacks, and troubleshooting advice, it’s time to roll up your sleeves and build! Start small—even a single bed can make a big impact—and don’t forget to share your progress (or your harvest) with fellow gardeners. Happy planting! 🌿