
Tools
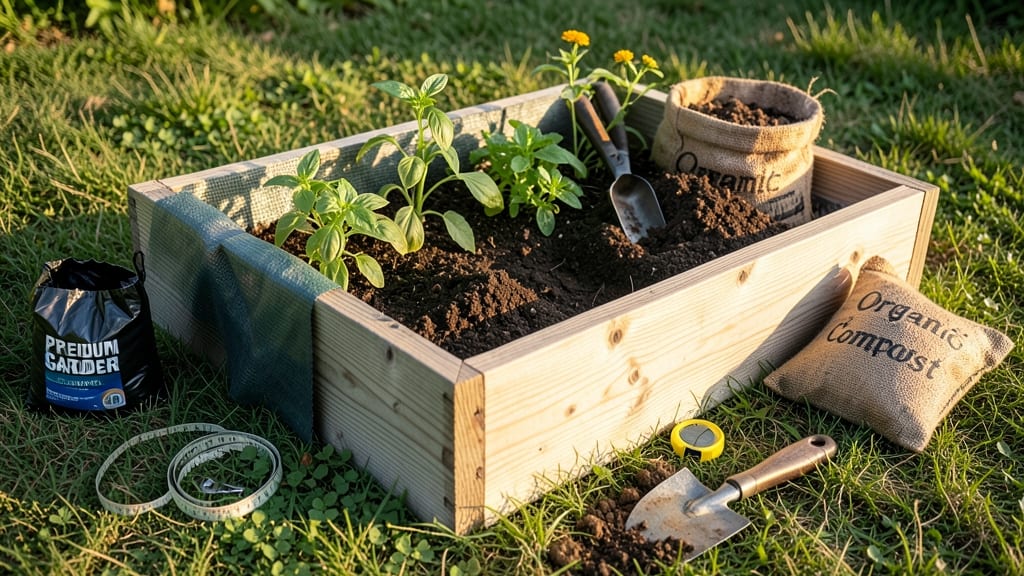
Building a garden bed box transforms your yard into a weed-free, soil-rich paradise with just a weekend and a handful of tools. 🌱 I designed mine with built-in drainage and a weed barrier after years of struggling with compacted soil and invasive grass—now my tomatoes thrive without backbreaking bending.
The key is choosing the right materials: cedar or redwood resists rot, landscape fabric blocks weeds, and gravel at the bottom ensures water flows out instead of pooling. A 4x8-foot box fits most spaces, but adjust dimensions to your patio or garden edge.
My first box cost under $100 and lasts longer than any in-ground bed. You’ll end up with a raised bed that warms up faster in spring, drains better in rain, and stays weed-free for years.
The soil stays loose and fertile, and you’ll spend less time weeding and more time harvesting. Plus, the height makes gardening easier on your back. Customize with legs for better drainage or add a removable top to protect plants in winter. Here’s how to build yours from scratch!
📚 In This Guide
- What you need
- Instructions
- Tips and common mistakes
- Wrapping up and next steps
What you need
- ● Lumber: 2 pieces of 2x6 or 2x8 boards (8 ft long for sides, 4 ft for ends—adjust based on bed size)
- ● Corrugated drainage pipe: 4-inch diameter, cut to fit bed length (or use perforated PVC pipe)
- ● Landscape fabric: 1 roll (3 ft wide, at least 10 ft long)
- ● Gravel: 1–2 bags (½-inch to 1-inch pebbles for drainage layer)
- ● Outdoor screws: 2.5-inch deck screws (1–1.5 lbs)
- ○ Wood glue (optional but recommended): For extra reinforcement
- ● Circular saw or handsaw
- ● Drill/driver + drill bits
- ● Measuring tape
- ● Level (to keep your box straight!)
- ● Staple gun (for securing landscape fabric)
- ● Safety gear: gloves, goggles, ear protection
- ● Wood stain/sealant: To protect against weather
- ● Corner brackets: For extra stability
- ● Drip irrigation kit: For hassle-free watering
- ● Compost or soil mix: Pre-mixed for easier planting
Step-by-Step instructions for building a raised garden bed box
Here's the straightforward method I use to create sturdy, long-lasting raised beds that stay weed-free and drain perfectly.
🪴 Step 1: Choose and Prepare Your Site
Pick a level spot that gets at least 6 hours of sunlight daily. Clear away grass, weeds, and debris down to bare soil—this prevents future weed growth from creeping up through the sides. I like to mark the bed dimensions with wooden stakes and string for perfect straight lines before cutting lumber.
Keep your bed 4 feet wide max so you can reach the center easily. For a 4' x 8' bed, that's perfect for four people to share. Avoid placing it where rainwater pools—even raised beds need good drainage.
📏 Step 2: Build the Frame Structure
Cut your lumber to these dimensions: two pieces at 4 feet long (width) and two at 8 feet long (length). Use 2.5-inch exterior screws to assemble the corners, pre-drilling holes to prevent splitting. I like to reinforce corners with 3-inch corner braces for extra stability.
For a deeper bed (12-18 inches), add vertical supports at 2-foot intervals along the length. This prevents the sides from bowing outward over time. Double-check all angles are square using a carpenter's square before attaching the weed barrier.
🛡️ Step 3: Install the Weed Barrier and Drainage Layer
Lay your landscape fabric over the bed frame, letting it hang down 6 inches outside the edges. Secure it with staples to the inside of the frame—this blocks weeds from growing up through the bottom. I always overlap seams by 6 inches to prevent gaps.
Add a 2-inch layer of gravel along the bottom for drainage. This keeps roots from sitting in soggy soil and prevents rot. For extra protection, add a 1-inch layer of hardware cloth over the gravel to block burrowing rodents.
🌱 Step 4: Fill With Soil and Planting Mix
Start with a 4-inch layer of coarse wood chips or compost to improve drainage in the lower half. Then add a 4-inch layer of quality potting mix mixed with 20% compost. This blend gives roots plenty of air and nutrients while preventing compaction.
Top with 2 inches of finished compost before planting. Water everything lightly to settle the layers. Avoid walking on the bed until plants are established—your weight compacts the soil and smashes roots.
✂️ Step 5: Add Finishing Touches and Maintain
Install your drip irrigation system or soaker hoses along the bottom edge before adding plants. Cover the edges with landscape fabric or edging stones to keep soil from spilling out. I like to add a 1-inch border of mulch around the inside edge to hold soil in place.
Water deeply 1-2 times per week, checking that water drains out the bottom within 30 minutes. Add a 2-inch layer of mulch on top each spring to suppress weeds and retain moisture. With proper care, your bed will last 10+ years without needing repairs.
Tips & tricks for perfect raised garden bed boxes
Building a raised bed isn't rocket science, but these small details make all the difference between a flimsy box and a garden workhorse that lasts for years. Here's what I've learned the hard way—and what'll save you time and frustration.
Site Selection Wisdom: That 6 hours of sunlight is non-negotiable, but here's the thing about drainage: if your yard has any low spots, build a slight mound under the entire bed frame before assembling. This prevents water pooling underneath even with the gravel layer. I've seen beds collapse when soil underneath gets waterlogged—trust me, it's a nightmare to fix later.
Frame Stability Secret: When you're adding those 2-foot vertical supports in Step 2, don't just eyeball it—measure from the bottom of the frame to the top of your desired height (12-18 inches) and mark every 2 feet along the length. This ensures your supports are perfectly aligned before screwing them in. I once built a bed where the supports were uneven, and one side bowed after just two seasons of planting.
Weed Barrier Pro Tip: For Step 3, buy landscape fabric with a minimum 30-mil thickness—thinner fabric tears easily when stapling and won't block weeds as effectively. And here's a trick I picked up: fold the fabric edges over the staples by 1 inch before securing. This creates a tighter seal that weeds can't penetrate. The extra 6-inch overhang you let hang down? Use it to cover any exposed soil around the base after filling.
Soil Layer Strategy: When you're adding that 4-inch layer of potting mix in Step 4, mix in a handful of perlite or vermiculite with your compost. This creates air pockets that prevent compaction—something you'll notice immediately if you've ever walked on fresh soil and seen those telltale footprints. The coarse wood chips at the bottom? Save some to use as mulch later—they'll break down slowly and add organic matter to your soil over time.
Pro Tips for Make A Garden Bed Box
- Building a raised bed isn't rocket science, but these small details make all the difference between a flimsy box and ...
- Site Selection Wisdom: That 6 hours of sunlight is non-negotiable, but here's the thing about drainage: if your yard ...
- Frame Stability Secret: When you're adding those 2-foot vertical supports in Step 2, don't just eyeball it—measure fr...
Frequently asked questions
Got questions about building your own garden bed box? Here are some of the most common ones—plus quick, practical answers to help you get started without a hitch!
What’s the best time of year to build a garden bed box?
The ideal time is early spring or late fall when the ground isn’t frozen or waterlogged. Building in these seasons gives your plants a head start in the growing period. If you’re in a mild climate, you can start anytime—just avoid extreme heat or cold, which can make materials brittle or difficult to work with.
Can I use scrap wood or recycled materials for my garden bed box?
Untreated wood
(like cedar or redwood) is the safest for edible gardens, but you can also use pressure-treated lumber if it’s labeled as safe for food contact (check for arsenic-free options). For non-edible plants, scrap wood, pallets, or even cinder blocks work great. Just ensure materials are sturdy and free of toxic chemicals.
How do I prevent weeds from growing through the bottom of my garden bed box?
Layering a thick weed barrier (like landscape fabric or cardboard) under your soil is key! For extra protection, add a 1-inch layer of gravel or small rocks before the barrier. This combo blocks weeds while allowing water to drain. Pro tip: Line the inside of the box with cardboard before adding soil to deter sprouts from the bottom.
What’s the best size for a garden bed box?
Aim for 4 feet wide by 8 feet long—this size is perfect for reaching the center without stepping on the soil. Height-wise, 6 to 12 inches is ideal for most plants (deeper for root crops like carrots). Avoid making boxes wider than 4 feet; otherwise, you’ll struggle to tend to the middle. For small spaces, a 2x4-foot box works well for herbs or salad greens!
What if my garden bed box starts leaking or collapsing?
Leaks usually mean the drainage holes are too large or the barrier isn’t secure. Patch gaps with waterproof caulk or add a second layer of landscape fabric. If the box sags, reinforce corners with metal brackets or extra screws. For a quick fix, prop up weak spots with stakes or rocks until you can reinforce the structure. Regularly check for loose screws or warped wood to keep it sturdy!
Wrapping up and next steps
Building your own garden bed box is a rewarding project that combines practicality with creativity! 🌱 With a sturdy raised planter, built-in drainage, and a weed barrier, you’ve created the perfect space to grow thriving plants—whether it’s veggies, herbs, or flowers.
The best part? Your garden will stay low-maintenance, healthy, and free from pesky weeds.
Now that you’re equipped with the knowledge, roll up those sleeves and start building! Need inspiration? Sketch out your design, gather your tools, and let your green thumb shine. Happy gardening! 🌿