
Landscaping
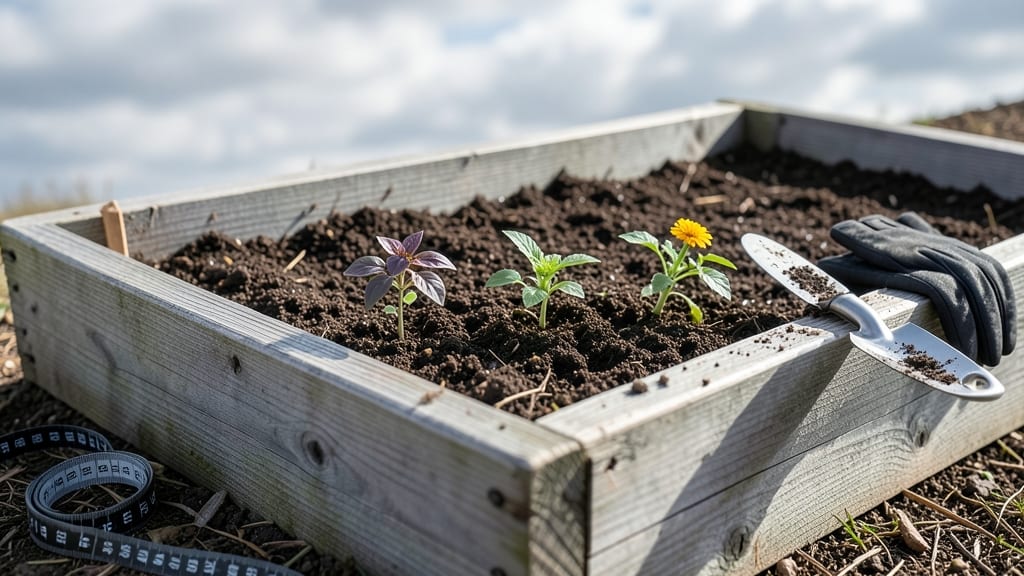
The Groundwork raised bed planter turns a simple 4-foot bed into your most productive gardening space—no measuring, no cutting, just assembly and planting. 🌱 I’ve built enough raised beds to know that pre-cut kits save hours of frustration while delivering a cleaner, more professional look than DIY lumber projects.
The 4-foot width is perfect for reaching across without stretching, and the pre-cut corners eliminate guesswork about angles and alignment.
This system works with cedar, redwood, or composite lumber, all of which resist rot and pests better than pressure-treated wood. You’ll need basic tools—a drill, screws, and a level—and a flat, sunny spot with easy access to water.
The beds sit directly on grass, soil, or even gravel, so you skip the backbreaking groundwork of removing sod or tilling. Just assemble, fill with soil, and plant.
What you end up with is a durable, weed-free growing space that stays level and looks intentional from day one. The 4-foot length fits neatly between sidewalks or patio edges, and the height (typically 6–12 inches) makes weeding and harvesting a breeze.
Plus, the pre-cut design means no wasted wood or uneven edges—just a clean, functional bed ready for your favorite vegetables, herbs, or flowers.
Whether you’re working with a small balcony garden or a backyard plot, this planter adapts to your space. For larger areas, you can connect multiple beds with bridges or pathways. The key is choosing a location with at least 6–8 hours of sunlight and ensuring good drainage—no soggy roots here.
Ready to transform a patch of yard into your most rewarding growing zone?
📚 In This Guide
- What you need
- Instructions
- Tips and common mistakes
- Wrapping up and next steps
What you need
- ● Pre-cut 4x4 lumber (cedar or redwood recommended) – 4 pieces, 8 feet long each (for a 4’ x 8’ bed).
- ● 2.5-inch exterior wood screws – 20-24 screws (stainless steel or galvanized for durability).
- ● Landscape fabric or hardware cloth – 1 piece, slightly larger than the bed base (to block weeds and pests).
- ○ Corrugated metal roofing or landscape fabric – 1 sheet, 4’ x 8’ (optional but recommended for extra weed suppression).
- ● Wood glue – 1 small bottle (for extra reinforcement at corners).
- ● Drill/driver (with Phillips and square-drive bits).
- ● Speed square or measuring tape (for precision cuts, if adjusting pre-cut pieces).
- ● Screwdriver or impact driver (for faster assembly).
- ● Staple gun (if using landscape fabric).
- ● Work gloves (for comfort and protection).
- ● Wood sealant or stain – To extend the life of your planter.
- ● Leveling feet or pavers – For stability on uneven ground.
- ● Drip irrigation kit – For hassle-free watering.
- ● Compost or soil mix – Pre-mixed for optimal plant growth.
Step-by-step assembly for your groundwork raised bed planter
Here’s how I assemble these pre-cut kits—no measuring, no guesswork, just clean, sturdy beds ready for planting.
🪴 Step 1: Unpack and Organize All Pre-Cut Components
Lay out every piece from your kit on a flat, stable surface—like a garage floor or patio table. You’ll find 4 side panels, 4 corner connectors, 1 base frame, and 16 decking boards (or equivalent pre-cut lumber). Sort them by type to avoid confusion later. I always start by checking for any missing pieces or damage—like splintered edges or warped wood—before assembly begins.
Pro tip: If your kit includes hardware like screws or brackets, group them by size. Smaller screws go in one pile, larger ones in another. This keeps things moving smoothly when you’re ready to fasten pieces. The pre-cut notches on the side panels should align perfectly—if they don’t, double-check that no pieces were damaged during shipping.
✂️ Step 2: Assemble the Base Frame and Attach Corner Connectors
Begin by laying the base frame flat on the ground. This is your foundation, so make sure it’s level before proceeding. Place one corner connector at each corner of the frame and secure it with the provided decking screws or bolts. Use a power drill with a countersink bit to drive screws at a 45-degree angle into the connectors—this ensures a tight, flush fit.
Here’s where precision matters: The connectors should sit flush with the top of the frame, not protruding. If they don’t, tap them gently with a rubber mallet until they align. Once all four connectors are secure, double-check that the frame forms a perfect 4-foot square. If it’s slightly off, adjust before moving forward—misalignment now will make the sides wobbly later.
🪴 Step 3: Attach the Side Panels to the Frame
Stand the first side panel upright against the base frame, aligning its bottom edge with the corner connectors. Pre-drill 1/8-inch holes through the panel into the connectors to prevent wood splitting. Secure the panel with 2 screws per connector, driving them in at a 30-degree angle for maximum strength. Repeat this process for all four side panels, working in a clockwise direction to maintain stability.
As you go, tap each panel gently with a level to ensure it’s plumb (perfectly vertical). If a panel leans inward or outward, loosen the screws slightly and adjust before retightening. The goal is a box that stands square and steady—no wobbling when you give it a firm shake. Once all four panels are attached, the structure should resemble a hollow cube with an open top.
🌱 Step 4: Install the Decking Boards for the Bed Floor
Lay the decking boards across the top of the assembled frame, spacing them evenly about 1/8 inch apart to allow for drainage and root expansion. Start at one corner and work your way across, using 1.5-inch deck screws to secure each board to the side panels. Drive screws into the face of the panel, not the edge, to avoid splitting.
Leave a 1/4-inch gap between the decking boards and the top of the side panels—this prevents water from pooling and rotting the wood over time. If your boards are slightly uneven, use a speed square to mark cut lines before trimming with a circular saw. Once all boards are in place, the bed should look like a sturdy, flat platform ready for soil.
⏰ Step 5: Reinforce and Prepare for Planting
Give the entire structure a final inspection: Check that all screws are tight, no boards are loose, and the corners are square. If you’re assembling this on uneven ground, consider adding adjustable leveling feet to the base frame for long-term stability. Now’s also the time to add any optional features—like a drip irrigation kit or landscape fabric lining—if you’re using them.
Here’s the thing—I always fill the bed with cardboard boxes (cut to size) before adding soil. This blocks weeds and breaks down over time, enriching the soil naturally. Once the cardboard is in place, top it with 6-12 inches of high-quality planting mix, and your raised bed is ready for plants. The pre-cut design means you’ll have a professional-looking, durable bed in under two hours.
Tips & tricks for perfect groundwork raised bed assembly
Here's what I've learned after building dozens of these—tricks that'll save you time and frustration while ensuring your raised bed stands up for years.
Pre-Assembly Inspection: Before you even touch a screw, run your hands over every piece—especially the side panels and decking boards. Look for splinters, warping, or any rough edges that might need sanding. I've caught damaged pieces at this stage that would've caused problems later. The pre-cut notches should fit snugly together; if they don't, this is your chance to address it before assembly begins.
Leveling is Non-Negotiable: Don't skip the leveling check after attaching the base frame and corner connectors. I've seen beds that looked perfect until someone tried to plant in them—only to find the corners weren't square. Use a 4-foot level across both diagonals of the frame. If it's off by more than 1/4 inch, adjust before proceeding. This single step prevents wobbly beds that might tip over in wind or when loaded with soil.
Screw Placement Strategy: When attaching the side panels in Step 3, I recommend driving your 2 screws per connector in an "X" pattern rather than parallel. This creates a stronger connection that resists twisting. Also, countersink your screws just enough so the heads sit flush with the wood—this prevents them from catching on gloves or tools later. For the decking boards, space screws every 12-18 inches along each board to maintain flexibility for seasonal wood movement.
Optional Weatherproofing: While not required, I always add a thin layer of outdoor-rated sealant to the decking boards after assembly. Focus on the edges and ends where moisture can seep in. This extra step extends the life of your bed by 2-3 years, especially in rainy climates. Use a brush-on sealant rather than spray to avoid oversaturating the wood—just one light coat is all you need.
Pro Tips for Groundwork Raised Bed Planter
- Here's what I've learned after building dozens of these—tricks that'll save you time and frustration while ensuring y...
- Pre-Assembly Inspection: Before you even touch a screw, run your hands over every piece—especially the side panels an...
- Leveling is Non-Negotiable: Don't skip the leveling check after attaching the base frame and corner connectors. I've ...
Frequently asked questions
What tools do I need to assemble the Groundwork raised bed?
You’ll need a few basic tools: a tape measure, screwdriver or drill (for the pre-cut screws), gloves, and a level to ensure stability. The kit includes all hardware, so no extra fasteners are required. Pro tip: A rubber mallet can help tap corners into place without damaging the cedar.
How long does assembly take for a 4-foot bed?
With two people, assembly typically takes 30–45 minutes. Break it down: 15 minutes for unboxing and prepping, 10 minutes for corner connections, and 10–20 minutes for leveling and securing the bed. Weekend warriors can finish in under an hour!
Can I use this raised bed on grass or concrete?
Yes! For grass, lay down landscape fabric or cardboard to suppress weeds and improve drainage. On concrete, use gravel or pavers to create a stable base and allow airflow. Avoid direct contact with soil or hard surfaces to prevent rot or instability.
What’s the best way to extend the life of the cedar wood?
Cedar is naturally rot-resistant, but a few steps boost longevity: Seal the wood with a non-toxic sealant every 1–2 years, avoid placing it in soggy areas, and elevate it slightly (4–6 inches) for airflow. Store spare parts in a dry place if disassembling for winter.
My bed feels wobbly after assembly—what should I do?
Wobbling usually means uneven ground or loose corners. Troubleshoot:
- Check the base: Level the ground or add gravel under low spots.
- Tighten screws: Re-torque the corner connectors (don’t over-tighten!).
- Add support: Bury the bed’s legs 2–3 inches into the soil for extra stability.
Wrapping up and next steps
Building your own groundwork raised bed planter for a 4-foot bed is a rewarding project that elevates your gardening game! 🌱 With pre-cut assembly, you’ve got a head start on creating a sturdy, customizable space for your plants.
Whether you’re a seasoned gardener or just starting out, this plan makes the process simple and efficient.
Now that you’re armed with the materials, tips, and answers to common questions, it’s time to roll up your sleeves and get planting! Start by gathering your tools, following the assembly steps, and soon you’ll be enjoying a thriving garden in your beautifully crafted raised bed. Happy gardening! 🌿