
Tools
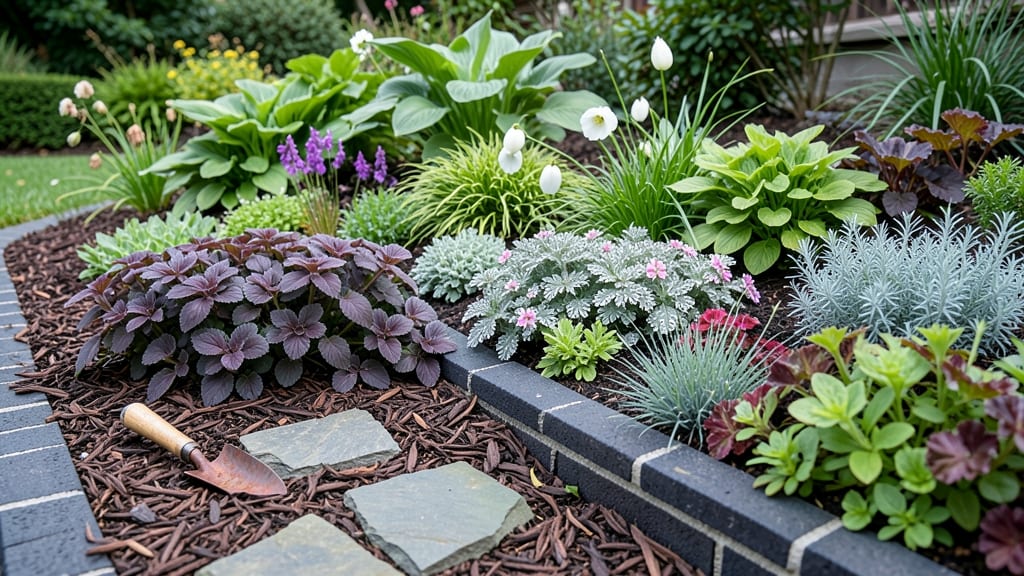
Building a garden bed layering system changed how I garden—no more wasted space, no more struggling plants, just thriving layers that work together. 🌱 The no-dig loam stack method lets you create a living ecosystem where each plant has its perfect spot, from towering sunflowers to delicate thyme at their feet.
The magic happens in the vertical: tall plants in back, mid-height in middle, and sprawlers up front. My 4' x 8' bed now fits 12 different plants where I used to squeeze in just 6.
Sunlight reaches every level, roots get the right conditions, and the whole thing looks like a designed tapestry—not a random pile of greenery. You’ll end up with a bed that’s easier to maintain, produces more food, and stays beautiful all season.
The key is starting with the right base layer—compost, mulch, and organic matter—that feeds everything above it without digging. Works for vegetable gardens, flower borders, or even pollinator-friendly plots. Here’s how to stack it right from the ground up.
📚 In This Guide
- What you need
- Instructions
- Tips and common mistakes
- Wrapping up and next steps
What you need
- ● Cardboard or thick newspaper – 5-10 sheets (to smother weeds and grass)
- ● Compost – 2-3 inches (well-aged, nutrient-rich)
- ● Leaf mold or shredded leaves – 2-3 inches (for structure and moisture retention)
- ● Straw or wood chips – 2-3 inches (to suppress weeds and retain moisture)
- ● Topsoil or finished compost – 1-2 inches (for planting)
- ○ Garden fork or broadfork – For aerating (optional but helpful)
- ● Garden hose or watering can – To keep layers moist
- ● Gloves and knee pads – For comfort and protection
- ● Biochar – ½ inch (boosts soil fertility and water retention)
- ● Worm castings – ½ inch (adds extra nutrients)
- ● Mycorrhizal fungi – Sprinkle lightly (enhances root growth)
- ● Mulch (straw, pine needles, or grass clippings) – 1-2 inches (final layer to lock in moisture)
How to build a no-dig loam stack for a thriving garden bed
Here's the method I've used for years to create rich, self-sustaining garden beds that need no tilling and keep producing.
🌱 Step 1: Clear and Prepare the Garden Space
Remove all existing plants, weeds, and debris from your 4-foot by 4-foot bed. I like to use a garden fork to gently loosen the top 6 inches of soil—this helps break up compaction without turning the entire bed. If you're working with grass, smother it first with cardboard for 2-3 weeks before starting; this prevents weeds from sprouting later.
Rake the area smooth, removing any rocks or roots larger than 2 inches. The goal is a clean, level surface where your layers will settle evenly. I always do this step on a dry day so the soil holds its shape better when I start stacking materials.
🪴 Step 2: Layer Carbon-Rich and Nitrogen-Rich Materials
Start with a 4-inch base layer of coarse wood chips or straw—this improves drainage and prevents compaction at the bottom. Next, alternate between 2 inches of nitrogen-rich materials (like well-aged manure or composted leaves) and 2 inches of carbon-rich materials (like shredded newspaper, cardboard, or straw). I build 3-4 layers total, ending with a 2-inch top layer of finished compost to feed your plants immediately.
Press each layer down lightly with your hands or a board—this helps materials settle and prevents air pockets. The key is balance: too much nitrogen stinks, too much carbon robs nutrients. You'll see the layers compress slightly as you go, so don't worry if it looks uneven at first.
☀️ Step 3: Top With Mulch and Plant Directly
Finish with a 3-inch layer of straw or wood chips—this protects your bed from erosion, retains moisture, and keeps weeds at bay. I like to leave 6 inches of space between plants when adding them directly to the bed. Dig a hole just big enough for the root ball, place the plant in, and water it deeply to settle the soil around the roots.
Here's the thing—you don't need to wait for decomposition before planting. The microbes in your soil will start breaking down the layers immediately, and your plants will benefit from the nutrients as they become available. Water lightly after planting to encourage root growth into the new loam.
💧 Step 4: Maintain With Minimal Effort
Add a 1-inch top layer of compost every 3-4 months to keep feeding the soil. I also top up with straw or wood chips after heavy rains to maintain moisture and prevent crusting. Avoid walking on the bed—your weight compacts the layers and disrupts the soil structure.
You'll notice new growth within 2-3 weeks as the soil warms up and microbes get to work. Over time, the layers will blend into a rich, crumbly loam that holds moisture and supports strong root systems. This method works year-round—just adjust watering based on seasonal needs.
Tips & tricks for perfect garden bed layering
These simple strategies will help you build a thriving no-dig garden bed that keeps producing all year long.
Prep Like a Pro: When clearing your 4-foot bed in Step 1, use a garden fork to loosen just the top 6 inches of soil—this prevents deep compaction while still improving drainage. For grassy areas, I've found that laying down cardboard 2-3 weeks before starting actually gives weeds time to die off completely, making your final cleanup much easier. The key is patience here—rushing this step can leave weeds sprouting through your layers later.
Layering Balance: In Step 2, the 2-inch nitrogen-rich and carbon-rich layers need to stay in perfect balance. Too much nitrogen (like fresh manure) will stink and burn plants, while too much carbon (like pure straw) will rob nutrients. I like to think of it like a sandwich: equal parts bread (carbon) and filling (nitrogen). If you're unsure, start with 3 layers total—you can always add more carbon if things get too smelly.
Planting Strategy: When planting in Step 3, the 6-inch spacing between plants is crucial for root growth. I've learned the hard way that crowding plants too close leads to competition for nutrients and stunted growth. For leafy greens, you can plant slightly closer (4-5 inches), but stick with 6 inches for most vegetables and herbs. Watering deeply after planting helps settle the soil around roots and encourages them to grow into your new loam layers.
Maintenance Made Easy: The 3-4 month compost top-up schedule in Step 4 is flexible—don't stress if you miss a month. Just keep adding that 1-inch layer whenever you remember. For mulch, I've found that straw breaks down faster than wood chips, so if you're using straw, you might want to add a little extra (about 1/2 inch more) to account for this. The goal is to maintain that 3-inch protective layer to keep moisture in and weeds out.
Pro Tips for Garden Bed Layering
- These simple strategies will help you build a thriving no-dig garden bed that keeps producing all year long.
- Prep Like a Pro: When clearing your 4-foot bed in Step 1, use a garden fork to loosen just the top 6 inches of soil—t...
- Layering Balance: In Step 2, the 2-inch nitrogen-rich and carbon-rich layers need to stay in perfect balance. Too muc...
Frequently asked questions
Got questions about garden bed layering?
You’re not alone! Here are answers to the most common queries to help you build the perfect no-dig loam stack with confidence.
What’s the best time of year to start layering my garden bed?
Spring or fall are ideal—when the soil is workable but not frozen or waterlogged. Avoid peak summer heat or winter frost, as these can disrupt decomposition. Pro tip: If you’re in a mild climate, you can layer year-round! Just adjust materials (e.g., use less green waste in dry seasons).
Can I skip expensive compost or use free alternatives?
Free alternatives like leaf mold, grass clippings, shredded newspaper, or manure (from local farms) work great. Just balance "greens" (nitrogen-rich) with "browns" (carbon-rich) to avoid odors. Bonus: Check municipal yard waste programs for discounted compost!
How long does it take for the layers to break down into usable soil?
With proper layering, you’ll see noticeable improvement in 3–6 months, but full decomposition can take 1–2 years for deep, fertile loam. Speed it up by chopping coarse materials (like branches) into smaller pieces and keeping the bed moist but not soggy.
Will pests or weeds invade my layered bed?
Weeds and pests are less likely if you smother them first with thick layers of cardboard or newspaper. Add a 1-inch top layer of straw or wood chips to deter critters. Monitor for slugs/snails—handpick them or use organic barriers like crushed eggshells.
How deep should my layered garden bed be?
Aim for 12–18 inches deep to support deep-rooted plants. Start with a 4-inch base of cardboard (to block weeds), then alternate layers of "browns" (carbon) and "greens" (nitrogen) until you hit your target depth. No need to dig! Just stack and let nature do the work.
What if my layers smell bad?
A foul odor usually means too much "green" material (like fresh grass clippings) without enough "browns" (dry leaves, straw). Fix it by adding more carbon-rich layers, fluffing the bed, and ensuring good airflow. If the smell persists, pause layering until it stabilizes.
Wrapping up and next steps
Mastering garden bed layering with a no-dig loam stack is your ticket to a lush, low-maintenance garden that keeps thriving year-round! 🌱 By mimicking nature’s own composting process, you’ll create fertile soil that nurtures roots, retains moisture, and cuts down on weeding—all while saving time and effort.
Your next step? Grab your materials, roll up your sleeves, and start layering—your plants (and future harvests) will thank you!
Pro tip: Begin small with a test bed to refine your technique, then expand as you gain confidence. Happy gardening!