
Tools
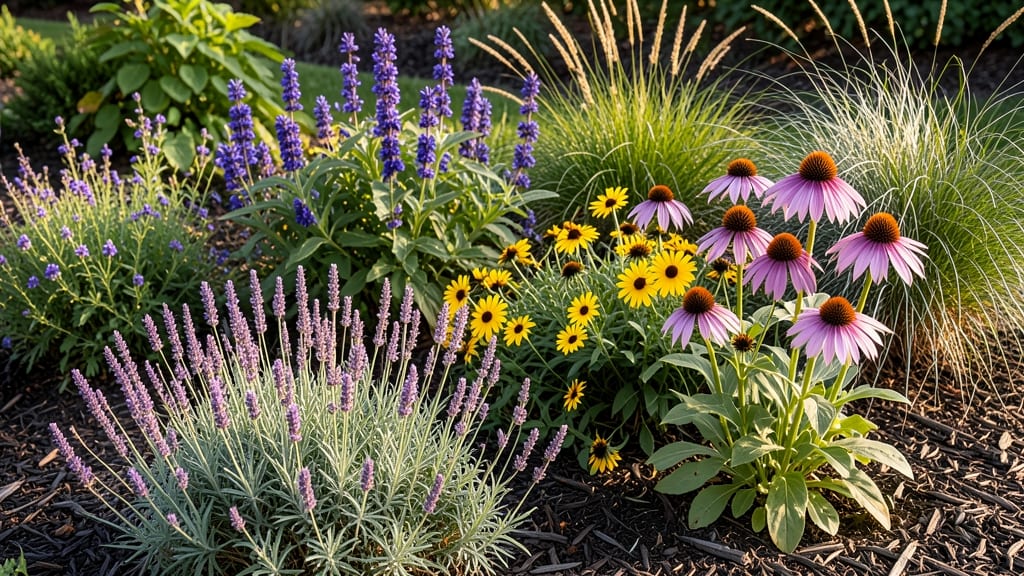
Your front yard garden bed can be the envy of the neighborhood—blooming with curb appeal that turns heads from spring through fall. 🌸 I designed mine after years of watching neighbors struggle with patchy lawns and boring borders; the secret isn’t expensive plants, but smart layering that hides maintenance while wowing visitors.
Start with 3-5 key plants that thrive in your climate: tall ornamental grasses for structure, mid-height shrubs for color, and low-spreading perennials for texture. My front bed uses black-eyed Susans (golden summer blooms), dwarf lilacs (spring fragrance), and heuchera (year-round foliage interest). The result?
A bed that looks intentional, not fussy. By mixing evergreens with seasonal bloomers, you’ll have color every month—even winter. The grasses add movement, the shrubs provide structure, and the perennials fill gaps naturally. Maintenance drops to 10 minutes a week once established.
This works for any yard size, from narrow strips to wide swaths. The key is edging (clean lines make it look polished) and mulch (suppresses weeds and retains moisture). Let’s make your front yard the first stop on the block!
📚 In This Guide
- What you need
- Instructions
- Tips and common mistakes
- Wrapping up and next steps
What you need
- ● Garden Bed Outline: Stakes or spray paint (for marking bed shape)
- ● Measuring tape (25+ ft)
- ● String or garden hose (to outline edges)
- ● Soil & Prep: Topsoil (1–2 cubic yards, depending on bed size)
- ● Compost or organic matter (1–2 bags, 40 lb each)
- ● Landscape fabric (to suppress weeds, cut to bed size + 6" overlap)
- ● Drainage & Structure: Gravel or sand (1–2 bags, 50 lb each, for drainage layer)
- ● Edging material (brick, stone, or metal—enough to line the bed perimeter)
- ● Tools: Shovel (round-point or flat)
- ● Garden rake (for leveling soil)
- ● Wheelbarrow (for hauling materials)
- ● Gloves (heavy-duty, waterproof)
- ● Knee pads (for comfort)
- ● Mulch (2–3 bags, 2 cubic ft each—pine bark or shredded leaves)
- ● Plant supports (stakes, cages, or trellises for climbing plants)
- ● Drip irrigation kit (for low-maintenance watering)
- ● Soil test kit (to check pH/nutrient levels before planting)
- ● Decorative stones or pebbles (for borders or pathways)
How to design a stunning front yard garden bed
Here's the method I rely on to create a front yard garden that turns heads and thrives season after season.
🪴 Step 1: Plan Your Layout and Select Plants
Start by sketching your garden bed on paper, marking the dimensions and existing features like walkways or shrubs. I always design with a 3:1 ratio of plants to hardscape—for every 3 square feet of plants, include 1 square foot of mulch or decorative stones. This creates visual balance and prevents the space from feeling overcrowded.
Choose plants that offer year-round interest by layering perennials, annuals, and seasonal bloomers. For example, pair evergreen shrubs like boxwood for structure with spring bulbs like daffodils, summer annuals like petunias, and fall foliage like ornamental grasses. Research each plant’s mature size to avoid overcrowding—nothing ruins curb appeal faster than plants fighting for space.
🌱 Step 2: Prepare the Soil for Optimal Growth
Remove any existing grass or weeds, digging down 6-8 inches deep to loosen the soil. I like to work in a 2-inch layer of compost mixed into the top 6 inches of soil—this improves drainage and provides nutrients without overwhelming new plants. For heavier clay soil, add 1 part perlite or sand to every 3 parts soil to create a lighter, more workable texture.
Test your soil’s pH if possible—most front yard plants prefer a neutral pH of 6.0-7.0. If your soil is too acidic or alkaline, amend it with lime (to raise pH) or sulfur (to lower pH) before planting. A simple DIY test kit works fine, or send a sample to your local extension office for a professional analysis.
☀️ Step 3: Plant in Layers for Depth and Texture
Begin with tallest plants at the back, gradually stepping down to shorter varieties toward the front. I place shrubs or perennials in the center or back rows, mid-height plants like salvia or catmint in the middle, and low-growing annuals or ground covers like ajuga or creeping thyme along the edges. This creates a natural tiered effect that draws the eye and adds dimension.
Dig holes twice as wide as the root ball but only as deep as the container’s drainage holes. Gently remove plants from their pots, tease out any circling roots, and place them in the hole so the top of the root ball sits flush with the soil line. Backfill with native soil, firming it lightly around the roots to eliminate air pockets.
💧 Step 4: Mulch and Water for Long-Term Success
Spread 2-3 inches of mulch over the bed, keeping it 2 inches away from plant stems to prevent rot. I prefer shredded bark or pine straw for its neat appearance and moisture-retention benefits. Mulch suppresses weeds, regulates soil temperature, and keeps roots consistently moist—critical for front yard plants that face more foot traffic and wind exposure.
Water deeply immediately after planting, soaking the soil until it’s 6-8 inches down. Follow up with 1 inch of water per week, either from rainfall or irrigation, splitting it into two sessions (morning and evening) to reduce evaporation. Avoid overhead watering, which can spread disease—use a soaker hose or drip irrigation instead for targeted moisture delivery.
✂️ Step 5: Maintain and Refresh Seasonally
Prune dead or overgrown stems throughout the growing season to encourage bushier growth and prevent legginess. I always deadhead spent blooms regularly to redirect energy into new flowers and extend the blooming period. In early spring, remove any winter-damaged foliage and apply a slow-release fertilizer to support new growth.
Refresh your bed’s appearance by rotating seasonal plants—swap out summer annuals for mums or pansies in fall, or add spring bulbs like tulips or hyacinths for early color. Every 2-3 years, top-dress with 1 inch of compost to replenish nutrients and keep the soil healthy. This low-maintenance approach keeps your front yard garden looking vibrant with minimal effort.
Tips & tricks for perfecting your front yard garden bed
These insider tricks will help you create a garden that not only thrives but also becomes the envy of the neighborhood.
Design Balance: When implementing the 3:1 ratio of plants to hardscape from Step 1, consider adding vertical elements like trellises or obelisks to create visual interest without occupying ground space. This technique adds dimension and draws the eye upward, especially useful in smaller front yards where space is limited. I often place these vertical structures along the back of the bed to maximize their impact.
Soil Prep Secret: For Step 2's soil preparation, if you're working with particularly compacted soil, rent a rototiller to break it up thoroughly before adding compost. This ensures better root penetration and aeration right from the start. If tilling isn't an option, use a broadfork to manually loosen the soil in sections—it's more labor-intensive but gives you better control over the depth you're working at those 6-8 inches.
Planting Precision: In Step 3, when creating your layered look, consider adding color-blocked sections using plants with similar foliage colors. This creates striking visual impact while maintaining harmony. For example, pair purple-leafed plants like 'Purple Smoke' bush with other purples and purples—it's a design trick that makes your garden look professionally landscaped. Just be sure to maintain that 2:1 hole width ratio for proper root spread.
Watering Wisdom: For Step 4's watering routine, invest in a smart irrigation timer that can be programmed to deliver those two 1-inch sessions automatically. This ensures consistent moisture without you having to remember to water manually. Place your timer near the bed so you can easily monitor the system and adjust as needed. Remember to check the soil moisture at 6-8 inches depth—if it's still damp, skip the watering that day.
Pro Tips for Garden Bed Front Yard
- These insider tricks will help you create a garden that not only thrives but also becomes the envy of the neighborhood.
- Design Balance: When implementing the 3:1 ratio of plants to hardscape from Step 1, consider adding vertical elements...
- Soil Prep Secret: For Step 2's soil preparation, if you're working with particularly compacted soil, rent a rototille...
Frequently asked questions
Got questions about transforming your front yard with a stunning garden bed? You’re not alone! Here are answers to the most common concerns—so you can plant with confidence and style.
What’s the best time of year to start a front-yard garden bed?
The ideal window is early spring (after the last frost) or early fall (6-8 weeks before your first frost). This gives plants time to establish roots before extreme weather. For warm-weather plants like tomatoes or marigolds, wait until soil temps hit 60°F+. Pro tip: Test your soil first—amend it with compost if needed!
How do I keep my garden bed looking neat without over-maintaining it?
Start with mulch (2–3 inches) to suppress weeds and retain moisture. Choose low-maintenance plants like ornamental grasses, succulents, or perennials (they return yearly!). For borders, try edging stones or metal strips to define the space cleanly. Group plants by water needs to cut down on upkeep!
Can I use a raised garden bed in my front yard? What are the pros?
Raised beds offer better drainage, warmer soil (great for early planting), and weed control. They’re also customizable—add height for accessibility or mix materials like cedar (rot-resistant) or composite lumber. Just ensure they’re level and placed where they won’t block walkways or views. Bonus: They’re perfect for small spaces!
What are some low-cost ways to create a front-yard garden bed?
Skip pricey planters! Use pallets (sand and seal them for safety), bricks or cinder blocks (arranged creatively), or repurposed containers (old troughs, buckets). For soil, mix yard waste (leaves, grass clippings) with compost or free mulch from local tree services. Check community boards for free plants too!
How do I fix a garden bed that’s not thriving or looks messy?
First, diagnose the issue:
- Weeds? Pull them early or smother with cardboard + mulch.
- Brown plants? Check water (over/under), soil (pH test kits are cheap), or sunlight (move shade-lovers to the right spot).
- Pests? Try neem oil or companion planting (e.g., marigolds repel bugs).
Wrapping up and next steps
Transforming your front yard with a stunning garden bed isn’t just about aesthetics—it’s about creating a welcoming space that thrives all year. Whether you’re a seasoned gardener or just starting, the key is to plan thoughtfully, choose the right plants, and maintain with care.
Your hard work will pay off with vibrant blooms, lush greenery, and that coveted curb appeal!
Ready to roll up your sleeves? Start small—pick a section of your yard, gather your tools, and dive in! Need inspiration? Sketch a design, test soil health, or browse plant varieties to match your style. Every great garden begins with a single shovel of dirt. 🌱✨