
Tools
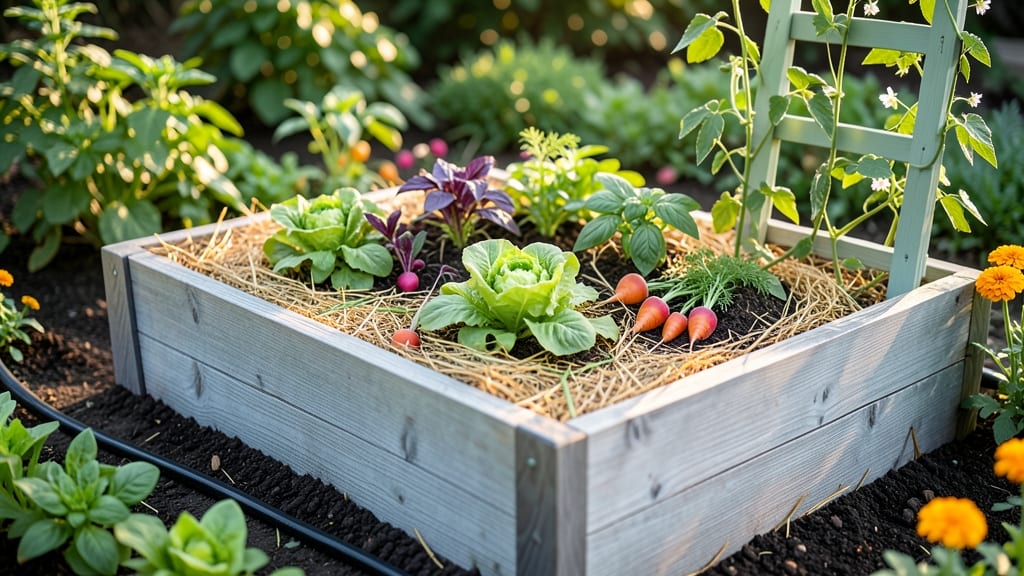
My garden bed enclosures finally solved the problems I’d been fighting for years—soil spilling everywhere, critters digging in, and beds looking messy. ✨ The hybrid wood-and-metal design I built lasts through rain, wind, and even my dog’s occasional digging attempts while keeping everything neat and contained.
This combo uses cedar for its natural rot resistance and metal corner brackets for extra stability. You’ll need basic tools, pre-cut lumber, and some hardware—nothing fancy. The best part? It looks intentional, not thrown together, and you can customize the height and width to fit your space perfectly.
Once installed, your garden beds stay tidy, pests stay out, and the soil stays where it belongs. The metal accents add a modern touch while the wood keeps it warm and inviting. You’ll spend less time fixing edges and more time enjoying your thriving plants.
Works for vegetable gardens, flower beds, or even herb spirals—just adjust the dimensions. Here’s how to make it happen without breaking the bank or your back.
📚 In This Guide
- What you need
- Instructions
- Tips and common mistakes
- Wrapping up and next steps
What you need
- ● Wood: Pressure-treated lumber (e.g., cedar or redwood) – 4x4 posts (6–8 ft long, 4–6 pieces) and 2x4s or 2x6s (for framing, ~10–15 ft total).
- ● Metal: Galvanized steel or aluminum sheets (for roofing/siding) – ~10–12 sq ft (cut to size).
- ● Hardware: Stainless steel screws or deck screws (2–3 lbs).
- ● Heavy-duty corner brackets (8–12 pieces).
- ● Hinges and latch (if adding a removable door).
- ● Weatherproofing: Exterior wood sealant or paint (1–2 gallons) and metal primer (1 can).
- ● Circular saw or miter saw (for precise cuts).
- ● Drill/driver with screwdriver bits.
- ● Level (to keep posts straight!).
- ● Measuring tape and pencil.
- ● Post hole digger or auger (for burying posts).
- ● Safety gear: gloves, goggles, and ear protection.
- ● Lattice panels (for a decorative touch).
- ● Garden bed liner (landscape fabric, ~5 sq ft).
- ● Solar-powered lights (for ambiance).
- ● Pre-made metal edging (if skipping DIY cuts).
Step-by-Step instructions for building weatherproof garden bed enclosures
Here's how I build sturdy, long-lasting enclosures that protect plants while blending seamlessly with your garden.
🪴 Step 1: Measure and Mark Your Garden Bed Layout
Start by measuring your existing garden bed or the space where you plan to build. I use a tape measure to mark the perimeter with wooden stakes at each corner—this creates a clear visual guide for cutting materials. For a 4-foot by 8-foot bed (the size we're building for), I mark the corners with stakes and stretch a string line between them to ensure perfect 90-degree angles.
Use a level tool to check that all corners are even. Uneven corners will make your enclosure look crooked or cause drainage issues. If you're replacing an existing bed, dig out any old mulch or plants first and level the soil with a rake. This ensures your enclosure sits flat and doesn't collect water in low spots.
📏 Step 2: Cut and Assemble the Wood Frame
For the frame, I use 2x4 lumber cut to the dimensions of your bed—4 feet for the short sides and 8 feet for the long sides. Pre-drill holes at each corner to make assembly easier and prevent wood splitting. Attach the corners with 3-inch exterior wood screws and reinforce each joint with a 2x4 corner brace for extra stability.
Here's the thing—don't skimp on the screws. I use galvanized exterior screws rated for outdoor use, and I drive them in at a slight angle for added strength. Once the frame is assembled, lay it flat on the ground and check for square again. If any side feels wobbly, add an extra brace or screw for reinforcement.
☀️ Step 3: Attach the Metal Edging for Weather Resistance
Cut 18-gauge galvanized steel edging to match the length of each side of your frame. This metal edging is what makes the enclosure weatherproof—it won't rot like wood and resists rust if properly sealed. I use stainless steel screws to attach the edging to the inside of the wood frame, ensuring it sits flush with the top edge.
Overlap the corners by at least 2 inches and secure them with additional screws. For extra protection, I apply a clear silicone sealant along the seams where the metal meets the wood. This prevents water from seeping in and causing rot over time. Test the fit by placing a small board on top—if it wobbles, add more screws or braces.
🌱 Step 4: Reinforce and Add Drainage Holes
Before filling the enclosure with soil, I add drainage holes along the bottom of the metal edging. Use a 1/4-inch drill bit to create holes every 6 inches along the length of each side. This allows excess water to drain out while keeping soil contained. I also reinforce the bottom of the frame with horizontal 1x4 boards to prevent warping over time.
Real talk: If you skip the drainage holes, your bed will stay soggy after rain, leading to root rot. I like to add a layer of landscape fabric at the bottom before filling with soil—this keeps weeds out while still allowing water to drain freely. Once everything is in place, give the frame one last check for stability by gently pressing down on each corner.
⏰ Step 5: Fill and Prepare for Planting
Now it's time to fill the enclosure with high-quality garden soil mixed with compost for nutrients. I fill it to about 6 inches below the top edge to allow for settling. For a 4-foot by 8-foot enclosure, that’s roughly 1 cubic yard of soil—don't guess, measure twice. Tamp the soil down lightly with a board to eliminate air pockets.
Here's where it gets fun—watch the soil settle over the first week and add more as needed. I like to add a layer of mulch on top to retain moisture and suppress weeds. Once your enclosure is filled, it's ready for planting. The metal edging will keep soil in place while the wood frame provides structure that lasts for years.
Tips & tricks for perfect garden bed enclosures
Building a sturdy enclosure doesn't have to be tricky—these practical tips will help you avoid common pitfalls and create a lasting structure.
Precision Matters in Step 1: When marking your 4-foot by 8-foot layout, use a laser level instead of just a string line for even more accuracy. I've found that even small deviations can cause drainage issues later. Press the stakes firmly into the ground so they don't shift when you're checking your 90-degree angles—this is where many beginners make their first mistake.
Frame Assembly Pro Tip: For the 2x4 lumber assembly in Step 2, I recommend using a Kreg Jig for pocket holes at the corners. This creates hidden joints that look cleaner and distribute weight more evenly than corner braces alone. If you don't have one, simply predrill your holes at a 45-degree angle to create stronger connections—this small detail prevents wobble over time.
Weatherproofing Secret: The metal edging in Step 3 is your best defense against rot, but don't forget to apply a bead of silicone sealant along the top edge where the metal meets the wood. This creates a watertight barrier that prevents water from seeping into the wood grain. I also recommend using rust-resistant washers with your stainless steel screws—they're a small investment that pays off in longevity.
Drainage Hack: When creating your drainage holes in Step 4, consider adding a second row of holes about 2 inches above the bottom. This creates better airflow through the soil while still keeping it contained. For extra protection, I wrap the bottom of the metal edging with plastic sheeting before adding the landscape fabric—this gives you an additional moisture barrier against the ground.
Pro Tips for Garden Bed Enclosures
- Building a sturdy enclosure doesn't have to be tricky—these practical tips will help you avoid common pitfalls and cr...
- Precision Matters in Step 1: When marking your 4-foot by 8-foot layout, use a laser level instead of just a string li...
- Frame Assembly Pro Tip: For the 2x4 lumber assembly in Step 2, I recommend using a Kreg Jig for pocket holes at the c...
Frequently asked questions
Got questions about garden bed enclosures? You’re not alone! Here are some of the most common concerns—and their answers—to help you plan like a pro.
What’s the best material for a weatherproof enclosure?
A hybrid design (wood + metal) is ideal! Cedar or redwood resists rot, while galvanized steel or aluminum handles rain, snow, and wind. For extra durability, pair wood with metal corner brackets or a powder-coated steel frame. Pro tip: Avoid pressure-treated wood near edible plants—opt for food-safe sealants instead.
When is the best time to install an enclosure?
Install in early spring (before planting) or late fall (after harvest). This gives you time to prep the bed, secure materials, and avoid disturbing roots. If retrofitting, do it after the first frost to minimize stress on established plants.
Are DIY enclosures cheaper than pre-made ones?
Yes! DIY kits (like cedar planks + hardware) cost $50–$200, while pre-built metal/wood hybrids run $300–$800+. Save more by repurposing materials (e.g., old fencing, pallets) or buying in bulk. Watch out: Cheap wood may warp over time—balance cost with longevity.
How do I keep pests out without harming plants?
Start with fine mesh hardware cloth (1/4" or smaller) on vents and bottom edges. Add a 3–4" deep soil barrier (like slate or metal flashing) to block burrowing critters. For organic gardens, companion plants (e.g., marigolds) and neem oil sprays work too!
Can I use an enclosure in freezing climates?
Reinforce with insulated panels (e.g., foam-core wood) and add a removable lid for winter. Bury the bottom edge 6–12" deep to prevent wind damage. For extreme cold, use polycarbonate panels (like greenhouse plastic) to trap heat.
Wrapping up and next steps
Transforming your garden with a weatherproof wood and metal hybrid enclosure isn’t just practical—it’s a game-changer for plant health and curb appeal! 🌱 Whether you’re protecting delicate greens from pests or extending your growing season, these designs blend durability with style.
The key? Start with the right materials, plan for weather resilience, and let your creativity shine.
Ready to take the next step? Sketch your design, gather supplies, and build with confidence! Your future garden will thank you—one sturdy, stylish frame at a time. 🛠️✨