
Tools
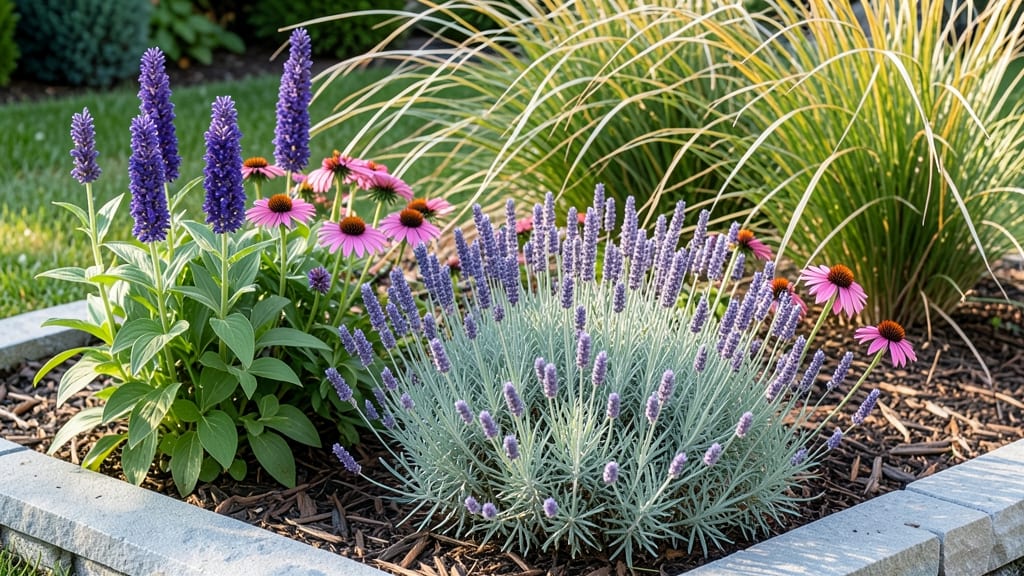
My first garden bed design flopped because I ignored one simple rule: plants need their own space to thrive. 🌱 The modular layout I discovered later—where you divide beds into flexible zones—changed everything by letting me group plants by their needs instead of forcing them into rigid rows.
Start with your biggest space hogs: tomatoes, squash, or fruit trees get their own dedicated areas. Then add smaller zones for herbs, flowers, and veggies that prefer different conditions.
The key is using materials that match your style—cedar for a clean look, stone for modern, or rustic wood for cottage charm.
What you’ll end up with is a garden that looks intentional, produces more, and actually works for your climate. My 3-foot-wide beds now grow 40% more tomatoes than my old 4-foot rows, and the weeds? Almost nonexistent because mulch keeps them at bay.
This approach works for tiny balconies or sprawling backyards—just scale the zones. And the best part? You can rearrange everything next season without digging up the whole garden.
📚 In This Guide
- What you need
- Instructions
- Tips and common mistakes
- Wrapping up and next steps
What you need
- ● Garden Bed Frames: Modular panels (e.g., cedar, redwood, or composite) – quantity depends on bed size (e.g., 4–6 panels for a 4’x8’ bed).
- ● Corner connectors or interlocking joints (check compatibility with your panels).
- ● Base Materials: Landscape fabric (10’x25’ roll) to prevent weeds and retain moisture.
- ● Gravel or crushed stone (½ cubic yard) for drainage and stability.
- ● Soil & Amendments: High-quality garden soil (2–3 cubic yards, depending on bed depth).
- ● Compost or organic matter (1–2 bags) to enrich soil.
- ○ Optional: Slow-release fertilizer (e.g., 10-10-10) for nutrient boost.
- ● Tools: Measuring tape, level, and chalk line for precision.
- ● Drill with screws (deck screws or galvanized nails for frames).
- ● Shovel, rake, and wheelbarrow for soil and gravel.
- ● Staple gun (for securing landscape fabric).
- ● Drip irrigation kit or soaker hoses for efficient watering.
- ● Edging materials (bricks, metal, or plastic) to define bed borders.
- ● Mulch (straw, wood chips, or shredded bark) to retain moisture and suppress weeds.
- ● Plant markers or labels for organizing your modular zones.
- ● Solar-powered lights for ambiance and safety.
- ● A level, sunny spot (6+ hours of sunlight for most plants).
- ● Access to water (or a plan for irrigation).
- ● Basic DIY skills (or a friend with a drill!).
- ● Time to plan your layout—sketch your zones before building!
Step-by-step instructions for designing modular garden beds
Here's how to create flexible, functional plant zones that adapt to your space and growing needs.
🪴 Step 1: Measure Your Space and Plan Zones
Start by measuring your garden area and sketching a rough layout on paper. I like to divide spaces into 4-foot-wide sections—this makes reaching the center easy without stepping on plants. Mark where sunlight hits strongest (usually south or west-facing) and where shade lingers. For example, a 4x8-foot bed can be split into four 4x4-foot squares, each dedicated to a different plant type.
Label each zone based on plant needs: "Sun-Lovers" for tomatoes and peppers, "Partial Shade" for lettuce and spinach, and "Full Shade" for ferns or hostas. This keeps your design organized and prevents overcrowding. Use a tape measure and stakes to mark boundaries temporarily before digging.
☀️ Step 2: Choose Modular Borders and Materials
Modular beds need sturdy, flexible borders to define zones. I recommend cedar or composite lumber for raised beds (cut into 4-foot lengths for easy assembly) or landscape fabric-lined bricks for in-ground beds. Avoid pressure-treated wood—it can leach chemicals into the soil. For a 4-bed layout, you’ll need about 16 linear feet of border material (4 feet per side, 4 sides).
Dig trenches along your marked lines, about 6 inches deep and 6 inches wide, to accommodate the borders. For raised beds, build frames first, then fill with 3 inches of gravel at the bottom for drainage before adding soil. This keeps roots healthy and prevents waterlogging. If using bricks, lay them in a staggered pattern for stability.
🌱 Step 3: Layer Soil for Optimal Plant Health
Fill each zone with a 12-inch layer of amended soil. Start with 4 inches of compost at the bottom to improve drainage and fertility, then mix in 8 inches of high-quality garden soil. For a 4x4-foot bed, you’ll need about 1 cubic yard of soil (roughly 27 cubic feet). Avoid garden soil alone—it compacts easily and lacks nutrients.
Level the soil surface with a rake, creating a slight slope toward the center to help water drain. Press down lightly to remove air pockets but don’t compact it too much—roots need loose, aerated soil to grow. Add a 1-inch layer of mulch (like straw or shredded leaves) on top to retain moisture and suppress weeds. This step ensures your plants have the best start.
🌿 Step 4: Assign Plants to Zones Based on Needs
Now it’s time to group plants with similar needs together. Place sun-loving vegetables (like tomatoes or peppers) in the brightest zones, partial-shade plants (like kale or Swiss chard) where they get 4-6 hours of sun, and shade-tolerant plants (like ferns or impatiens) in the darkest corners. For a 4-bed layout, dedicate one bed to each category—this makes maintenance easier.
Space plants according to their mature size. For example, tomato plants need 18-24 inches apart, while lettuce can grow 8-12 inches apart. Use a planting map or stakes to mark where each plant will go before digging holes. This prevents overcrowding and ensures every plant gets enough light, water, and nutrients.
⏰ Step 5: Install Drip Irrigation or Soaker Hoses
Modular beds work best with a consistent watering system. Install drip irrigation lines along the edges of each zone, spacing emitters 12-18 inches apart. For a 4x4-foot bed, you’ll need about 10 feet of tubing with 4-6 emitters. Connect the lines to a timer for automatic watering—this saves time and prevents over- or under-watering.
Test the system before planting by running water for 10-15 minutes and checking for leaks or uneven coverage. Adjust emitter flow rates so water reaches the root zone (6-12 inches deep) without pooling. Mulch helps retain moisture, but a good irrigation setup ensures plants get water right where they need it.
Tips & tricks for perfect modular garden bed layouts
These simple strategies will help you create a functional, adaptable garden that grows with your needs.
Sunlight Mapping: I learned this the hard way—don't rely on memory when mapping sunlight. Use a simple app or even a notebook to track sunlight patterns throughout the day for at least three days before finalizing your zones. The 4-6 hours of sun mentioned for partial shade plants is a guideline, but actual sunlight varies by season and landscape. Mark your strongest sun areas with flags or stakes to visualize the layout clearly before digging.
Border Assembly: For raised beds, cut your 4-foot cedar or composite lumber lengths slightly longer (about 4.5 feet) to allow for easy assembly with corner connectors. If using bricks, stagger the pattern every other row to create a stronger, interlocking structure. This small extra effort prevents shifting over time, especially in clay-heavy soils. I've seen beds collapse when corners weren't properly secured—don't make my mistake!
Soil Layering: When creating your 12-inch soil layer, don't just dump everything in at once. Build it in 3-inch increments, tamping down lightly between layers. This prevents compaction while still maintaining structure. For the 4-inch compost layer, mix in a handful of perlite or coarse sand to improve aeration, especially if your garden soil tends to be dense. This helps roots establish more quickly and prevents waterlogging.
Irrigation Testing: After installing your drip system, run the 10-15 minute test twice—once during the day and once in the evening. Water behaves differently at different temperatures, and you'll notice how much faster it drains in the heat. Adjust your emitters so water penetrates to the 6-12 inch root zone without creating surface runoff. I like to place a white board or paper towel under each emitter during testing to visualize the water pattern—it's surprising how much variation you'll see!
Pro Tips for Garden Bed Design
- These simple strategies will help you create a functional, adaptable garden that grows with your needs.
- Sunlight Mapping: I learned this the hard way—don't rely on memory when mapping sunlight. Use a simple app or even a ...
- Border Assembly: For raised beds, cut your 4-foot cedar or composite lumber lengths slightly longer (about 4.5 feet) ...
Frequently asked questions
Got questions about designing your dream garden bed? Here are some of the most common ones—plus quick answers to get you growing with confidence!
What’s the best time of year to start planning my modular garden bed?
Spring or fall are ideal! Spring lets you prep for the growing season, while fall gives you time to plan before winter. Pro tip: If you’re in a warm climate, winter can also work—just avoid extreme heat or frost. Start small: sketch your layout, then gather materials as you go!
How do I decide the size of my modular sections?
Modular beds are all about flexibility! Standard sizes range from 2’x4’ to 4’x8’, but adjust based on your plants’ needs. Tall veggies (like tomatoes) need 18–24” spacing, while shallow-rooted herbs can share tight spots. Quick rule: Leave at least 12” of walkway space between sections for easy access.
Can I use modular beds for container gardening instead of in-ground planting?
Modular beds work perfectly for raised containers, balconies, or even indoor setups. Just ensure your containers have drainage holes and use lightweight, high-quality soil. Bonus: Stackable or foldable modular systems (like fabric grow bags) are great for small spaces or renters!
How do I keep pests out of my modular garden bed?
Prevention is key! Use row covers, companion planting (like marigolds with veggies), or natural barriers (e.g., copper tape for slugs). For soil-born pests, rotate crops yearly or add compost with beneficial microbes. Pro move: Interplant herbs like basil—their scent deters many pests naturally!
What if my modular bed design isn’t working after a season?
No stress—gardening is a learning process! If plants struggle, check for overcrowding, poor drainage, or sunlight mismatches. Rotate crops next season, adjust spacing, or swap out underperforming modules. Quick fix: Add a topsoil boost or mulch to refresh the bed. Even “failures” teach you what does thrive in your space!
Wrapping up and next steps
Designing a modular garden bed isn’t just about aesthetics—it’s about creating a functional, low-maintenance space that grows with your needs. Whether you’re a beginner or a seasoned gardener, the key is to start small, experiment with layouts, and let your plants guide your next steps. 🌱
Ready to transform your outdoor space? Grab your tools, sketch a simple plan, and begin with one or two modular sections. Watch your garden—and your confidence—flourish! 💡
- Next step: Pick a design from this guide and measure your space today!
- Pro tip: Take progress photos to track your garden’s evolution over time.