
Tools
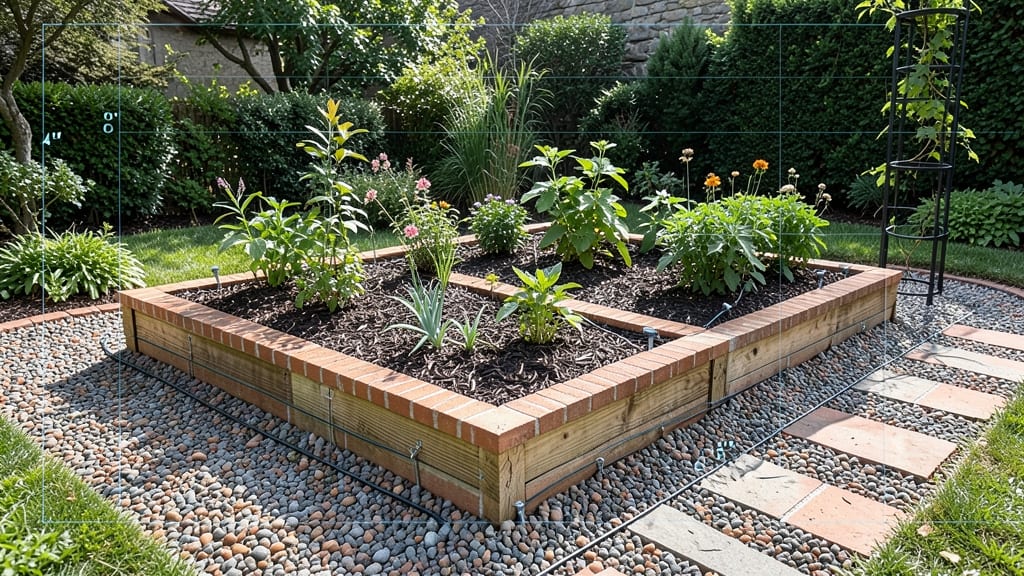
A modular grid layout turns your garden bed into a high-yielding puzzle where every plant has its perfect spot. 🌱 I designed mine after realizing my old random-planting approach wasted space and led to overcrowded tomatoes and lonely herbs.
The difference? More harvests, less competition, and a layout that actually makes sense year after year.
The magic happens with simple math: 12-inch spacing for most vegetables, 18 inches for bushy plants, and 24 inches for sprawlers like pumpkins. Start with a 4x8-foot bed (the gold standard) and divide it into 12-inch squares using string lines or wooden stakes.
This creates a grid where you can swap plants season to season without replanning everything.
By the time you're done, you'll have a system that maximizes sunlight, minimizes weeds, and makes harvesting a breeze. My zucchini went from 3 squash to 12 last summer, and the carrots finally grew straight instead of forking. The grid also makes crop rotation effortless—just move the stakes next year.
Works for raised beds, in-ground plots, or even container setups. Whether you're growing flowers, veggies, or herbs, this layout adapts to any space. Let's get your garden working smarter, not harder.
📚 In This Guide
- What you need
- Instructions
- Tips and common mistakes
- Wrapping up and next steps
What you need
- ● Lumber or Cedar Planks: 2x6 or 2x8 boards (untreated cedar recommended for durability) – 8–12 pieces, depending on bed size (e.g., 4’x8’ needs ~10 boards).
- ● Corner braces or L-brackets (galvanized steel) – 4–8 pieces (1 per corner + extras for reinforcement).
- ● Hardware: 3” exterior deck screws (stainless steel) – 50–100 screws (2 per board joint).
- ○ Galvanized nails (optional for extra stability) – 20–30 nails.
- ● Measuring & Marking Tools: Tape measure (25’+ for large beds).
- ● Speed square or carpenter’s square.
- ● Chalk line or string for straight edges.
- ● Pencil or marker for marking cuts.
- ● Cutting Tools: Circular saw or miter saw (with fine-tooth blade for clean cuts).
- ● Safety glasses & ear protection.
- ● Leveling & Prep: Shovel or spade (for digging trenches or leveling ground).
- ● Gravel (½” crushed stone) – 1–2 bags per 4’x8’ bed (for drainage).
- ○ Landscape fabric (optional, to suppress weeds).
- ● Pre-cut bed frames (if DIY isn’t your jam—saves time!).
- ● Post caps or decorative trim (for a polished look).
- ● Soil mix (high-quality garden soil or compost blend).
- ● Irrigation kit (drip tape or soaker hoses for efficiency).
- ● Plant labels & stakes (for your modular grid organization!).
Step-by-Step instructions for designing a modular grid garden bed
Here’s how to create a high-yield, easy-to-maintain grid layout that maximizes space and minimizes wasted effort.
📏 Step 1: Measure and Mark Your Garden Space
Start by measuring your garden bed area—aim for a minimum 4-foot width to allow easy reach from both sides. I like to use 3-foot or 4-foot squares as my base modules because they fit standard lumber and accommodate most plant spacing needs. For example, a 4-foot square gives you 16 square feet of planting area, perfect for 4 servings of veggies.
Use wooden stakes and string to outline your grid. Drive stakes at each corner and along every 1-foot increment to create a clear framework. This ensures your rows stay straight and your plants get consistent spacing. If your bed isn’t perfectly square, adjust the grid to fit—just keep those 3-foot or 4-foot modules in mind for planting.
🌱 Step 2: Plan Your Planting Zones Based on Height and Needs
Divide your grid into three height zones: tall plants (like tomatoes or trellised cucumbers) go in the back or north side of the bed, medium-height plants (peppers, bush beans) fill the middle, and low-growing plants (lettuce, radishes) take the front or south side. This prevents shading issues and makes harvesting easier—no more reaching over tall plants to grab a handful of spinach!
Within each zone, use a modular spacing chart to determine how many plants fit. For example, tomatoes need 18-24 inches apart, while lettuce thrives in 6-12 inches. Sketch a rough layout on paper first to visualize how everything fits. I like to use graph paper where each square represents 1 foot—this makes it easy to tweak spacing until it’s perfect.
☀️ Step 3: Install Pathways or Raised Beds for Accessibility
If your garden bed is 4 feet wide or larger, add a 1-foot-wide pathway down the middle made of gravel, mulch, or stepping stones. This keeps soil from compacting underfoot and gives you easy access to every plant. For in-ground beds, simply mark the pathway with landscape fabric or boards to prevent weeds from encroaching.
For raised beds, build them in 3-foot or 4-foot widths to match your grid. Use 2x6 lumber for the sides and cedar or untreated wood to prevent rot. Line the bottom with cardboard or landscape fabric to suppress weeds, then fill with 6-12 inches of quality soil mix. This keeps your grid neat and makes planting a breeze—no more stepping on soil and compacting roots.
✂️ Step 4: Label and Plant According to Your Grid
Label each section of your grid with plant markers or a simple sketch so you remember what goes where. I use small wooden stakes with the plant name and spacing written in pencil—it’s durable and easy to update. Plant in a staggered pattern (like bricks) to maximize space and improve airflow. For example, if your grid has 1-foot squares, place a tomato seedling in the center of every other square to give it room to grow.
Water deeply after planting to settle the soil and encourage root growth. Use a soaker hose or drip irrigation to deliver water evenly without disturbing the grid. Avoid overhead watering, which can wash away soil and disrupt your carefully planned spacing. Check your grid weekly to ensure plants are thriving—adjust spacing if any look crowded or stunted.
🌿 Step 5: Maintain and Adjust as Plants Grow
Monitor your grid regularly for gaps or overcrowding. If a plant outgrows its space, thin it out or harvest it early to make room for succession planting. For example, if your radishes bolt before the bed clears, pull them and sow a quick-growing crop like lettuce in their place. This keeps your grid productive year-round.
Add mulch (2-3 inches) around plants to retain moisture and suppress weeds—just avoid piling it against stems. Use your grid as a guide to rotate crops next season, too. Keep a simple logbook of what you planted where and how it performed. Over time, you’ll refine your layout to fit your space and climate perfectly.
Tips & tricks for perfect modular garden layouts
These simple strategies will help you create a grid system that's both functional and flexible—so you can adjust as your garden grows.
Modular Flexibility: The 3-foot or 4-foot squares from Step 1 are your secret weapon. You can combine them to create larger sections for heavy feeders like corn or potatoes, or split them into smaller 1-foot squares for delicate herbs. I've even used half-squares for microgreens when I wanted to test varieties. The key is keeping that modular framework—it lets you adapt without starting over completely.
Visual Planning Pays Off: That graph paper trick in Step 2 isn't just for show—it's how I avoid planting mistakes. Before I even buy seeds, I sketch my layout with each square representing 1 foot. This helps me visualize how many plants will fit and where to place them. I've saved myself from buying too many seeds (or not enough) by doing this simple planning step first. It's like having a blueprint for your garden!
Pathway Materials Matter: The 1-foot pathway in Step 3 doesn't have to be just gravel—think creatively! I've used recycled bricks, old patio stones, or even wooden planks for pathways. The material choice affects both aesthetics and maintenance. Gravel drains well but needs occasional raking, while mulch pathways suppress weeds but may need replenishing. Choose based on your priorities and how much maintenance you're willing to handle.
Labeling System Upgrade: While wooden stakes work great, I've found that using small plastic plant markers with QR codes takes labeling to the next level. Scan the code to get instant care instructions, planting dates, and even photos of mature plants. For a low-tech option, try colorful twist ties with plant names written in permanent marker—they're visible from a distance and won't blow away. Either way, good labeling prevents the "what was I thinking?" moments when you can't remember what you planted where.
Pro Tips for Garden Bed Design Layout
- These simple strategies will help you create a grid system that's both functional and flexible—so you can adjust as y...
- Modular Flexibility: The 3-foot or 4-foot squares from Step 1 are your secret weapon. You can combine them to create ...
- Visual Planning Pays Off: That graph paper trick in Step 2 isn't just for show—it's how I avoid planting mistakes. Be...
Frequently asked questions
Got questions about designing your garden bed layout? You’re not alone!
Here are answers to the most common queries to help you plan like a pro.
What’s the best size for a modular garden bed?
A standard modular bed is 4’ x 8’ (or 4’ x 4’ for smaller spaces), making it easy to reach the center from all sides. This size maximizes space efficiency while keeping maintenance manageable. For raised beds, 3’ wide x 6-8’ long is ideal for most gardeners.
When is the best time to plan and build my garden bed?
Start planning in late winter or early spring (2-3 months before planting) to account for soil prep, weather, and seedling schedules. If you’re in a mild climate, fall planning works too—just adjust for cooler-season crops. Pro tip: Test your soil in early spring for pH and nutrients before finalizing your layout!
Can I use a modular grid for containers or vertical gardens?
Modular grids adapt well to container gardening (like fabric pots or hanging baskets) and vertical planters (e.g., wall pockets or trellis systems). Just scale the spacing to fit your container sizes—aim for 12-18” spacing between plants in deep containers and tighter for shallow ones.
How do I fix uneven soil or drainage issues in my bed?
For uneven soil, amend with compost or topsoil to level the bed, then tamp it down gently. For drainage, add a 1-2” layer of gravel or sand at the bottom before filling with soil. If water pools, consider raised beds or sloping the bed slightly (1-2% grade) away from your house.
Do I need to follow strict grid lines, or can I customize?
While grids offer precision, customization is key! Adjust spacing based on plant maturity (check seed packets) and your bed’s orientation (e.g., taller plants on the north side to avoid shading shorter crops). Pro tip: Sketch your layout first—even a rough draft—to visualize plant heights and sunlight needs before digging!
Wrapping up and next steps
Designing a modular grid garden bed isn’t just about aesthetics—it’s a game-changer for maximizing space, efficiency, and yield! 🌱 By embracing precision spacing, you’ll reduce waste, boost plant health, and create a low-maintenance paradise.
Whether you’re a seasoned gardener or just starting out, this layout gives you the tools to grow smarter, not harder.
Ready to transform your garden? Start small—sketch a simple grid on paper, gather your materials, and dive in! Every square inch counts, and your future harvest will thank you. Happy planting! 🌿