
Tools
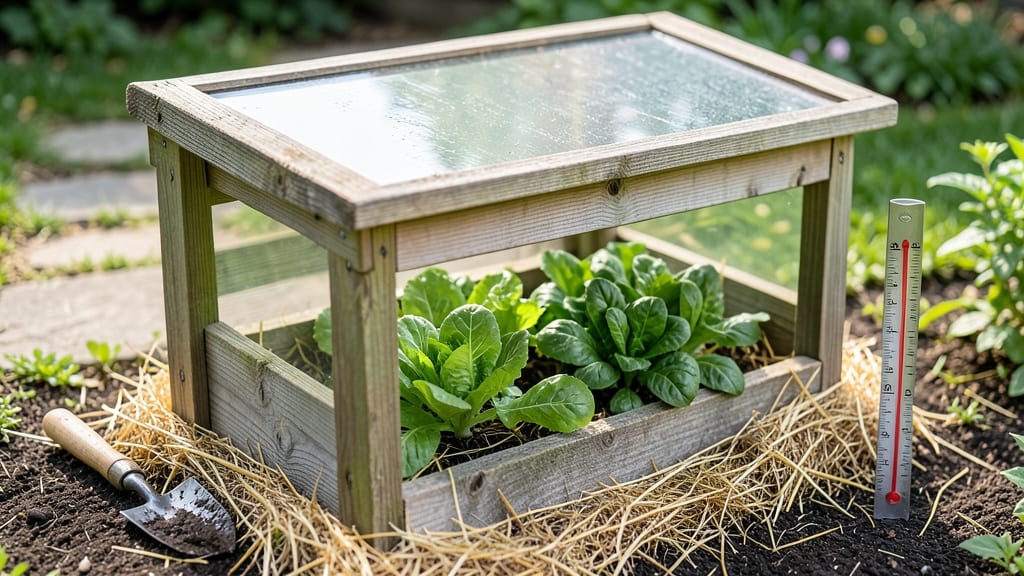
A garden bed cold frame turns your late-season harvests into a year-round possibility—no greenhouse needed. 🌱 I built mine after watching my spinach bolt in April, and now I'm growing greens in December when neighbors are still dreaming of spring.
The magic is simple: a transparent top traps heat while letting light through, protecting tender plants from frost while they keep growing.
You don’t need fancy materials—just sturdy lumber, clear plastic or glass panels, and a hinged lid that opens easily. My first frame cost under $50 and took a weekend to build, yet it’s saved me from replanting kale twice.
The best part? It works for seedlings, overwintering herbs, and even extending the season for tomatoes in cooler zones. Just place it where plants get morning sun and shelter from harsh winds.
Inside, temperatures stay 10-15°F warmer than outside, giving seedlings a fighting chance against early frosts. I’ve seen lettuce survive down to 20°F under my frame, and strawberries push new growth in March when bare soil is still frozen.
The key is ventilation—crack the lid on warm days to prevent overheating, and watch your plants thrive when others are still dormant.
Works for raised beds, in-ground plots, or even containers. Whether you’re a beginner or a seasoned gardener, this is the low-cost trick that keeps your garden productive when others are calling it quits. Let’s get yours built!
📚 In This Guide
- What you need
- Instructions
- Tips and common mistakes
- Wrapping up and next steps
What you need
- ● Base Frame: 4 wooden boards (2x4s or 2x6s) – 2 for length (6–8 ft), 2 for width (2–3 ft)
- ● OR a pre-built wooden or metal garden bed frame (ensure it’s at least 12–18 inches deep)
- ● Covering: Clear plexiglass or polycarbonate sheets (½-inch thick, cut to fit frame)
- ● OR a clear plastic greenhouse panel (for larger setups)
- ● Hardware: Galvanized screws or nails (2–2.5 inches long, ~30–40 pieces)
- ● Hinges (2–4, depending on cover design)
- ● Sealing: Weatherstripping or foam tape (for edges to prevent drafts)
- ● Outdoor-rated caulk (to seal gaps)
- ● Measuring tape & pencil
- ● Circular saw or handsaw (for cutting wood)
- ● Drill/driver
- ● Screwdriver or impact driver
- ● Level (to ensure the frame is even)
- ○ Clamps (optional, for securing pieces during assembly)
- ● Thermometer (to monitor internal temps)
- ● Vents or louvers (for airflow on warm days)
- ● Insulation (e.g., foam board or straw for extra cold protection)
- ● Removable side panels (for easy access to plants)
- ● Paint or stain (to protect wood from weather)
Step-by-Step instructions for building a garden bed cold frame
Extend your growing season with this simple, frost-proof design that keeps plants thriving even when temperatures drop.
🪴 Step 1: Select and Prepare the Garden Bed Location
Choose a south-facing spot that gets at least 6 hours of sunlight daily—this maximizes warmth inside the frame. Clear the area of weeds and rocks, then loosen the soil to a depth of 12 inches using a garden fork. I like to add 2-3 inches of compost to the top layer before planting, as cold frames trap heat and accelerate nutrient depletion.
Level the ground carefully—uneven surfaces create air pockets that reduce heat retention. A slight slope toward the north helps with drainage while keeping plants safe from pooling water. Mark the bed dimensions with stakes and string before digging, especially if you're working in a rectangular shape for easy frame attachment.
🌱 Step 2: Build or Install the Cold Frame Structure
For a 4-foot by 8-foot bed, use ½-inch thick plywood for the base and sides, cutting to 12-18 inches high—taller frames trap more heat but require stronger anchoring. I reinforce the corners with 2x4 lumber to prevent warping over time. Leave the north side slightly lower (about 2 inches) to create a natural vent when needed.
Cover the top with clear polycarbonate panels (better than glass—they won’t shatter in hail) or heavy-duty plastic sheeting. Secure edges with aluminum tape to seal gaps where cold air could sneak in. If using a pre-made cold frame, position it so the hinged lid opens toward the south for easy access without disturbing plants.
☀️ Step 3: Plant Frost-Tolerant Crops and Add Insulation
Start with hardy greens like kale, spinach, or lettuce, which thrive in 30-40°F temperatures. Plant seeds or transplants 2-3 weeks before the first frost—the cold frame will protect them until spring. Space plants 6-12 inches apart, leaving room for growth without overcrowding, which reduces airflow and increases disease risk.
Add a 2-inch layer of straw or leaves over the soil surface to insulate roots during extreme cold snaps. This extra layer can raise soil temperatures by 5-10°F, making the difference between survival and freeze damage. Water the bed deeply before closing the frame in fall—moist soil holds heat better than dry soil.
⏰ Step 4: Manage Ventilation and Light for Seasonal Success
On mild winter days (above 40°F), prop the lid open slightly with a wooden wedge to prevent overheating. Watch for condensation buildup—if you see droplets on the inside, ventilation is needed immediately to avoid fungal issues. In spring, remove the lid entirely when daytime temperatures reach 50°F to harden off plants gradually.
Rotate the frame quarter-turn weekly to ensure even light exposure—plants will lean toward the glass, and rotating keeps them growing upright. This simple habit prevents leggy growth and maximizes yield. If snow accumulates, brush it off gently; a 1-inch snow layer actually insulates, but deeper piles can collapse the structure.
✂️ Step 5: Maintain and Extend the Cold Frame’s Lifespan
Clean the polycarbonate panels twice yearly with a mild soap solution to remove algae and dirt buildup, which blocks sunlight. Check seals around edges annually—replace cracked caulk or loose tape to maintain heat retention. I also add reflective aluminum foil to the inside of the north wall in late fall to bounce extra light onto plants.
Before storing for summer, remove all plant debris and disinfect the bed with a 10% vinegar solution to kill overwintering pests. Store the lid flat on the ground to prevent warping, and keep the frame in a dry, shaded spot. With proper care, a cold frame lasts 5-10 years, paying for itself in extended harvests and saved seed money.
Tips & tricks for perfect garden bed cold frame construction
These practical strategies will help you build a cold frame that extends your growing season without the common pitfalls.
Sunlight Optimization: In Step 1, when selecting your south-facing spot, prioritize locations with unobstructed sunlight for those critical 6 hours daily. I've found that even a small tree or fence casting shade for just 1 hour can reduce internal temperatures by 5-10°F—enough to make the difference between survival and failure for tender crops. Consider pruning nearby vegetation before building if needed.
Structural Stability: For Step 2, when cutting your ½-inch plywood to 12-18 inches high, remember taller frames need extra support. I reinforce the corners with 2x4 lumber and add diagonal braces if building in windy areas. The 2-inch lower north side creates that essential vent—don't skip this detail, as proper airflow prevents overheating during warm winter days.
Insulation Layer: The 2-inch straw or leaves mentioned in Step 3 is your secret weapon during extreme cold. I've seen soil temperatures rise from 20°F to 35°F overnight with this simple layer—critical for protecting roots. For even better insulation, mix in composted leaves which break down slowly and add nutrients over time.
Ventilation Management: When managing ventilation in Step 4, I keep a wooden wedge collection kit handy for quick adjustments. On days above 40°F, I start with a 1-inch gap and increase as needed. Watch for condensation—if you see droplets, that's your cue to ventilate immediately to prevent fungal growth that can kill your plants before spring arrives.
Pro Tips for Garden Bed Cold Frame
- These practical strategies will help you build a cold frame that extends your growing season without the common pitfa...
- Sunlight Optimization: In Step 1, when selecting your south-facing spot, prioritize locations with unobstructed sunli...
- Structural Stability: For Step 2, when cutting your ½-inch plywood to 12-18 inches high, remember taller frames need ...
Frequently asked questions
Got questions about garden bed cold frames?
You're not alone—these handy structures can feel a little tricky at first. Below, we’ve rounded up the most common queries to help you get the most out of your frost-proof garden bed. Whether you're troubleshooting, planning, or just curious, here’s what you need to know!
What’s the best time of year to set up a cold frame?
A cold frame works best when installed before the first hard frost—typically in late summer or early fall. This gives plants time to acclimate to cooler temps while still benefiting from sunlight. For spring use, set it up in late winter to extend the growing season. Pro tip: If you’re in a mild climate, you can use it year-round!
How do I prevent my cold frame from overheating in sunny weather?
Overheating can stress plants, so ventilation is key! Use hinged lids or prop them open slightly with bricks or sticks on sunny days. Some frames even have built-in vents. If temps rise above 85°F (29°C), remove the lid entirely for a few hours. Pro tip: A shade cloth (30-50%) can help on extra hot days.
Are DIY cold frames cheaper than buying one?
A DIY frame (using wood, plastic sheeting, and hardware cloth) can cost half as much as a pre-made one. Materials like clear polycarbonate panels or even repurposed windows work well. Just ensure it’s sturdy and has proper drainage. Pro tip: Check local salvage yards for discounted glass or metal sheets!
How do I keep pests out of my cold frame without chemicals?
Pests love cold frames too! Start with hardware cloth or fine mesh to block insects and rodents. Remove fallen leaves/debris regularly, and rotate crops yearly. For slugs/snails, try copper tape or diatomaceous earth. Pro tip: Plant companion herbs like basil or mint to naturally deter pests!
What should I do if my plants look wilted or yellow inside the cold frame?
Wilting or yellowing often signals overwatering, poor airflow, or nutrient deficiency. Check soil moisture—cold frames trap humidity, so let the top inch dry out before watering. Ensure vents are open, and fertilize lightly if needed. Pro tip: If roots look mushy, it’s time to improve drainage or reduce watering!
Can I use a cold frame for seedlings or only mature plants?
Cold frames are perfect for both! Start with hardened-off seedlings in early spring/fall to give them a head start. For mature plants, they’re great for overwintering greens, herbs, or even strawberries. Pro tip: Thin seedlings early to avoid overcrowding as they grow!
Wrapping up and next steps
Building a garden bed cold frame is your ticket to extending the growing season and protecting your plants from frost—no matter the weather! 🌱 With the right materials and a little creativity, you can create a cozy, frost-proof haven for your seedlings, herbs, or veggies.
Whether you're a beginner or a seasoned gardener, this project is a game-changer for year-round harvests.
Ready to take the next step? Start small—try a mini cold frame for herbs or lettuce, then expand as you gain confidence. Happy gardening, and may your plants thrive in warmth and safety! 🌿