
Flowers
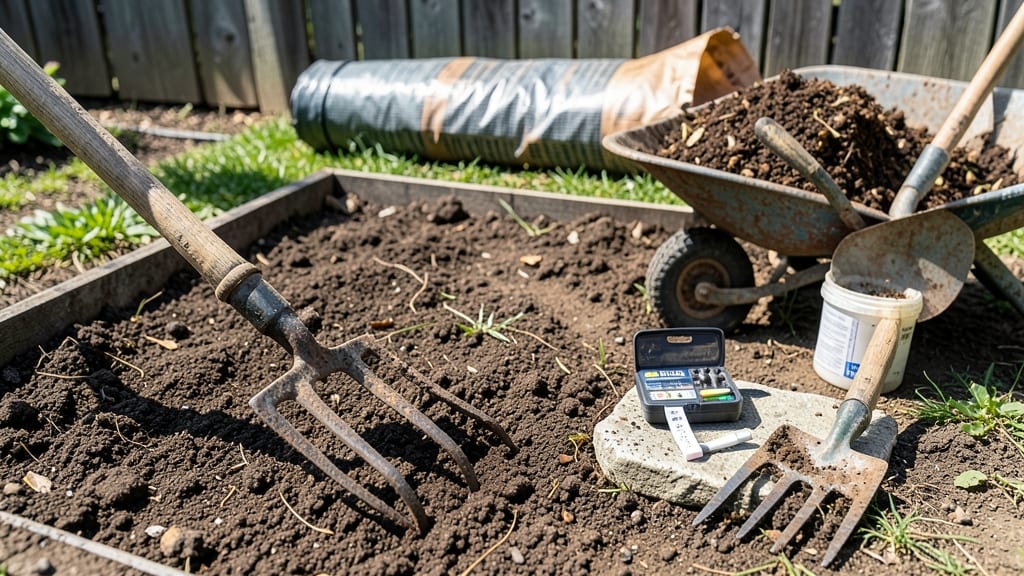
Flower bed soil preparation isn’t just about digging—it’s about creating a loose, aerated foundation where roots can thrive. ✨ The right soil mix makes the difference between wilting petunias and blooms that last all season, and I've learned the hard way that skipping this step leads to poor drainage, stunted growth, and plants that struggle to establish themselves. Start with a simple soil test to identify your base—whether it's heavy clay that bakes dry or sandy soil that drains too fast. Most flower beds need a mix of organic matter (compost or aged manure) and existing soil, with a ratio of about 1 part compost to 3 parts soil for most annuals and perennials. For clay-heavy areas, add coarse sand or perlite to improve aeration, while sandy soils benefit from peat moss or coconut coir to retain moisture. Once amended, the soil should crumble easily between your fingers and hold moisture without becoming soggy. Think of it as creating a spongy mattress for roots—firm enough to support growth but loose enough to breathe. This prep work pays off in stronger stems, deeper roots, and blooms that arrive earlier and last longer. The best time to prepare is 4-6 weeks before planting, giving soil microbes time to break down amendments. Avoid working wet soil—it compacts easily—and always cover bare soil with 2-3 inches of mulch to protect your investment and keep moisture levels steady.
📚 In This Guide
- What you need
- Instructions
- Tips and common mistakes
- Wrapping up and next steps
What you need
- ● Garden fork or digging spade: A sturdy heavy-duty fork (18–24 inches long) or a border spade for turning soil.
- ● Garden rake: A bow rake (for leveling) or leaf rake (for debris removal).
- ● Garden hose or watering can: For wetting soil before amending.
- ● Soil amendments (pick 1–2): Compost: 2–3 inches of well-aged compost (avoid fresh manure).
- ● Peat moss or coconut coir: 1–2 inches (for moisture retention in sandy soil).
- ● Perlite or vermiculite: 1–2 cups per sq. ft. (for drainage in clay-heavy soil).
- ● Sand: 1–2 inches of coarse builder’s sand (for sandy or compacted soil).
- ○ Organic matter (optional but recommended): Leaf mold or shredded bark: 1–2 inches (improves structure).
- ● Worm castings: ½ cup per sq. ft. (boosts nutrients gently).
- ○ pH testing kit (optional but helpful): To check soil acidity (aim for 6.0–7.0 for most flowers).
- ● Gloves & knee pads: Because comfort matters! 😉
- ● 🔥 Test your soil first! A simple home pH test kit (or local extension service) saves guesswork.
- ● ✨ Layer amendments: Mix compost into the top 6–12 inches of soil; avoid piling on top.
- ● 🌡️ Work with damp soil: Water the bed 24 hours before digging to prevent clumping.
Step-by-Step instructions for preparing a loose, aerated flower bed base
Here’s how I transform compacted soil into a root-friendly foundation—tested across seasons and climates.
🪴 Step 1: Clear and Mark the Flower Bed Area
Start by removing all weeds, grass, rocks, and debris from the designated area. I use a sharp spade to slice through stubborn roots—this prevents regrowth later. For a clean edge, drive a wooden stake at each corner and stretch a string line to outline the bed. This keeps you from wandering off-target and ensures even soil prep.
Measure the area to calculate how much soil amendments you’ll need. A general rule: 3-4 inches of topsoil or compost spread over the bed’s surface covers most flower types. Mark any existing plants or structures you’ll need to avoid, like irrigation lines or tree roots. Real talk: Skipping this step leads to uneven beds and wasted materials.
🌱 Step 2: Loosen the Soil to a Depth of 12 Inches
Use a digging fork or broadfork to break up compacted soil without turning it over. I work in 2-foot sections, inserting the fork at a 45-degree angle and prying upward to loosen the soil. This aerates without disturbing the natural soil layers, which is critical for root penetration. Aim for a crumbly texture—you should see earthworms and small roots moving freely once you’re done.
For particularly hardpan soil, rent a rototiller for the first pass, then finish with the fork to avoid overworking the soil. If you hit rocks or clay layers deeper than 12 inches, focus on the top layer and amend it heavily instead. The goal is to create a loose, airy environment where roots can spread easily.
💧 Step 3: Amend the Soil with Organic Matter
Spread a 2-3 inch layer of compost or well-rotted manure evenly over the loosened soil. I like to mix in a handful of granular organic fertilizer (like 10-10-10) to provide slow-release nutrients. Work the amendments into the top 6 inches of soil using a garden fork or tiller. This improves drainage, water retention, and microbial activity—all essential for healthy roots.
For sandy soil, add 20% peat moss or coconut coir to improve moisture retention. For clay soil, mix in 30% perlite or coarse sand to break up compaction. Test the amended soil by squeezing a handful: it should hold together lightly but crumble when poked. If it forms a tight ball, you need more organic matter.
☀️ Step 4: Level and Compact Gently
Rake the soil surface until it’s smooth and level, sloping slightly away from any nearby structures to prevent water pooling. I use a bow rake for fine tuning, then walk over the bed to check for low spots. For larger beds, use a level to ensure consistency—uneven surfaces lead to poor drainage and uneven plant growth.
Give the soil a light compaction by walking over it or using the back of a rake. This isn’t about packing it down hard—just enough to stabilize the surface for planting. Over-compacting now will undo all your aeration work. Water the bed lightly to settle the soil, then let it dry slightly before planting. This final step ensures roots encounter loose soil from day one.
⏰ Step 5: Test and Adjust Before Planting
Dig a small hole, about 6 inches deep, and fill it with water. If the water drains away in 10 minutes or less, your soil is too sandy—add more compost or peat moss. If it pools for hours, you need more perlite or sand. The ideal drainage rate is 2-4 hours for most flowers. Adjust by adding amendments in layers and retesting.
Finally, perform a pH test using a soil kit. Most flowers thrive in a 6.0-7.0 range. If your soil is acidic (below 6.0), mix in lime; if alkaline (above 7.0), add sulfur or peat moss. This last check ensures your hard work pays off with vibrant, healthy plants from the start.
Tips & tricks for perfect flower bed soil preparation
Transforming compacted soil into a thriving garden base takes precision—and these pro techniques will help you avoid common pitfalls while maximizing root growth.
Precision in Step 1: When marking your flower bed, use a laser level for large areas to ensure perfect slopes away from structures. I’ve seen water pooling in beds where the grade was just 1/2 inch off—this simple tool eliminates guesswork. For smaller beds, a string line stretched between stakes works perfectly, but always check with a level at the corners to confirm your slope.
Soil Loosening Secret: In Step 2, work the digging fork in a grid pattern (every 12 inches) rather than random strokes. This creates consistent aeration channels for roots to penetrate. For hardpan layers deeper than 12 inches, consider golf spikes—drive them in at 45-degree angles to break up compacted zones without tilling the entire area. The key is maintaining that crumbly texture where earthworms appear naturally.
Amendment Application: When spreading your 2-3 inch compost layer in Step 3, use a stake and string line to create a perfectly even distribution. I’ve found that mixing amendments into just the top 6 inches works best—deeper incorporation risks burying organic matter where microbes can’t access it. For clay-heavy soils, pre-mix 30% coarse sand with your compost before spreading to prevent clumping.
Drainage Test Hack: In Step 5, that 6-inch deep water test is your golden rule—but here’s the pro move: use food coloring in the water to track drainage paths. If colored water appears at the surface within 10 minutes, you’ve got sandy soil needing more organic matter. For clay soils, watch for water pooling at the bottom of the hole after 2-4 hours—the ideal test shows gradual absorption with no standing water.
Pro Tips for Flower Bed Soil Preparation
- Transforming compacted soil into a thriving garden base takes precision—and these pro techniques will help you avoid ...
- Precision in Step 1: When marking your flower bed, use a laser level for large areas to ensure perfect slopes away fr...
- Soil Loosening Secret: In Step 2, work the digging fork in a grid pattern (every 12 inches) rather than random stroke...
Frequently asked questions
Got questions about prepping your flower bed soil? You’re not alone! Here are some of the most common concerns—and their answers—to help you get started with confidence.
What’s the best time of year to prepare flower bed soil?
The ideal time is early spring or fall when the soil is workable but not frozen or waterlogged. Spring prep gives roots a head start, while fall allows nutrients to settle before winter. Avoid heavy clay soils when wet—they’re a mess to work with!
Do I need to remove all the grass before planting?
Not necessarily! For small patches, smother grass with cardboard or landscape fabric for 4–6 weeks to kill it naturally. For larger areas, dig it out or use a glyphosate herbicide (follow label instructions). Pro tip: A mix of removal and smothering often works best for efficiency.
How do I fix soil that’s too sandy or too clay-heavy?
| Problem Soil | Solution |
|---|---|
| Sandy | Add 2–3 inches of compost or peat moss to improve water retention. Mix in aged manure for nutrients. |
| Clay-heavy | Amend with coarse sand or perlite (1 part sand to 2 parts soil) and organic matter like leaf mold. Avoid tilling when wet! |
Can I reuse old flower bed soil, or should I replace it entirely?
You can refresh old soil by removing weeds, breaking up compacted areas, and adding 2–3 inches of compost. If the soil is depleted or diseased, replace the top 6–12 inches. Test your soil’s pH (ideal: 6.0–7.0 for most flowers) to guide amendments.
What if my soil smells bad after tilling?
A foul odor usually means decomposing organic matter or compacted, anaerobic soil. Aerate further, add compost or perlite to improve airflow, and water lightly to encourage beneficial microbes. If the smell persists, test for excess nitrogen or pests.
Wrapping up and next steps
Preparing your flower bed soil is the foundation of a thriving garden—it ensures your plants grow strong, bloom beautifully, and thrive for seasons to come! 🌱 By focusing on loose, aerated soil with proper drainage, you’re giving your flowers the best possible start.
Whether you’re a seasoned gardener or just beginning, these steps make the process simple and rewarding.
Now that you’re armed with the right techniques, roll up your sleeves and get planting! Start small with one bed, and soon you’ll be enjoying a lush, vibrant garden that turns heads in your neighborhood. Happy digging! 🌸