
Tools
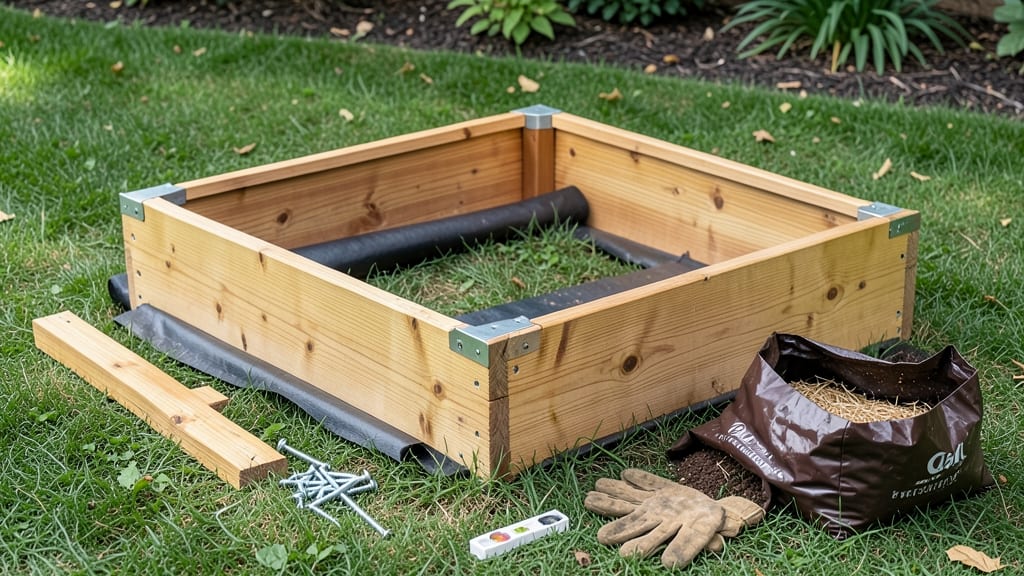
A cedar raised garden bed kit transforms your yard into a high-ground growing powerhouse—no digging, no weeds, and soil that stays perfect for years. 🌱 The first time I set one up, I realized how much easier gardening could be: no bending, no back strain, and plants that thrive in the ideal conditions cedar naturally creates.
Cedar’s resistance to rot and insects means your bed will last 10+ years with minimal care, while its rich aroma keeps pests at bay. Pre-assembled kits cut setup time to under an hour, and you can customize sizes to fit patios, corners, or even rooftops.
The real magic happens when you fill it with the right soil mix—your veggies and flowers will grow faster and healthier than ever.
Picture this: warm summer evenings harvesting tomatoes, crisp fall greens, or even winter greens in milder climates. The elevated design also improves drainage, so no soggy roots or wasted water. Plus, the cedar’s natural beauty makes it a garden centerpiece that looks as good as it performs.
Whether you’re a beginner or a seasoned gardener, this kit makes year-round growing foolproof—just add plants and watch your garden flourish. Here’s how to pick the perfect one for your space and style.
📚 In This Guide
- What you need
- Instructions
- Tips and common mistakes
- Wrapping up and next steps
What you need
- ● Cedar raised garden bed kit (pre-cut lumber, typically 2x6 or 2x8 boards, 4-6 ft long—check kit specs for exact dimensions).
- ● Exterior wood screws (2.5–3 inches long, galvanized or stainless steel to resist rust, ~12–20 screws depending on bed size).
- ○ Corrosion-resistant hardware (optional but recommended): Corner brackets or L-brackets (4–6 pieces for stability).
- ● Wood glue (for extra reinforcement).
- ● Landscape fabric or hardware cloth (to deter burrowing pests, cut to fit bed dimensions).
- ● Garden soil or compost mix (high-quality topsoil + compost, ~2–3 cubic feet per square foot of bed space).
- ● Drill/driver (with screw attachment).
- ● Measuring tape and pencil (for marking cuts).
- ● Circular saw or handsaw (if customizing kit pieces).
- ● Level (to ensure your bed is even).
- ● Work gloves (for protection while handling wood/screws).
- ○ Optional but handy: Clamps (to hold pieces steady during assembly).
- ● Staple gun (for securing landscape fabric).
- ● Flat, level ground (remove rocks/weeds; consider a weed barrier layer if needed).
- ● Sunlight assessment (6+ hours of direct sun for most veggies/herbs).
- ● Access to water (garden hose or irrigation system nearby).
- ● Weather-ready mindset (assemble on a dry, calm day for best results!).
Step-by-Step assembly for your cedar raised garden bed kit
Here's how to transform your pre-assembled cedar planter into a thriving year-round growing space.
🪴 Step 1: Unpack and Inspect All Components
Start by laying out all pieces on a flat, stable surface. Cedar raised bed kits typically include pre-cut boards, corner brackets, and hardware. I always check for any missing pieces or damaged wood before assembly—cedar can develop splits during shipping, and addressing them early prevents long-term structural issues.
Look for the manufacturer's assembly diagram (usually included with the kit). This will show you which pieces connect where. If no diagram exists, most kits follow a simple rectangular assembly pattern with corner brackets securing the joints. Run your fingers along the edges of each board to feel for any rough spots or splinters—sanding these now saves frustration later when you're planting tender seedlings.
🔧 Step 2: Assemble the Frame Structure
Begin by attaching the corner brackets to each board end using the provided screws. I like to pre-drill pilot holes to prevent wood splitting—cedar is beautiful but can crack under direct screwing. Start with one corner and work your way around the rectangle, ensuring each joint is square by measuring diagonally from corner to corner (both measurements should be equal).
Once all four corners are secured, double-check the frame's stability by gently lifting each side. The structure should hold its shape without wobbling. If you notice any instability, add an extra screw to each corner bracket. This is especially important for taller beds, which need extra reinforcement to prevent warping over time. Cedar's natural oils make it resistant to rot, but proper assembly is key to longevity.
🪴 Step 3: Secure the Bottom and Add Support
Most pre-assembled kits include a removable bottom panel or legs. If your kit has legs, attach them to the frame's bottom corners using the provided hardware. For kits with a solid bottom, ensure the panel fits snugly—you may need to trim excess wood for a perfect fit. I've found that leaving a small gap (about ¼ inch) around the edges improves drainage and prevents water pooling.
If your bed lacks built-in legs, consider adding landscape fabric or hardware cloth to the bottom before filling with soil. This prevents weeds and pests from entering through the gaps. For heavier beds (like those filled with compost-rich soil), add diagonal braces inside the frame for extra support. This step is often overlooked but prevents the bed from sagging under weight.
🌱 Step 4: Prepare the Site and Position the Bed
Choose a location with at least 6 hours of sunlight daily—cedar beds work well in full sun or partial shade, depending on your plants. I recommend placing the bed on a level surface to ensure even water distribution. If your yard is sloped, use pavers or bricks to create a stable base and prevent erosion around the edges.
Before setting the bed down, lay down landscape fabric or cardboard to suppress weeds. Cedar's natural resistance to decay means your bed will last years, but this extra layer keeps grass and weeds from competing with your plants. Leave about 6 inches of space around the bed for easy access and maintenance. If you plan to move the bed later, consider adding wheels or glides to the bottom for mobility.
💧 Step 5: Fill and Condition the Soil
Start by adding a 2-inch layer of coarse gravel or landscape fabric at the bottom for drainage. Cedar beds can hold moisture well, but proper drainage prevents root rot. Next, fill the bed with a mix of high-quality potting soil and compost—I use a ratio of 60% soil to 40% compost for optimal drainage and fertility. Avoid garden soil, which compacts easily and reduces aeration.
Water the soil thoroughly after filling, then let it settle for 24 hours before planting. This allows the mix to compact slightly and eliminates air pockets. If you're planting perennials or heavy feeders like tomatoes, add a slow-release fertilizer to the soil mix. Cedar beds dry out faster than in-ground plots, so incorporate moisture-retentive amendments like coconut coir if your climate is dry.
Tips & tricks for perfect cedar raised garden bed assembly
Building a sturdy, functional raised bed starts with these essential tips that'll save you time and frustration.
Material Inspection: In Step 1, when inspecting your cedar boards, pay special attention to the end grain—this is where splits most commonly occur during shipping. If you find any cracks, reinforce them immediately by applying wood glue and clamping until dry. I've seen kits where the end grain splits completely through the board, and addressing this early prevents long-term structural weaknesses. Cedar's natural oils make it resistant to rot, but physical integrity is what keeps your bed standing for years.
Precision Joinery: During Step 2, when attaching corner brackets, use a speed square to verify 90-degree angles at each joint. The diagonal measurement trick works, but a square gives you instant visual confirmation. I've found that even slight deviations from perfect squares can cause the frame to wobble over time. For extra stability in taller beds, consider adding a center support brace along the longest dimension—this prevents sagging under heavy soil loads.
Drainage Strategy: In Step 3, when securing the bottom panel, remember that proper drainage is critical for root health. The ¼-inch gap recommendation works well, but if your climate experiences heavy rainfall, consider adding drainage holes along the bottom edges. You can also install a removable false bottom made from hardware cloth—this allows excess water to drain while keeping soil and compost in place. This two-layer system works especially well for containers with solid bottoms.
Site Preparation: For Step 4, when choosing your location, remember that cedar's natural resistance to decay means your bed will last, but the site preparation determines your success. If you're working with sloped terrain, consider building a slight berm around the perimeter to prevent erosion during heavy rains. I've seen beds that were perfectly assembled but failed because the surrounding soil eroded away, leaving them unstable. A 6-inch buffer isn't just for maintenance—it's also crucial for preventing water runoff from pooling against the bed walls.
Pro Tips for Cedar Raised Garden Bed Kit
- Building a sturdy, functional raised bed starts with these essential tips that'll save you time and frustration.
- Material Inspection: In Step 1, when inspecting your cedar boards, pay special attention to the end grain—this is whe...
- Precision Joinery: During Step 2, when attaching corner brackets, use a speed square to verify 90-degree angles at ea...
Frequently asked questions
Got questions about setting up and maintaining your cedar raised garden bed kit? You're not alone! Here are some of the most common queries—plus straightforward answers to help you grow with confidence.
How long does a cedar raised garden bed last before needing replacement?
A well-built cedar raised bed kit can last 10–15 years or longer, thanks to cedar’s natural rot resistance. To extend its life, avoid direct soil contact with untreated wood (use landscape fabric or gravel at the base) and keep it dry. Regularly inspect for cracks or warping—small repairs with cedar wood filler can save your bed!
When is the best time to assemble and plant in a raised bed kit?
Assemble your kit in early spring or late fall when soil temps are mild. Plant cool-season crops (like lettuce or spinach) immediately after assembly, or wait until after the last frost for warm-season plants (tomatoes, peppers). Pro tip: Prep the bed by filling it with a mix of topsoil, compost, and perlite 2–4 weeks before planting for optimal root growth.
Are there cheaper alternatives to a pre-assembled cedar raised bed kit?
Yes! DIY options like untreated lumber (cedar or redwood) or corrugated metal troughs can cut costs, but they require more effort. Pre-assembled kits save time and ensure precision cuts. For budget-friendly upgrades, skip the liner or use cardboard or newspaper as a temporary weed barrier instead of fabric.
How do I keep pests out of my cedar raised garden bed?
Cedar’s natural oils deter some pests, but don’t rely on it alone. Use floating row covers for early planting, plant pest-repellent herbs (basil, mint), and avoid overcrowding. For stubborn critters, try diatomaceous earth (food-safe) around the bed’s edges. Elevate beds off the ground to reduce burrowing pests like voles.
What tools do I need to assemble a cedar raised bed kit?
Most kits include pre-cut panels and hardware, but you’ll likely need:
- A drill/driver (for screws or brackets)
- A level (to ensure even placement)
- Gloves and safety glasses (cedar shavings can irritate skin)
- Staple gun (if adding landscape fabric)
Wrapping up and next steps
A cedar raised garden bed kit is your ticket to a thriving, low-maintenance garden—no matter the season! 🌱 With pre-assembled convenience, natural durability, and customizable growing space, it’s the perfect solution for both beginners and green thumbs.
Whether you’re expanding your harvest or simplifying yard work, this kit makes gardening effortless and rewarding.
Ready to transform your outdoor space? Start by measuring your garden area, gathering tools, and assembling your kit today! With just a little effort, you’ll soon be enjoying fresh, homegrown produce year-round. Happy planting! 🌿