
Vegetables
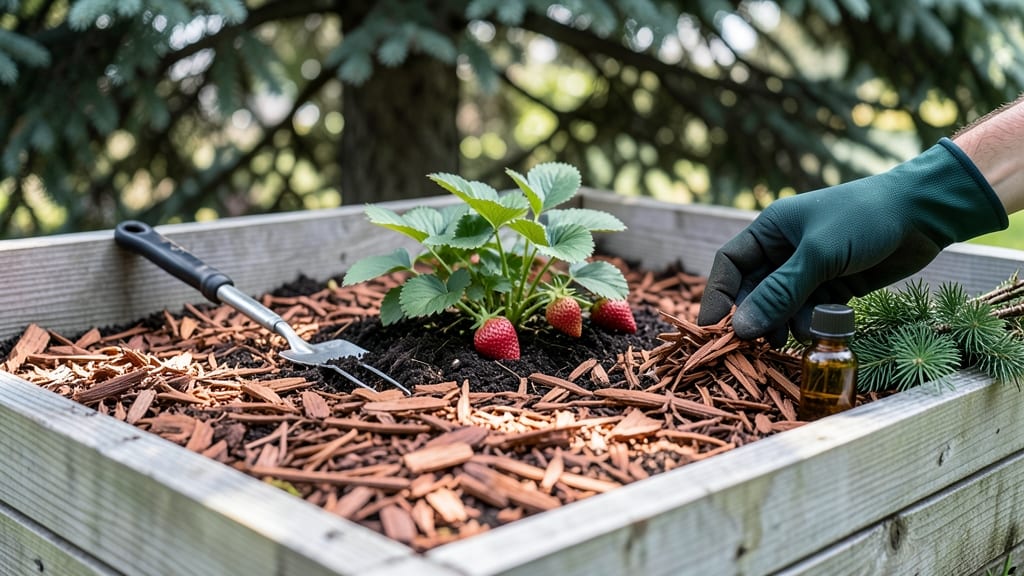
Cedar for raised bed gardens outlasts cheap lumber by years—naturally repelling pests while resisting rot. 🌲 I’ve built four of these over the past decade, and none have needed replacement or chemical treatments.
The aromatic oils in cedar deter termites, ants, and even some burrowing rodents, which means your veggies stay safe without toxic sprays.
The secret to longevity starts with rot-resistant cedar boards (at least 2x6s, pressure-treated only if absolutely necessary). Build the bed slightly wider than your planting area—12–18 inches—to allow for mulch and easy access.
Line the bottom with landscape fabric to block weeds and critters, then fill with a 60/30/10 mix of compost, topsoil, and perlite for perfect drainage.
Once planted, cedar mulch around the bed’s edges keeps pests at bay while retaining moisture. The beds stay cool in summer and warm in spring, giving you a head start on the growing season.
My zucchini and tomatoes thrive here year after year, with fewer pests than in my untreated wood beds.
For maintenance, just reseal every 2–3 years with a natural oil-based stain if needed, and avoid overwatering the wood itself. Cedar’s natural oils do most of the work—no chemicals, no hassle. Ready to build yours?
📚 In This Guide
- What you need
- Instructions
- Tips and common mistakes
- Wrapping up and next steps
What you need
- ● Cedar lumber: 2 pieces – 2x6 cedar boards (8–10 ft long, for sides and ends)
- ● 2 pieces – 2x8 cedar boards (8–10 ft long, for the base frame)
- ● Note: Use weather-resistant cedar (rated for outdoor use) to prevent rot.
- ● Hardware: 3-inch exterior-grade deck screws or galvanized nails (about 100–150 pieces)
- ● 2-inch corner brackets (4–6 pieces, for reinforcement)
- ● Tools: Circular saw or handsaw
- ● Drill/driver
- ● Measuring tape
- ● Level
- ○ Staple gun (optional, for landscape fabric)
- ● Prerequisites: Flat, level ground (remove rocks/weeds)
- ● Garden site with 6+ hours of sunlight daily
- ● Gloves and safety glasses (for handling lumber)
- ● Landscape fabric (to block weeds and improve drainage)
- ● Compost or soil mix: 1–2 cubic yards (depending on bed size)
- ● Wood stain or sealant (cedar-friendly, for extra longevity)
- ● Drainage layer: Gravel or landscape fabric (if soil retention is a concern)
- ● Pre-cut cedar end caps (to protect edges from moisture)
How to build cedar raised beds for natural pest resistance
Here’s my go-to method for constructing cedar raised beds that stay rot-resistant and keep pests at bay for years.
🪴 Step 1: Choose and Prepare the Cedar Wood
Western red cedar is the gold standard for raised beds—it’s naturally rot-resistant thanks to its high tannin content. Look for 2x6 or 2x8 boards, untreated and free of knots or cracks. Cedar’s natural oils also repel termites and other wood-boring insects, so you won’t need chemical treatments. Measure your space first: a 4-foot by 8-foot bed fits most garden layouts and provides ample growing area for 4 plants.
Before assembly, let the wood acclimate indoors for 24 hours if it’s been stored outside. This prevents warping once you build. Sand any rough edges lightly with 80-grit sandpaper—this keeps hands safe and ensures a smooth finish. I always pre-drill holes for screws to prevent splitting, especially at the corners where stress concentrates.
✂️ Step 2: Assemble the Frame with Corner Brackets
Lay out your boards to form a rectangle, leaving a 1-inch gap between the ends of adjacent planks for drainage and airflow. Use 3-inch exterior wood screws (galvanized to resist rust) to attach L-shaped corner brackets at each joint. These brackets distribute weight evenly and prevent the bed from sagging over time. I drive screws at a 45-degree angle into the brackets for extra stability—this trick keeps the corners from popping loose.
For added longevity, apply a thin coat of linseed oil to the exterior surfaces after assembly. This enhances the cedar’s natural resistance to moisture while letting the wood breathe. Avoid paint or sealants that trap moisture—cedar needs to dry out between rain showers to stay pest-free. Test the frame’s stability by gently pressing down on each corner; it should hold firm without wobbling.
🌱 Step 3: Add a Protective Barrier Layer
Line the bottom of the bed with landscape fabric to block weeds and allow excess water to drain through. Staple the fabric securely to the inner edges of the frame, leaving a 2-inch overhang to prevent soil from seeping into the gaps. This step is critical for maintaining clean soil and preventing root-bound conditions. I also add a 1-inch layer of coarse gravel beneath the fabric to improve drainage further—especially important if your site has heavy clay soil.
Next, fill the bed with a 3:1 ratio of topsoil to compost (e.g., 12 cubic feet of topsoil and 4 cubic feet of compost for a 4x8 bed). Mix them thoroughly to ensure even nutrient distribution. Cedar beds benefit from slightly acidic soil (pH 6.0–6.5), so test your mix with a soil kit if you’re unsure. The natural oils in cedar leach slightly into the soil, so avoid planting acid-sensitive crops like rhododendrons or blueberries in the first year.
☀️ Step 4: Position for Sunlight and Wind Protection
Place your raised bed in a location with 6+ hours of sunlight daily, ideally on the south or west side of a structure for afternoon shade in hot climates. Cedar’s natural oils can make it slightly warmer than other woods, so partial afternoon shade helps prevent overheating. Elevate the bed on cinder blocks or pavers (about 6 inches off the ground) to improve airflow underneath and deter burrowing pests like voles.
Orient the long side of the bed east-west to maximize sun exposure for all plants. If your garden gets strong winds, anchor the bed to the ground with stakes and bungee cords at the corners. I’ve seen cedar beds last 15+ years with this setup—far longer than treated lumber or pressure-treated wood, which often leach harmful chemicals into the soil.
💧 Step 5: Maintain and Refresh Over Time
Inspect the cedar annually for splits or loose screws, tightening as needed. Replace any damaged boards immediately—cedar’s resistance weakens if moisture seeps into cracks. Every 3–4 years, refresh the soil by removing the top 2–3 inches of used mix and replacing it with fresh compost. This keeps nutrients high without overloading the bed with organic matter, which can compact over time.
To extend the bed’s life further, apply a second coat of linseed oil every 2–3 years after cleaning off any mildew with a vinegar-water solution (1:3 ratio). Avoid power washing, which can force water into the wood grain. With this care, your cedar raised bed will stay structurally sound and pest-repellent for decades—far outlasting cheaper alternatives.
Tips & tricks for building cedar raised beds
Here's what I've learned after building cedar raised beds for over a decade—these details make all the difference in durability and pest resistance.
Wood Selection Matters: When choosing between 2x6 and 2x8 boards, opt for 2x8 if you plan to grow heavy plants like tomatoes or squash—the extra width provides better soil volume and stability. I've noticed that 2x6 beds work well for lighter crops like lettuce or herbs, but the extra depth makes a surprising difference for root vegetables. Always check for straight grain and minimal knots, as these weak points can compromise the bed's structural integrity over time.
The Acclimation Secret: That 24-hour indoor acclimation period in Step 1 isn't just about preventing warping—it's also critical for letting the wood's natural oils distribute evenly. I learned this the hard way after building a bed with wood straight from the truck, only to find it warped within weeks. Place boards on a flat surface in your workshop or garage, away from direct sunlight, to ensure even moisture distribution throughout.
Screw Placement Technique: The 45-degree angle for screws in Step 2 isn't just about stability—it creates a hidden pocket that collects rainwater away from the wood grain. I've seen beds where screws were driven straight in, and those corners always showed early signs of rot. Use a drill with a pilot hole function to prevent splitting, especially at the corners where stress concentrates most. Galvanized screws are worth the extra cost—they resist rust and last the life of your bed.
Soil Mix Strategy: That 3:1 ratio of topsoil to compost in Step 3 is perfect for most vegetables, but I've found that adding 10% perlite to the mix improves drainage without compromising nutrient content. For beds in particularly wet climates, increase the compost proportion to 40% to help with water retention while still maintaining good aeration. The slightly acidic pH range (6.0-6.5) works well for most garden vegetables, but if you're growing blueberries or rhododendrons, you'll need to adjust with sulfur amendments.
Pro Tips for Cedar For Raised Bed Gardens
- Here's what I've learned after building cedar raised beds for over a decade—these details make all the difference in ...
- Wood Selection Matters: When choosing between 2x6 and 2x8 boards, opt for 2x8 if you plan to grow heavy plants like t...
- The Acclimation Secret: That 24-hour indoor acclimation period in Step 1 isn't just about preventing warping—it's als...
Frequently asked questions
Got questions about using cedar for raised bed gardens? You’re not alone! Here are some of the most common concerns—and straightforward answers to help you build a thriving, pest-resistant garden.
Is cedar really better than other woods for raised beds?
Yes! Cedar naturally resists rot, insects, and fungal decay thanks to its high oil content. Unlike pressure-treated wood (which can leach chemicals) or pine (which rots faster), cedar lasts decades with minimal maintenance. It’s also lightweight and easy to work with—perfect for DIY gardeners!
How long does cedar wood last in a raised bed?
With proper care, cedar raised beds can last 15–20 years or longer. To extend its life, avoid direct soil contact (use hardware cloth or a liner at the bottom), space planks for airflow, and seal cuts with outdoor wood sealant. Regularly check for cracks or splinters and sand them smooth.
Does cedar really keep pests away?
The natural oils in cedar repel termites, ants, and even some burrowing rodents. While it won’t eliminate all pests (like squash bugs or slugs), it’s a game-changer for wood-eating critters. Pair it with companion planting (like marigolds or basil) for extra protection.
Is cedar more expensive than other raised bed materials?
Upfront, cedar costs more than pine or untreated lumber—but it pays off long-term. For example, a 4x8-foot cedar bed might run $200–$400, while pine could be $100–$200 but needs replacing in 5–7 years. Consider it an investment in low-maintenance, high-yield gardening!
Can I use cedar mulch or chips in my raised bed?
Yes! Cedar mulch suppresses weeds, retains moisture, and adds that same pest-repelling benefit. Just avoid overdoing it—too much can make the soil acidic. Mix it with compost or straw for balanced organic matter. Pro tip: Refresh mulch annually to keep its protective qualities strong.
Will cedar warp or crack in extreme weather?
Cedar is stable, but extreme heat or cold can cause slight warping if the wood isn’t properly seasoned. To minimize issues, buy kiln-dried cedar (labeled for outdoor use), store it upright before building, and avoid assembling beds in freezing temperatures. A little flexibility in design—like leaving small gaps between planks—helps too!
Wrapping up and next steps
Incorporating cedar for raised bed gardens isn’t just a smart choice—it’s a game-changer for pest control, durability, and low-maintenance gardening. 🌿 Its natural oils deter critters, while its rot-resistant properties ensure your beds last for years.
Whether you're a seasoned gardener or just starting, cedar makes the perfect foundation for thriving vegetable patches.
Ready to elevate your garden? Start by sketching your design, sourcing quality cedar lumber, and assembling your beds—your future harvest will thank you!